易造成失誤,這時候可以把針線通過輔助張力控制板(F)來
某些種類的線在針窩上不容易造出線環,結線鉤在挑線時容
因縫線種類不同,各有不一樣的伸縮性,故容易造成跳針、
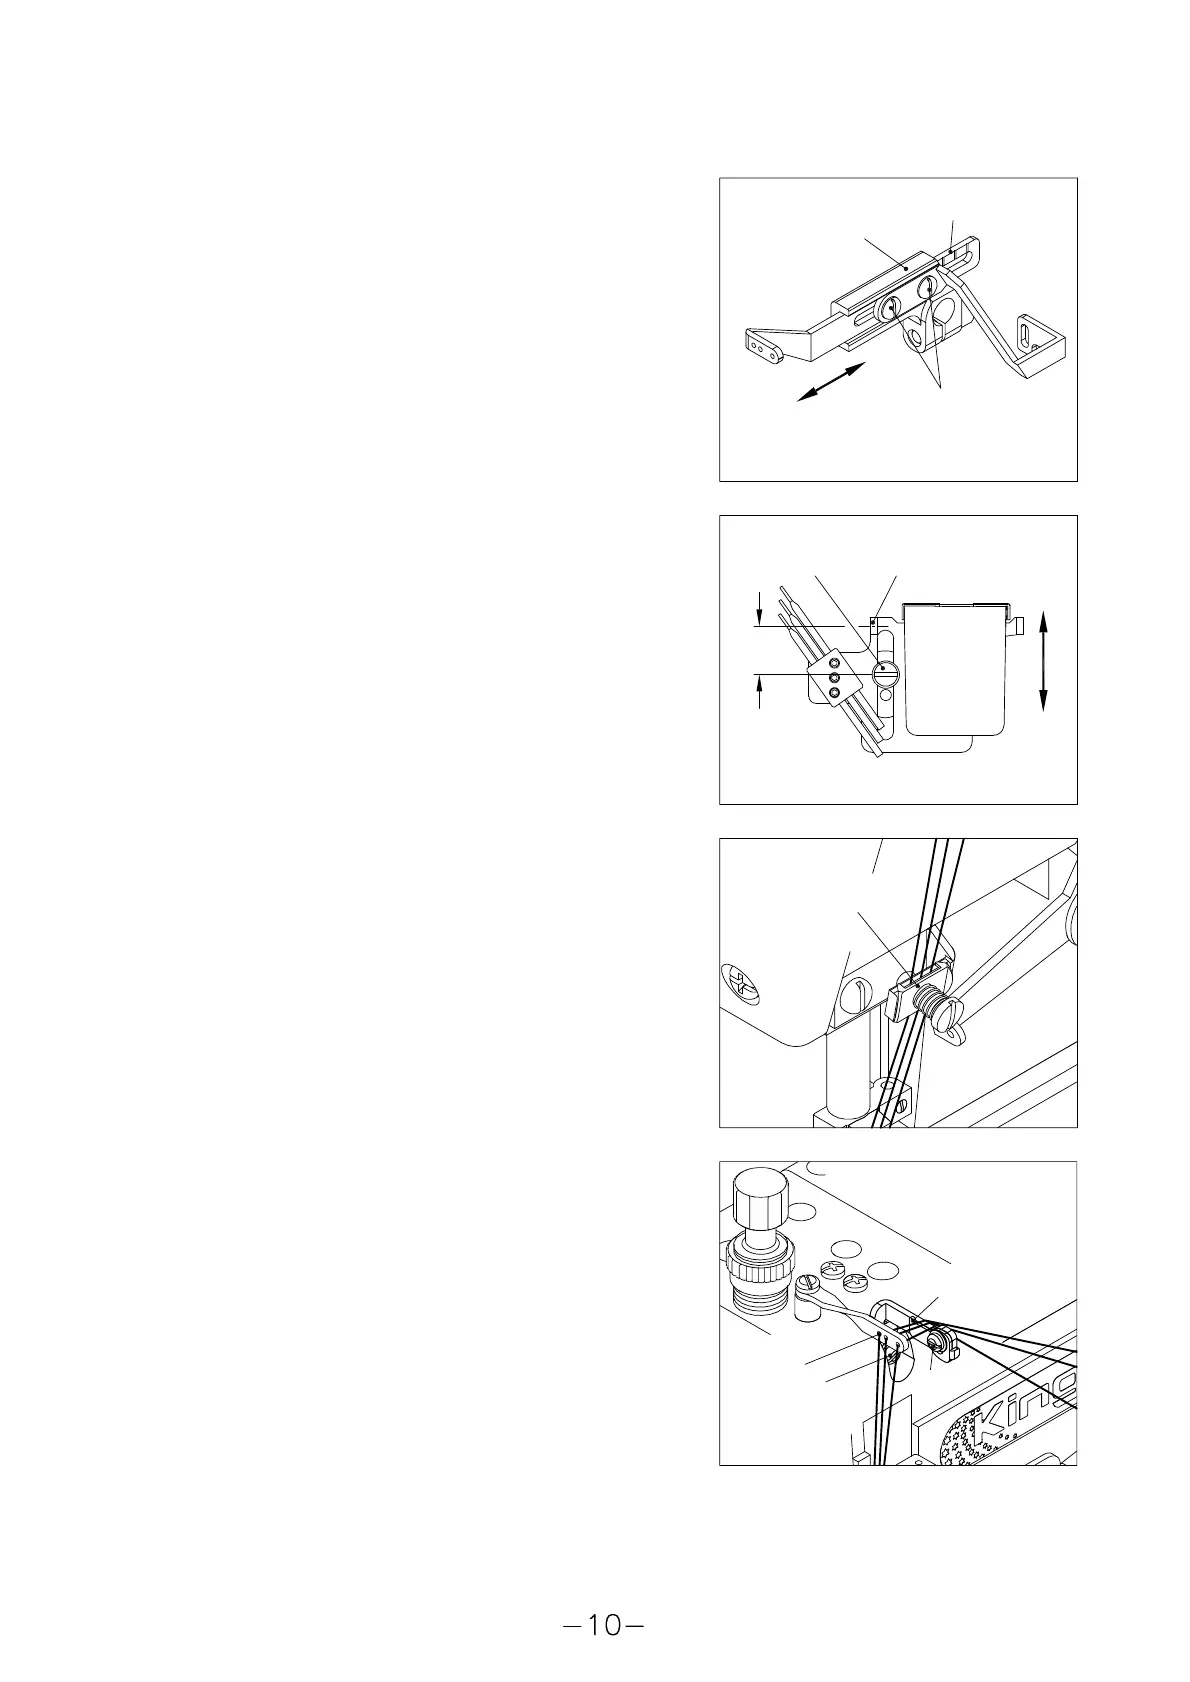
7-5. 針線收放量調整 Adjusting the needle thread take-up
斷線、線跡不穩定等問題。本縫機有針線揚線臂,前導線桿
整前導線桿(G)的高度來克服。特別是當結線鉤從右向左移
對於大伸縮性的縫線、線環不穩定、容易跳針等問題,可調
到線,可將針棒降至下死點,以螺絲(I)來調整前導線桿(G)
針線揚線臂(A)、後導線桿(D)兩者在出廠時,均安裝於標準
位置。針線揚線臂(A)上共有6條刻線,由右至左第3條刻線
對齊承座(B)邊緣,以螺絲(C)調整,後導線桿(D)位置如附圖
穩定縫線。(圖 3)
equipped with thread take-up, front needle thread guide, rear thread
stitching thread breaking and unstable stitching easily. This machine
Different threads have different strectch tension and cause skip
control guide F to stabilize the threads. (Fig. 3)
causing skip stitch. In such case, can use auxiliary thread tension
and also make it difficult for looper to catch the needle thread,
Some times, it is not so easy to make loop for some kinds of thread
In case of the formation of needle thread loop is unstable or skip
needle bar to its lowest position and by loosening screw I to adjust
thread, you can adjust front needle thread guide G, by adjusting the
interfere with the formation of thread loop when using blended
needle skip the stitch when using sysnthetic thread, or right needle
especially, when looper moves from right to the left. If the left
this problem by adjusting the height of front needle thread guide G,
stitching happened when using strectchable thread, you can solve
the top of front needle guard G to even with the centers of eyelets
of thread guide H in order to loosen the needle thread tension.
,後導線桿,輔助張力控制板等,用來控制縫線的收放量以
及穩定縫線的伸縮性。
,以螺絲(E)調整 ,兩者於需要時可依箭頭方向調整。(圖1
動時,如果用合纖線時左針會跳針,使用混紡線右針容易勾
的上緣對正導線孔(H),使前導線桿(G)盡可能放鬆針線的張
guide and auxiliary thread tension control guide in order to give
letter control of the looper thread take-up and stabilize the
strectching of looper thread.
A
C
緊
Tighten
Loosen
鬆
B
、2)
D
Tighten
緊
鬆
Loosen
Fig. 2
18mm
E
F
Fig. 3
Fig. 1
力。(圖 4)
position when machines were out of factory.
There are 6 marks on thread take-up A and the third mark line from
right to left, should even with the edge of bracket B and can be
adjusted by screw C and rear thread guide's D portion as shown on
illustration, can be adjusted by screw E. And bath can be adjusted
according the arrow direction in order to obtain tighten or loosen
effects. (Fig. 1、2)
Thread take-up A, rear thread guide D were set-up at standard
Fig. 4
H
I
G
I
(Fig. 4)
 Loading...