Do you have a question about the Kingtex FT Series and is the answer not in the manual?
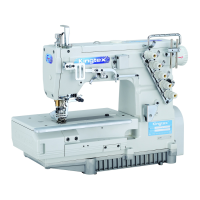
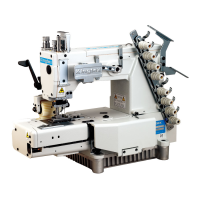
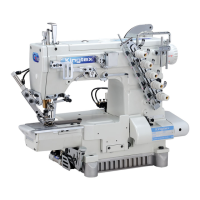
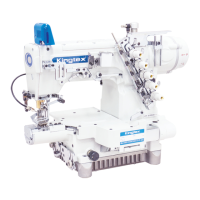
Details on model, stitch type, application, speed, needle, stitch length, and feed regulation.
Explains how model numbers indicate specific features and sub-classes.
Instructions for correctly installing the motor, belt, and belt cover for machine operation.
Guidance on correctly placing and securing the machine head onto the table top for stable operation.
Recommendations for the correct type of lubrication and cooling oil to use with the sewing machine.
Steps for adding new lubrication oil and ensuring proper oil flow through the system.
Instructions on how to drain old oil and refill the machine with new oil for maintenance.
Instructions for checking, cleaning, and maintaining the machine's oil filter.
Guidance on adding cooling oil to prevent overheating and needle issues during high-speed sewing.
Criteria for choosing the correct needle size based on fabric thickness and thread type.
Correct method for inserting needles into the machine to ensure proper stitch formation.
Step-by-step guide for threading the sewing machine for accurate stitch formation.
How to adjust the presser foot pressure for optimal fabric feeding and stitch quality.
Method for adjusting thread tension for each thread to achieve balanced and stable stitches.
How to adjust the stitch length for desired seam appearance and strength.
How to adjust differential feed for shrink or stretch sewing effects on various fabrics.
Table showing the relationship between stitch length and differential ratio for adjustments.
How to adjust the needle thread take-up mechanism for stable stitching and consistent thread loops.
Adjusting the looper thread take-up for proper loop formation and stitch stability.
How to adjust the top cover thread amount using the spreader thread take-up.
Procedure for removing the presser foot and setting its correct height for operation.
Adjusting needle bar height and needle drop point for correct alignment with the needle plate.
Correct procedure for inserting and securing the looper into its holder for stitch formation.
Positioning the looper correctly relative to the needles for optimal stitch formation.
Adjusting the precise gap between the looper and needles for best sewing performance.
Adjusting the rear needle guard's height and timing relative to the needles for proper guidance.
Adjusting the front needle guard's angle and timing relative to the needles for accurate thread path.
Adjusting the feed dog height for proper fabric feeding and movement during sewing.
Installing and positioning the spreader mechanism for top coverstitching operations.
Adjusting the top cover thread guide to ensure the correct thread path and tension.
Technical drawing detailing dimensions for the semi-submerged type sewing machine table cut-out.
Technical drawing detailing dimensions for the fully submerged type sewing machine table cut-out.
Technical drawing with dimensions for semi-submerged table cut-outs for specific machine models.
| Brand | Kingtex |
|---|---|
| Model | FT Series |
| Category | Sewing Machine |
| Language | English |