7-18 April 28, 2004
Controlling Exposure
Auto Bracketing Auto Bracketing is useful when you’re having difficulty determining the
proper exposure. This function lets you capture a sequence of images of
the same subject at three different exposure levels: appropriate exposure,
underexposure and overexposure.
You can use Auto Bracketing with four exposure modes. The following
table indicates the effect of Auto Bracketing in each mode:
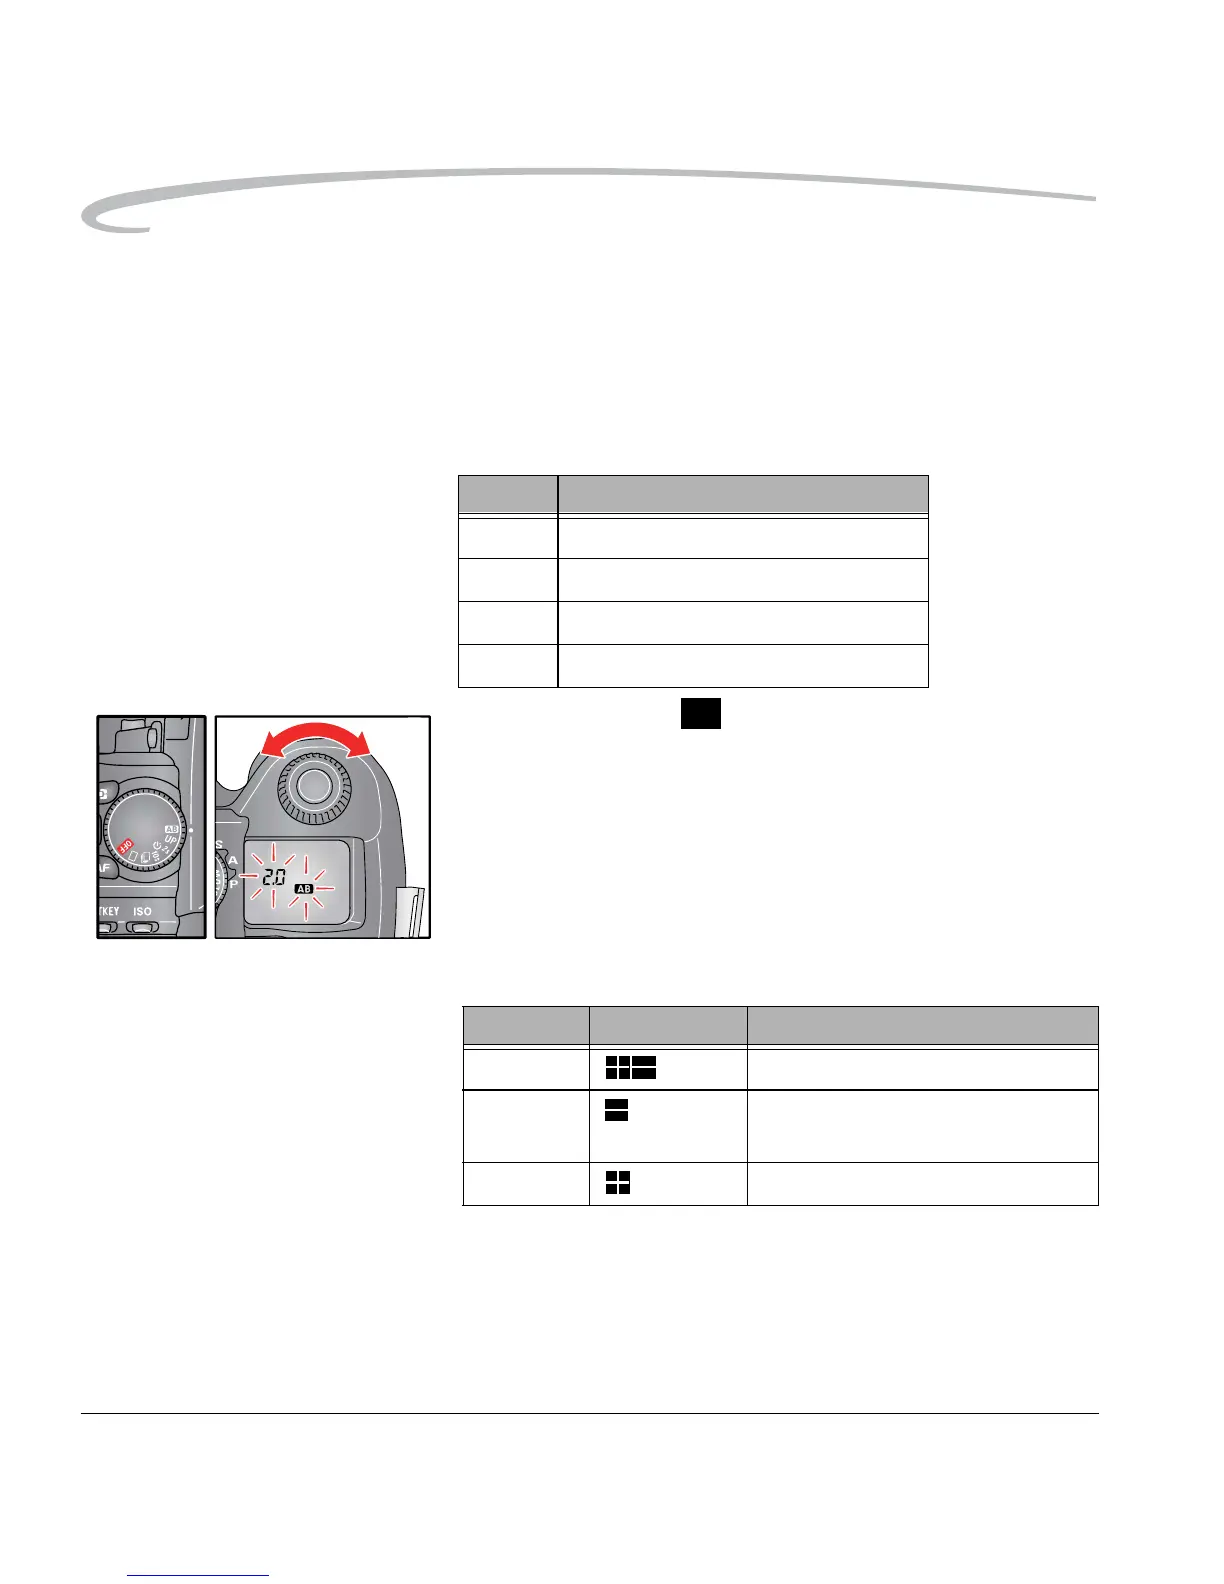
1. Rotate the D-Dial to .
2. Rotate the C-Dial to set the bracketing amount.
It can be set in 1/3 EV step increments up to ±3 EV. The Auto
Bracketing function continues until you set the amount to 0.
3. Rotate the D-Dial to the desired Drive mode.
The camera captures three images in the following sequence: appropriate
exposure, underexposure and overexposure.
For example: If you set the bracketing amount to 2.0, the indicator in the
viewfinder appears as in the following table:
* Measured value is the difference between the correct exposure value for
the camera and your setting value.
NOTE: The default Auto Bracketing sequence is: appropriate exposure,
underexposure and overexposure. You may change the sequence
using the Bracket Order Custom Setting. See page 5-3.
Mode Changed by Auto Bracketing
P mode shutter speed and aperture value
A mode shutter speed
S mode aperture value
M mode shutter speed
P,A,S mode M mode
First frame * Measured value
Second
frame
-2.0 EV deviation from Measured value
Third frame +2.0 EV deviation from Measured value
AB
0.0
2.0
2.0