The power cord, permanently attached
to
the projector,
has a 3·prong polarized plug
for
connection
to
a 110· to
125·volt
, 60
Hz
outlet of the grounding type. The cord can
also
be
connected to a conventional 2·prong wall receptacle.
To do this, however, a 2·prong adapter must
be
used and
the wire attached
to
the adapter must
be
connected
to
a
suitable ground. The faceplate screw
on
the receptacle box
can
be
used
if
the box is grounded; otherwise a cold·water
pipe
or
other solid ground will
be
needed.
2. Connect the remote control cord
to
the projector with the
small
ORIENTATION
DOT
(Figure
3)
on
the cord·plug facing up.
NOTE:
The white dot
on
the plug of the remote control
assembly
for
your projector denotes a 5·conductor cord.
This assembly,
or
an
exact duplicate, must
be
used with
the Model AF·2 Projector
for
all applications, including in·
stallations where one or more
KODAK Remote Extension
Cords are employed.
3.
If
a loaded slide
tray
is not
on
the projector, install one at
this
time. Use the procedure described above.
4.
Set
the automatic
timer
at
M. Move the selector switch
to either
LOW
or HIGH.
5.
If
you have placed
an
additional slide in the projector
gate,
as
described
on
page 6,
this
slide will now
be
projected
on
the screen.
If
you have placed a square of cardboard
in
the
gate, the screen will
be
dark. Otherwi
se,
the screen will
be
bright.
If
there
is
no image, momentarily depress the
forward
button
on
the projector or the remote control
to
project the first slide.
6. Focus the image
on
the screen, using the focus knob
or
the remote·control focus lever. Only the
first
image requires
focusing; the remaining images will
be
automatically fo·
. cused.
(See
page 5
for
focusing instructions
for
the zoom
lens.)
7. Center the image vertically
on
the screen (elevating
wheel).
8. Level the screen image (leveling foot).
9. Move the selector
to
OFF
until you are ready
to
start
projecting.
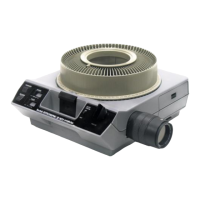
operating
the
projector
At this point the projector should have
been
prepared for
operation
as
described
in
the previous section. Now move
the selector switch to
LOW
or HIGH , depending
on
which
level of illumination is best suited
to
your projection situa·
tion.
(If
your slide show has been designed
for
automatic pro·
jection, set the
timer
at 5, 8, or 15. The slide·changing
mechanism will then
be
actuated automatically and each
slide will
be
shown
for
the number of seconds you have
selected.)
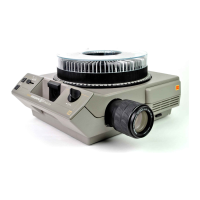
FORWARD
AND
REVERSE
BUTTONS
To
project the slide with the next higher identification num·
ber, momentarily depress the
forward button; the slide tray
will rotate one slide space in the forward (counterclockwise)
direction. Depress the reverse button
to
rotate the
tray
one
slide space
in
the reverse (clockwise) direction. (Either but·
ton can
be
used to override automatic·timer operation, if
desired.)
IMPORTANT:
When
you use the reverse button, press it
firmly
.
If
this
button
is
not
firmly
depressed, the slide tray
may rotate
in
a forward direction.
REMOTE
CONTROL
The forward and reverse buttons
on
the remote control
function the same
as
those
on
the projector.
The focusing lever
on
the remote control performs the
same function
as
the focus knob
on
the projector.
RANDOM
PROJECTION
To
project a slide out of sequence:
1. With one hand,
firmly
depress the select button and hold
it down.
2. Rotate the slide tray with the other hand until the number
of the slide you want
to
project is opposite the gate index
on
the projector.
3. Release the select button. The selected slide will
be
im·
mediately projected.
NORMAL
SLlDE·TRAY
REMOVAL
If
the zero position
is
at the gate
ind~x,
simply
lift
off the
tray. Otherwise:
1.
With the
projector
turned
on, depress the select button
firmly
and hold it down .
2. Rotate the slide
tray-in
either
direction-until
the zero
position is opposite the gate index.
3. Release the select button and
lift
off the tray.
EMERGENCY
SLIDE-TRAY
REMOVAL
In
the event
that
the slide·changing mechanism becomes
inoperative
as
the result of a defective slide becoming lodged
in the projector gate, the tray usually will need to
be
removed
in
order to eliminate the trouble.
If
the tray does not ad-
vance, depress either the forward
or
reverse button.
If
this
does not free the stuck slide, follow the tray· removal pro·
cedure given
on
the next page.
7
 Loading...