10.5
Section 10
Reassembly
10
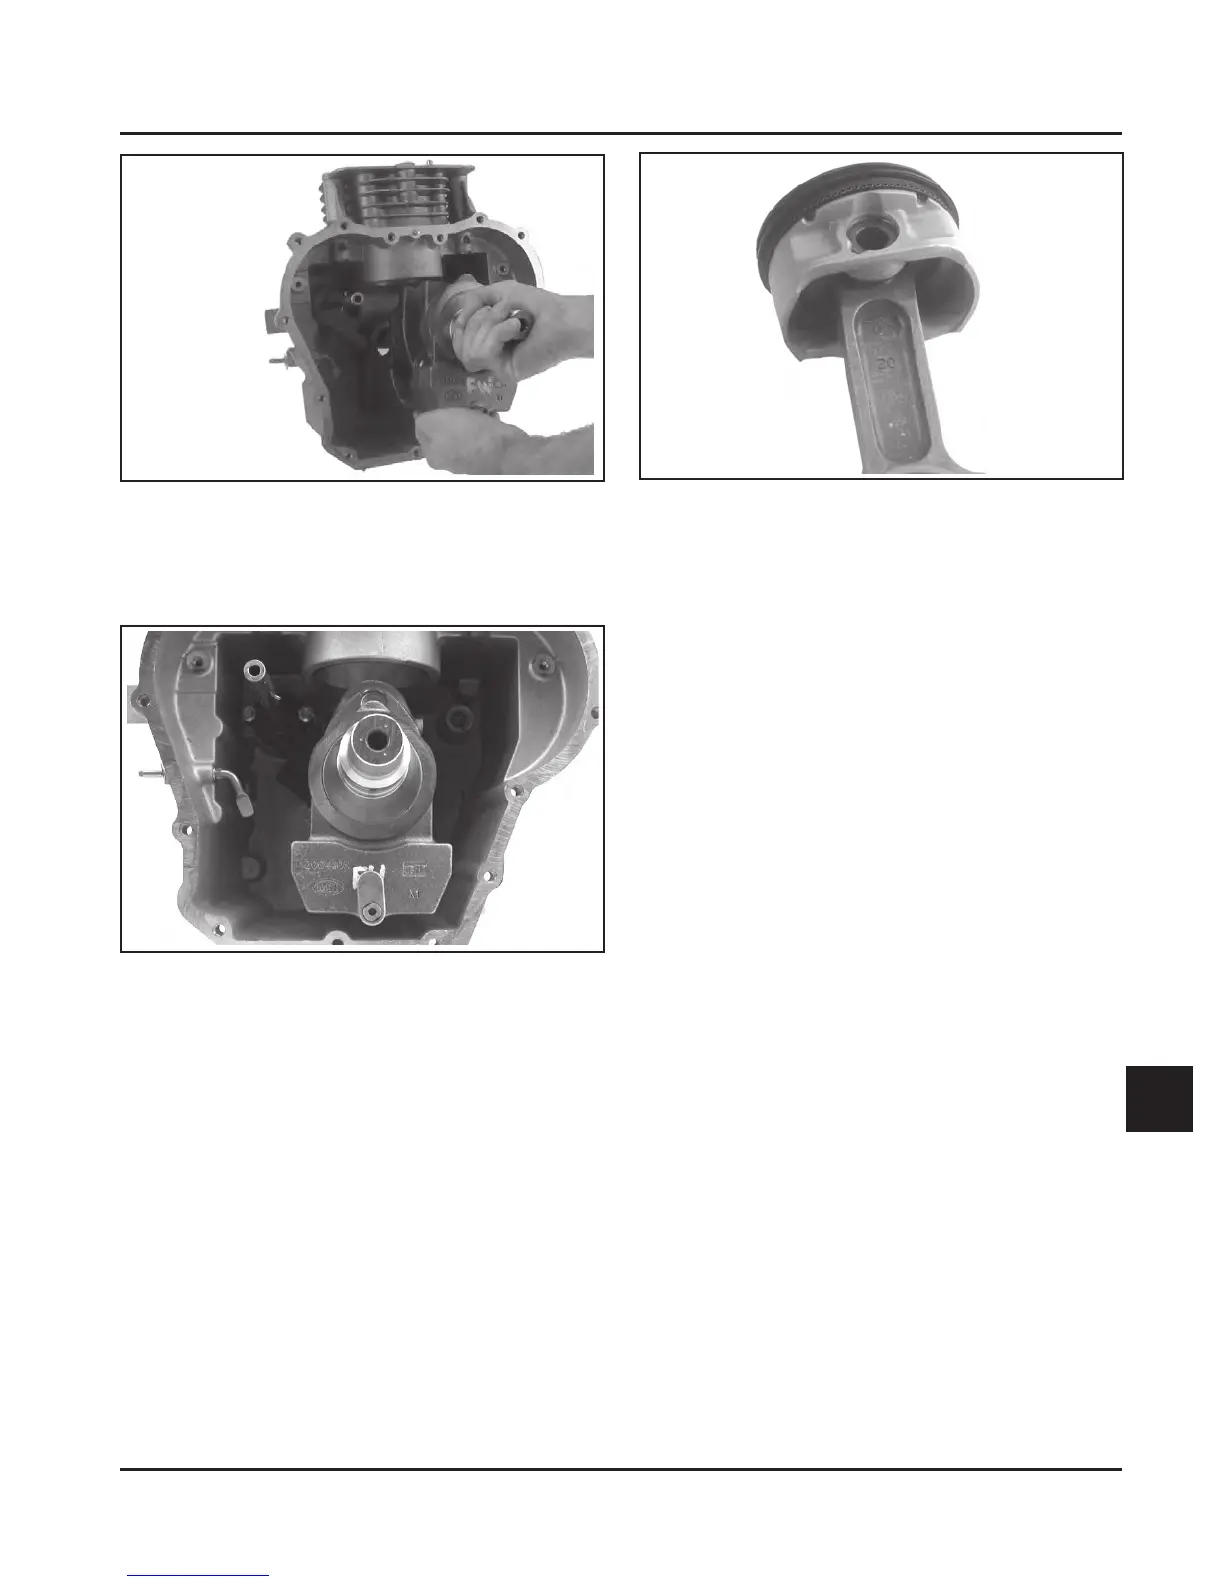
Figure 10-16. Assembled Piston and Connecting
Rod.
Install Piston and Connecting Rod
NOTE: Proper orientation of the piston/connecting
rod inside the engine is extremely important.
Improper orientation can cause extensive
wear or damage.
1. Stagger the piston rings in the grooves until the
end gaps are 120° apart. Lubricate the cylinder
bore, crankshaft journal, connecting rod journal,
piston, and rings with engine oil.
2. Compress the piston rings using a piston ring
compressor. Orient the “FLY” mark on the piston
toward the flywheel side of the crankcase. See
Figure 10-17. Place the ring compressor on the
top surface of the crankcase and make certain it
is seated down around the entire circumference.
Use a soft, rubber grip hammer handle and tap
the piston/connecting rod into the bore. See
Figure 10-18. The first tap should be rather firm,
so the oil ring moves from the compressor into
the bore in one smooth, quick motion. Otherwise
the oil ring rails may spring out and jam between
the ring compressor and the top of the bore.
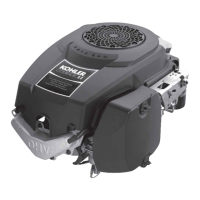
Figure 10-14. Installing Crankshaft Assembly.
4. Install the balance weight guide shoe onto the
guide pin with the solid end toward the
crankshaft. See Figure 10-15.
Figure 10-15. Installing Guide Shoe.
Install Piston Rings
NOTE: For detailed piston inspection procedures
and piston ring installation refer to Section 9
“Inspection and Reconditioning.”
Install Piston to Connecting Rod
1. Assemble the piston, connecting rod, piston pin,
and piston pin retainers. See Figure 10-16.
Not For Resale
www.SmallEngineDiscount.com

 Loading...