12
Installing the Batteries
1. Remove the cover on the back of the remote control.
2. Insert the batteries with the (+) and (-) ends pointing in the correct direction.
3. Slide the cover back on.
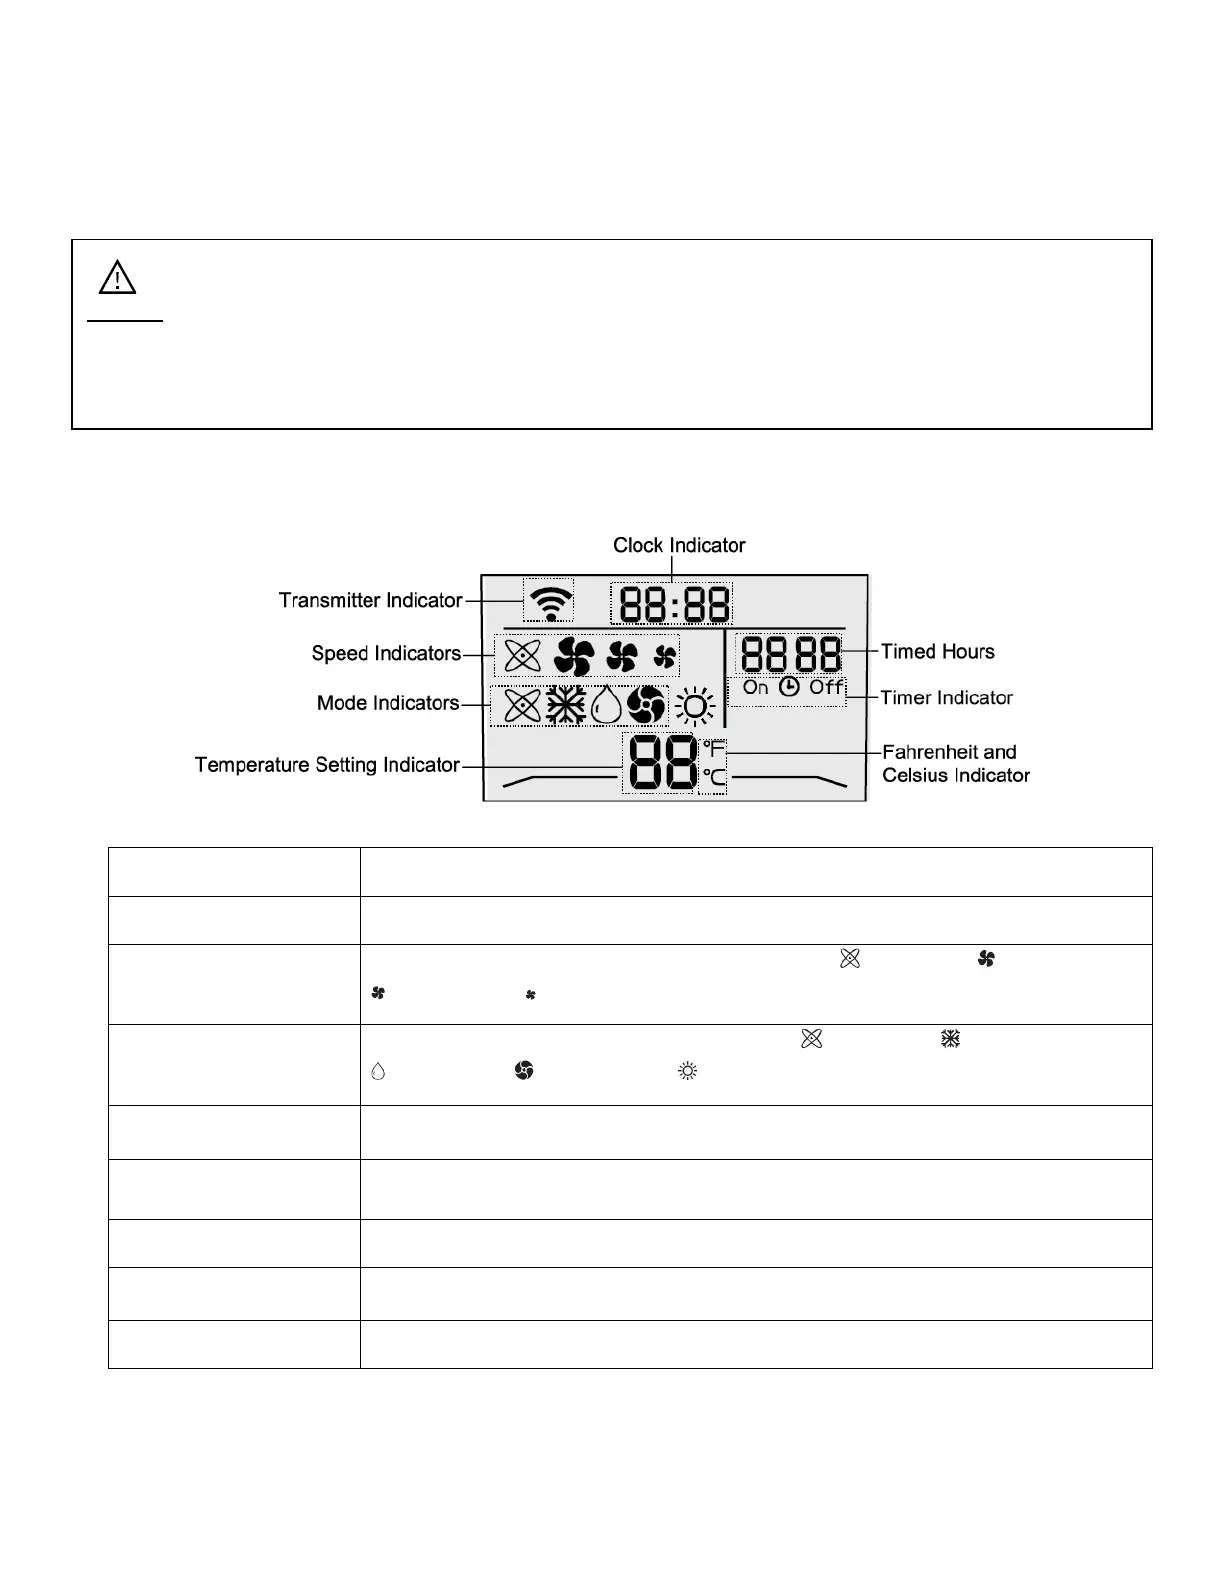
Remote Control LCD Indicators
This indicator appears when the Power or Timer button is signaling the unit.
This indicator shows the set fan speed between Automatic, High,
Medium, and Low.
This indicator shows the set mode between Automatic, Cooling,
Dehumidify, Fan Only, and Heat.
This indicator shows the set temperature.
This indicator shows if the set temperature is in Fahrenheit or Celsius.
This indicator shows the Clock’s time. The remote control has a 24-Hour clock.
This indicator shows the number of timed hours when the Timer is enabled.
This indicator shows if the On Timer or Off Timer is enabled.
Caution: use only AAA batteries. Remove the batteries if the remote control will not be used for one month
or longer. Do not attempt to recharge batteries not designed to be recharged. All batteries should be
replaced at the same time. Do not mix old and new batteries. Do not dispose of batteries in a fire as they
may explode.