22
KOLDWAVE 2AK (AIRMASTER)
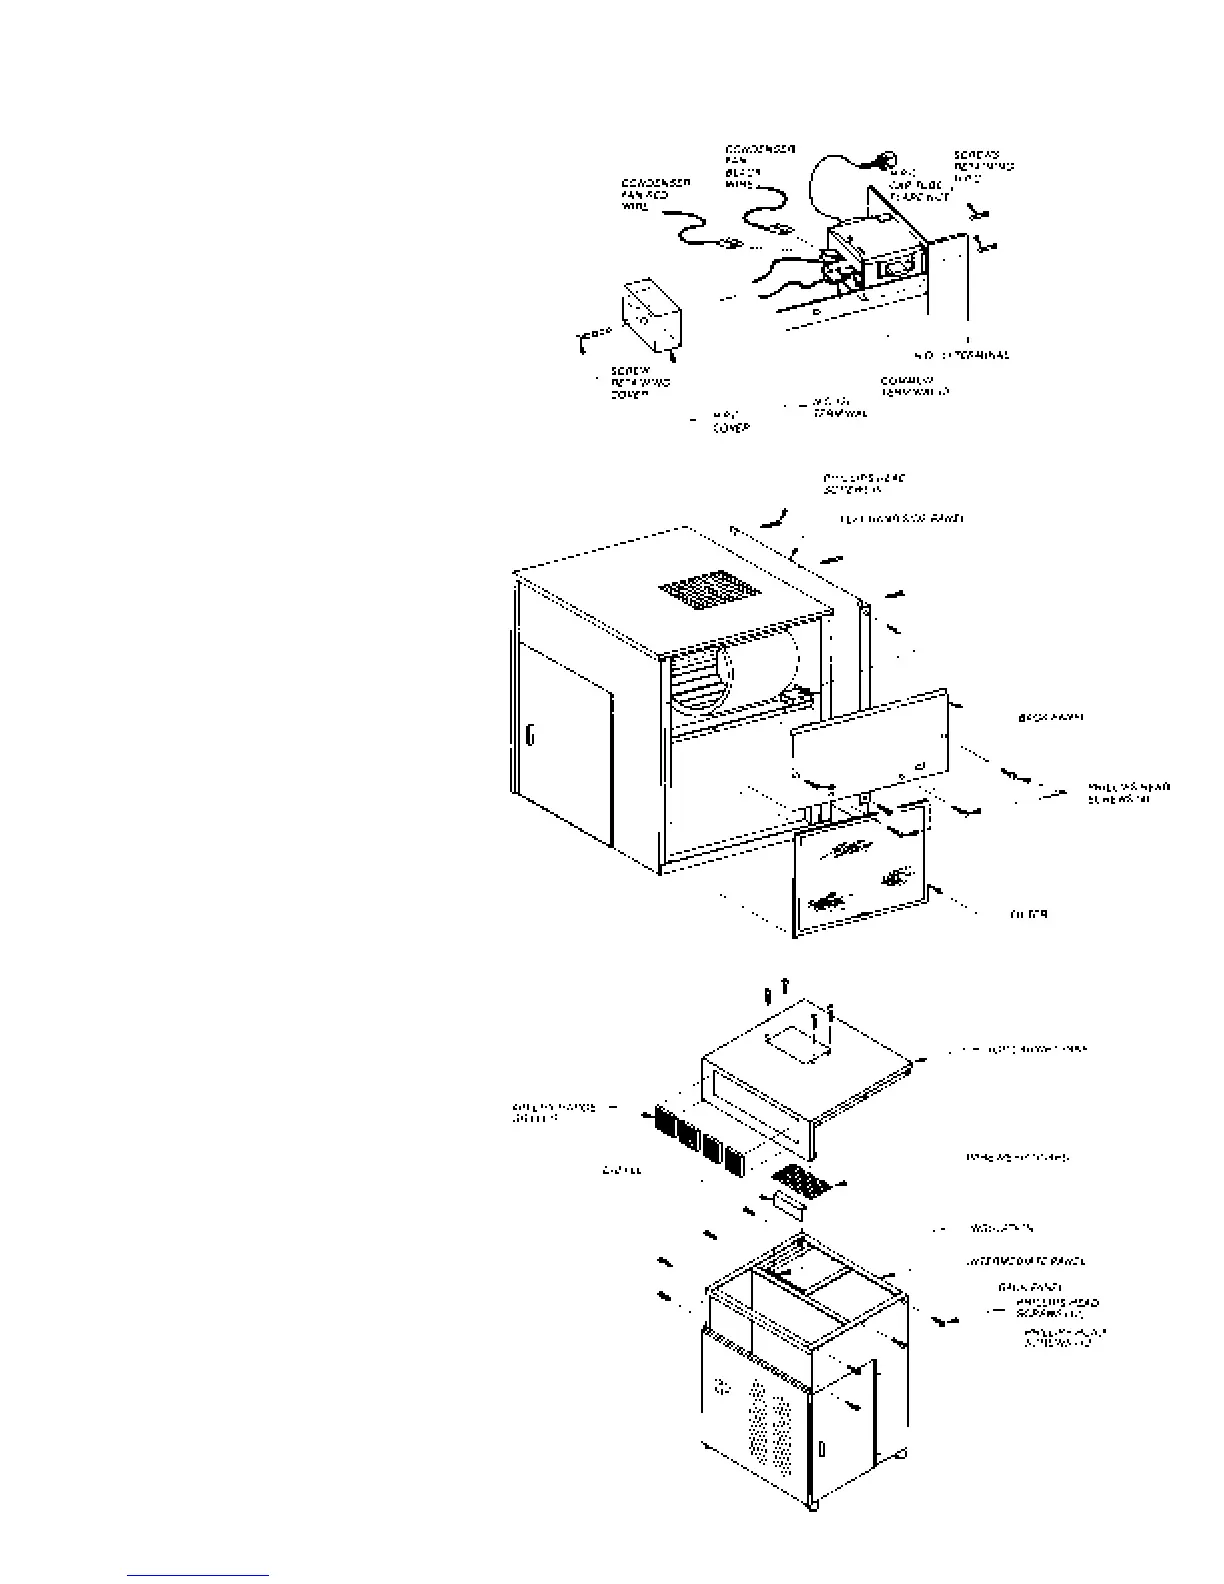
High Pressure Control
To gain access to the high pressure
control, remove the condenser air filter by
holding tab at bottom of filter, lifting filter
and pulling toward you and down. Remove
back and left hand side cabinet panels by
removing 13 Phillips head screws.
Remove screw from high pressure control
plastic cover and pull cover off and three
wires behind it. Unscrew two machine
screws holding control to condenser coil
flange. Loosen 3/8" flare nut securing
control capillary tube to Shrader fitting in
compressor discharge line. Replace high
pressure control, reversing above
procedure.
Condenser Fan Motor Speeds
Koldwave Airmaster is shipped from
factory with condenser fan motor wired on
low speed. A noise baffle is mounted
partially over the condenser blower
opening. The external static pressure
(E.S.P.) at the condenser discharge
cannot exceed 0.25" of water. When
employing more than 10 ft. of duct, the
condenser fan should be wired on high
speed and the noise baffle removed. This
will prevent the unit from tripping on its
high pressure control at high ambients.
To change condenser fan speed from low
to high, replace black wire from fan at high
pressure control with taped red wire from
fan motor (see paragraph on high
pressure control above to gain access to
high pressure control).
Removal of Noise Baffle
To gain access to noise baffle, remove the
four discharge grilles by pulling out each
grille (approximately 3/4") and pushing
down to snap out the tip spring and lift out.
Unscrew (12) Phillips head screws to
remove top, and loosen left and right side
cabinet panels. Remove condenser blower
wire mesh guard. The noise baffle is
located between the condenser blower
housing and the insulation (see figure
below). Remove baffle and assemble
remaining parts by reversing above
procedure.