21
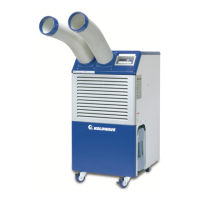
KOLDWAVE 2AK (AIRMASTER)
INSPECTION AND REPAIR OF REFRIGERATION LEAK
When repairing a leak, use dry nitrogen gas. During
brazing, the inside of the pipe undergoes oxidative
reaction due to the brazing flame. It is desirable to use
a slightly reduced flame. Conduct dry nitrogen gas
through the refrigerant piping to prevent oxidation.
Always evacuate refrigeration system thoroughly with
a vacuum pump before charging the system with
refrigerant.
PARTS REPLACEMENT PROCEDURE
Always disconnect power and discharge capacitors
before servicing.
Thermostat and Rocker Switches
1. Remove evaporator filter by pulling filter end cap at
bottom and slide out.
2. Open hinged right side bottom panel.
3. Remove four Phillips head screw from front right
and left corner posts of the chassis holding front
panel. Remove front panel and pull away towards
left. Unscrew two sheet metal screws securing
cover to control box.
4. Remove thermostat sensor bulb from clip secured
on control box cover. Disconnect wires from
controls. Pull thermostat knob out and unscrew hex
nut retaining thermostat.
5. Remove wires from rocker switches, press down
four positive-locking legs of rocker switches used
for snap-in mounting and pull out. Replace controls
and reverse above procedures.
Pilot Lights
To remove pilot lights, remove evaporator filter and
front panel, disconnect wires from controls, bend
Tinnerman clip retaining light and pull out. Install new
light(s) reversing above procedure.
Condenser Fan Motor
To gain access to condenser fan motor, remove left
hand side, top, back and front cabinet panels. Remove
fan motor wires from capacitor, high pressure switch
and terminal strips. Loosen set screw in blower wheel.
Loosen clamp around motor housing and remove
motor. Unfasten clamp around motor and replace
motor, reversing above procedures.
Condenser Blower Housing
To replace the condenser blower housing, first remove
condenser fan motor as described in “Condenser Fan
Motor”. Unscrew four 1/4-20 bolts and four sheet metal
screws holding blower to chassis and top panel.
Remove six self-tapping screws off the bracket
mounted on the housing. The blower wheel can be
replaced by pulling it out through the blower housing’s
discharge opening after removing the blower cut-off
plate. Replace housing, reversing the above
procedure.
Evaporator Fan Motor Assembly
Remove the left hand side and front cabinet panels.
Open hinged right side bottom panel by pushing on the
identified area. Remove fan motor wires from terminal
strip and fan speed rocker switch. Loosen set screw in
blower wheels. Remove locknuts retaining motor to
motor base. Remove motor and blower housings.
Blower wheels can be removed after taking off the
outside blower rings. No you can replace fan motor,
housings or wheels without removing the fan board by
reversing the above procedure.
Tank, Terminal Strip and Microswitch
The lower front section of Koldwave Airmaster
encloses the electrical terminal strips and the
condensate holding tank and its water level detection
system. Access can be gained to those parts by simply
removing the front panel.
Compressor and Running Capacitor
To service the compressor and its running capacitor,
remove the left hand side panel.
WARNING: All repair work on the refrigeration
system must be done by a qualified service
technician who is certified to handle refrigerants.
Carefully check all connection and every part for leaks
whenever the refrigerant system is repaired. Use a
leak detector or the halide torch to inspect the system.