Before Making Copies
3
3-13
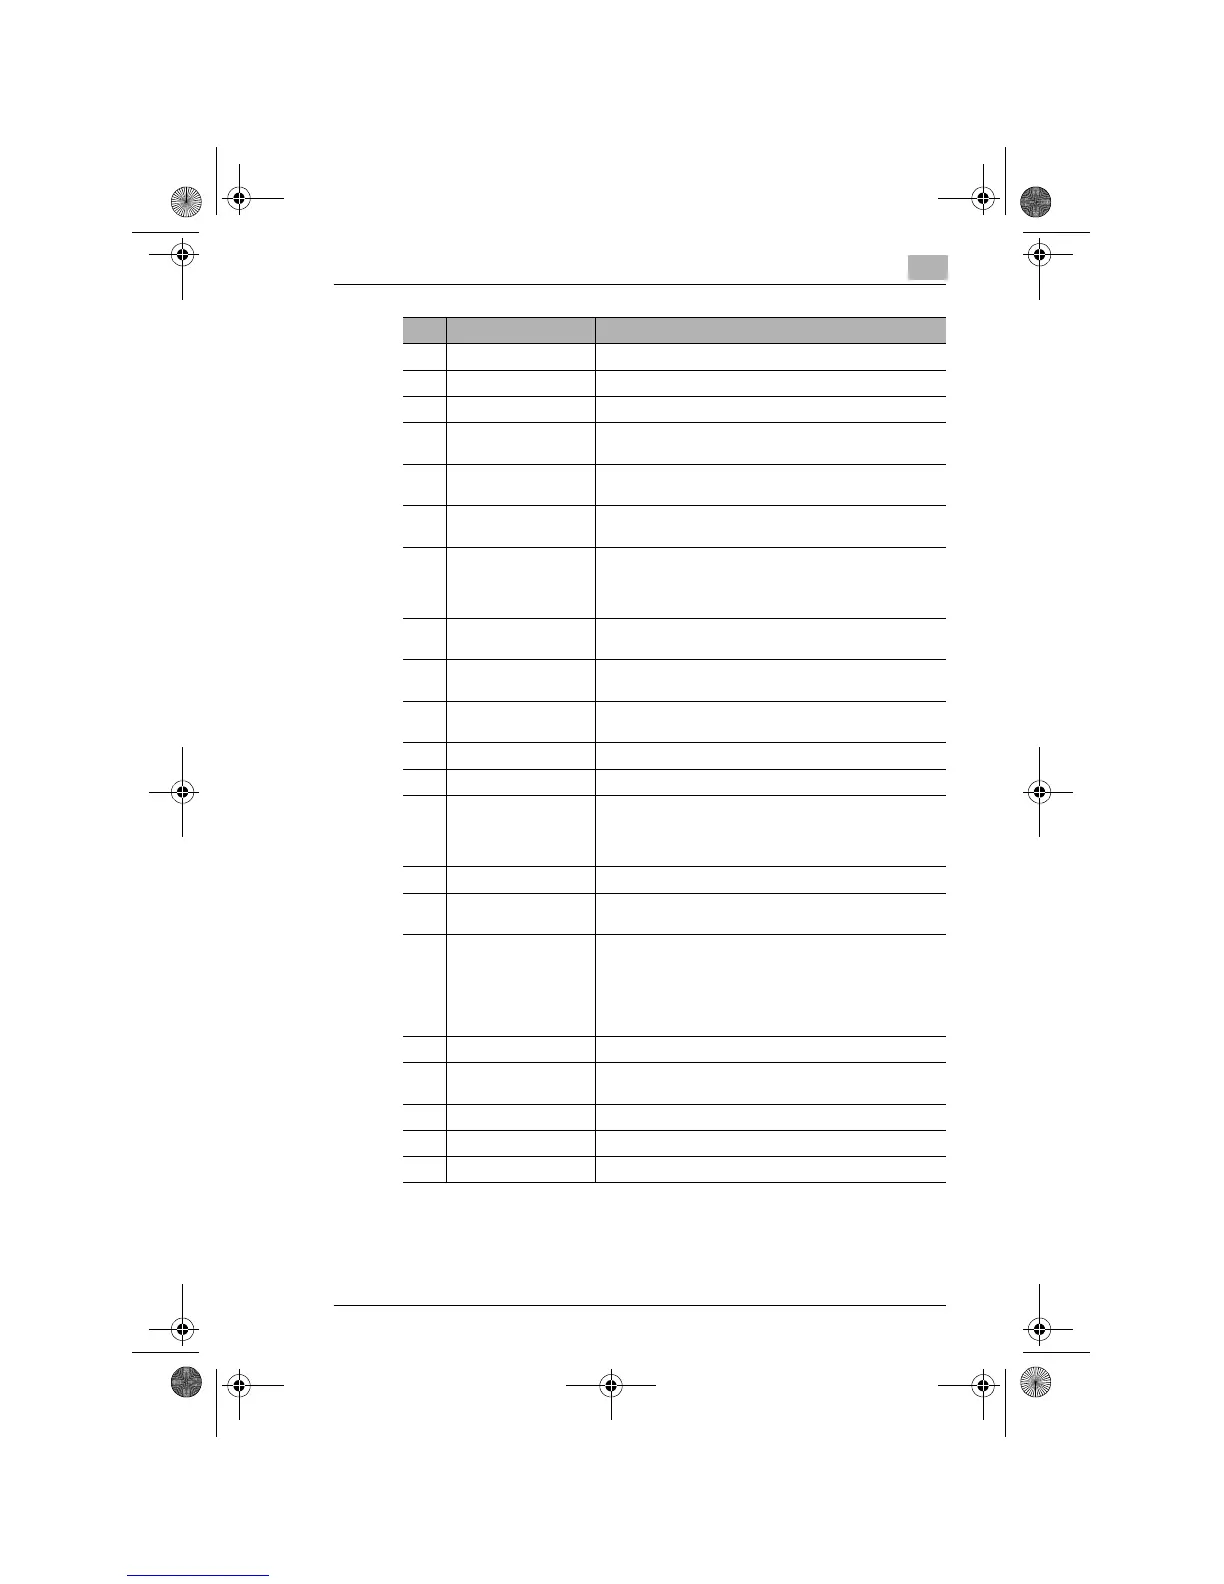
7 ERASE • Press to select the erase position.
8 OUTPUT • Press to select the output function.
9 IMAGE SHIFT • Press to select the Image Shift mode.
10 X/Y ZOOM • Press to make a copy with different zoom ratios set for
X (horizontal) and Y (vertical) directions.
11 JOB RECALL • Press to recall either one of the two jobs previously
stored in memory.
12 BYPASS TRAY • Press to select the size of the paper loaded in the
Bypass Tray.
13 ZOOM • Press to change the zoom ratio in the range between
50% and 200% in 1% increments.
• What is shown on the Display changes from the number
of copies to be made to the zoom ratio.
14 DISPLAY • Shows the number of copies to be made, the zoom
ratio, and other setting data.
15 KEY PAD • Use to type in the number of copies to be made and any
other numeric data.
16 ID • Press when entering an account number.
• Becomes valid only when Copy Track has been set.
17 POWER SAVE • Press to set the copier into the Power Save mode.
18 INTERRUPT • Press to interrupt a copy job.
19 AUTO RESET • Press to reset all copy functions and settings to their
defaults.
• Holding down the key for 3 seconds or more will set the
copier into the Utility mode.
20 CLEAR • Press to reset the number of copies to “1.”
21 STOP • Press to stop a print cycle.
• Press to stop a scanning sequence.
22 START • Press to start a scanning sequence.
• Press to start a print cycle.
• Press to validate the setting just made.
• The key lights up green when the copier is ready to
make copies, orange when it is not ready to make
copies.
23 ENTER • Press to validate the setting just made.
24 RE • Press to select a zoom ratio from among those fixed
ratios available as standard.
25 APS/AMS • Press to select either APS or AMS.
26 PAPER SIZE • Press to select the paper size
.
27 DENSITY SET • Press to adjust the image density of the copy.
No. Part Name Description
Konica7115_7118.book Page 13 Tuesday, October 16, 2001 10:51 AM