67
Settings Section
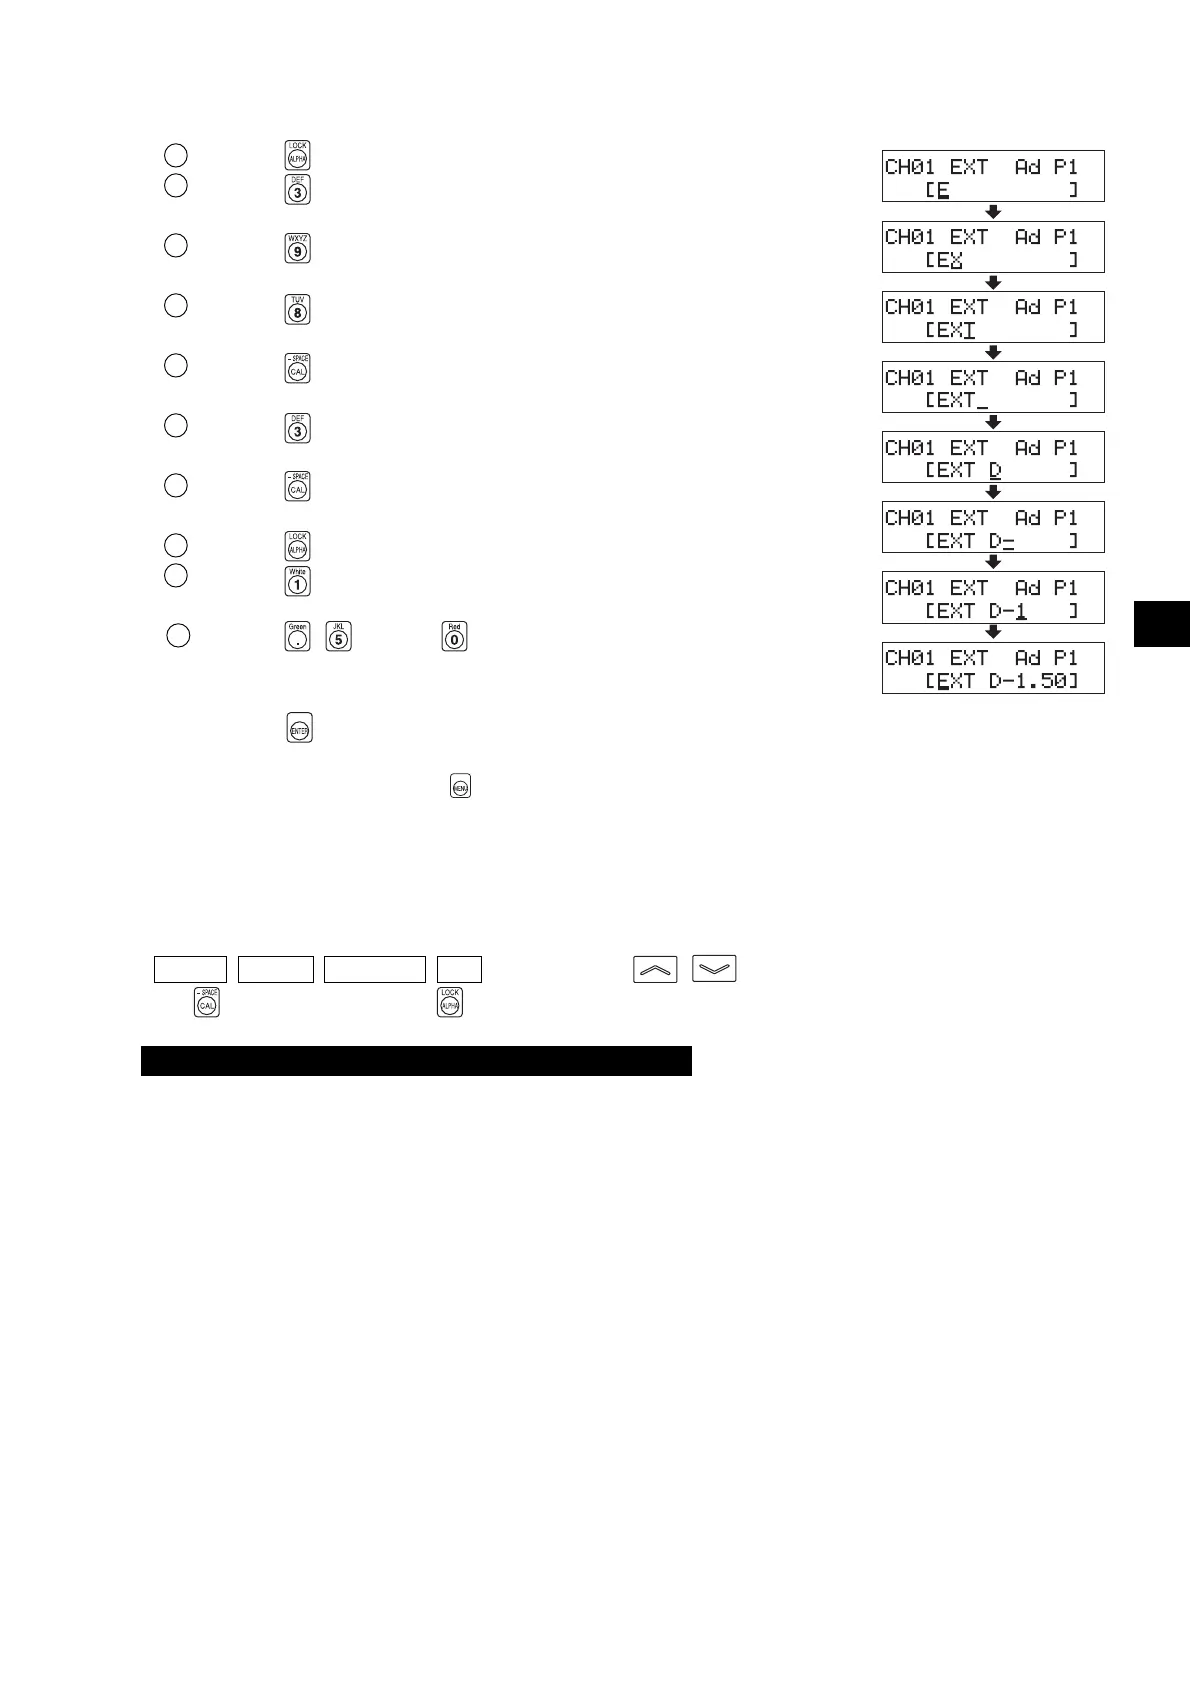
In this example, “EXT D-1.50” is set as the ID name.
1 Press the key.
2 Press the key twice.
“E” will appear at the cursor position.
3 Press the key twice.
“X” will appear at the cursor position.
4 Press the key once.
“T” will appear at the cursor position.
5 Press the key twice.
“ ” will appear at the cursor position.
6 Press the key once.
“D” will appear at the cursor position.
7 Press the key once.
“-” will appear at the cursor position.
8 Press the key.
9 Press the key.
“1” will appear at the cursor position.
10
Press the , and then key.
“.”, “5” and then “0” will appear at the cursor position.
5. Press the key.
The ID name will be set for the selected memory channel.
* To cancel ID name setting, press the key.
<Notes when Setting an ID Name>
● The ID name will be kept even if the POWER switch is set to OFF.
● Never press the following keys during ID name setting.
Doing so will cancel setting and activate the mode corresponding to the pressed key.
( 0-CAL , MODE , REMOTE , MR , MEMORY CH , )
If the key is pressed while the key is not held down (i.e. the ten-key is not used as alphabet key), a screen
for setting the analog display range will appear.
● When the optional 4-Probe Expansion Board CA-B04 is used
Only one ID name can be set for each memory channel irrespective of the number of probes. (The specified ID
name will be common to all probes [P1] to [P5].)
CH01 EXT Ad P1
[E ]
_
CH01 EXT Ad P1
[EX ]
_
CH01 EXT Ad P1
[EXT ]
_
CH01 EXT Ad P1
[EXT ]
_
CH01 EXT Ad P1
[EXT D ]
_
CH01 EXT Ad P1
[EXT D- ]
_
CH01 EXT Ad P1
[EXT D-1 ]
_
CH01 EXT Ad P1
[EXT D-1.50]
_