E-7
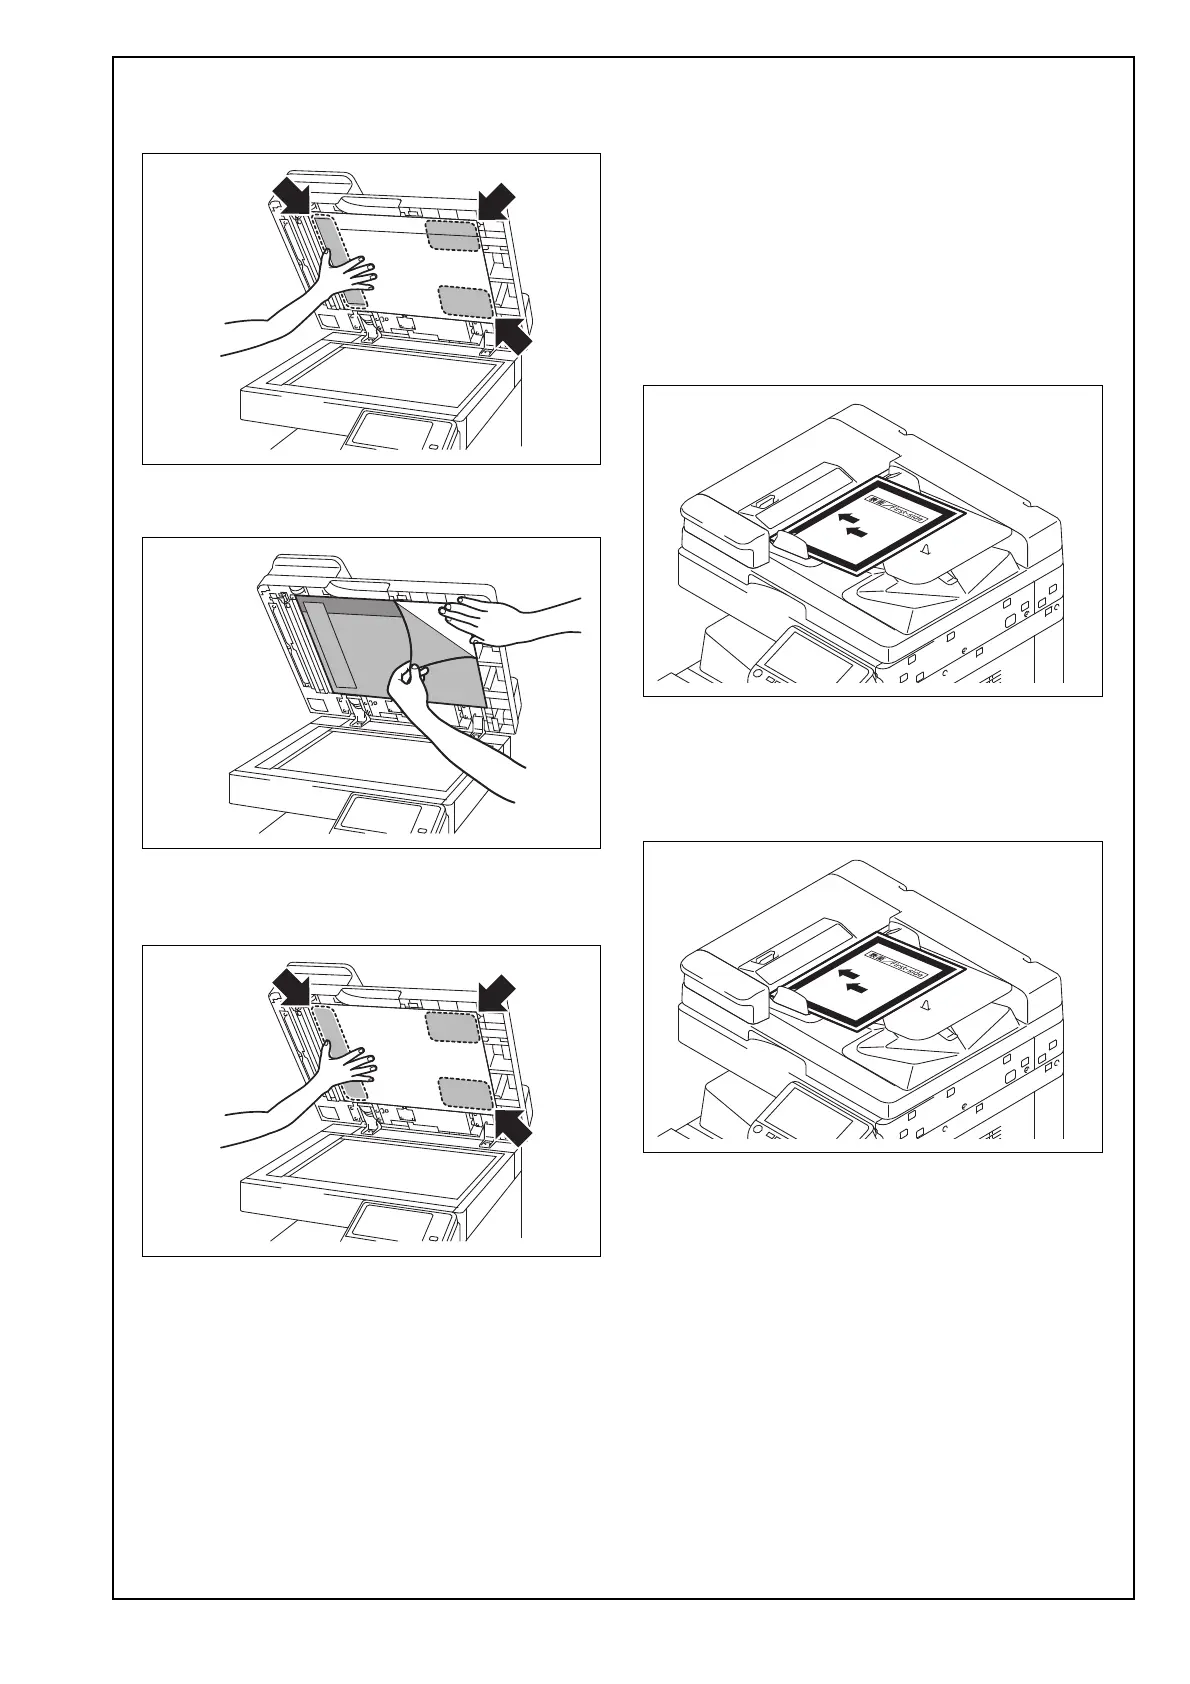
(6) Firmly press the positions where the original mat
is attached with the double-sided tape so that the
original mat does not peel off.
(7) Remove the protective sheet while pressing the
original mat to prevent it from peeling off.
(8) Once again, firmly press the positions shown in
the illustration so that the original mat does not
peel off.
(9) Close the Reverse Automatic Document Feeder.
(10) Perform the height adjustment again.
Note:
For the height adjustment, refer to E-3 <Adjusting
the height>.
(11) Load A3 or Ledger paper into a paper tray.
(12) Select the paper tray loaded with the A3 or Led-
ger paper on the Paper screen of Copy mode.
(13) Do not load any originals and make a copy in
the 1-Sided > 1-Sided mode.
(14) Confirm whether there is a problem in the
image.
<Auto Stop Position Adjustment>
(1) Display the Service Mode screen.
(For details of how to display the Service Mode
screen, see the service manual.)
(2) Touch “ADF.”
(3) Touch “ADF automatic adjustment.”
(4) Touch “Sub Scanning.”
(5) Place the chart in the document feeding tray
(with the side having an arrow facing up).
(6) Press the Start key.
(7) Touch “Apply.”
(8) Touch “Main Scanning.”
(9) Place the chart in the document feeding tray
(with the side having an arrow facing up).
(10) Press the Start key.
(11) Touch “Apply.”
(12) Touch “END.”
 Loading...