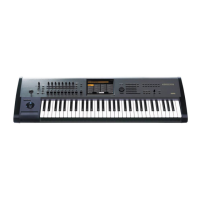
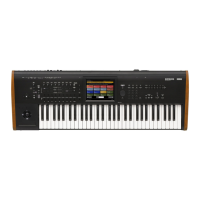
KRONOS & KRONOS-X Test mode
How to enter the TEST MODE
Following table shows each static test mode.
The instruments enters the each test mode when pushing the switch in the SWITCH column of the
table below.
SWITCH TEST MODE
[MIXER KNOBS ]+
[RESET CONTROLS]+
[ENTER]+[5]
Full test
[MIXER KNOBS ]+
[RESET CONTROLS]+
[ENTER]+[2]
Skipp internal Test
Basic operation
[ENTER]:Proceed to the next check .
: The item is advanced.
: The item is returned.
[FF>>]: The step is advanced.
[<<REW]: The step is returned.
1. Appearance check
1) Check that there is no scratch on Case and Knobs.
2) Check that there are no abnormalities or problems on paintings and silk printings.
3) Check that there are no abnormalities or problems of float or ETC on Buttons, Switches, Jacks,
Potentiometers and etc.
4) Check that there are about one sheet of paper space between the touch panel and the LCD food.
5) Check there are 0.8mm or more space between the keyboard and the FrontBar.
6) Check that there is neither shaking of the product nor a distortion on the plane.
2. Preperation and LCD flicker Check
(note)Do not insert USB memory before power on.
1) Push [POWER] switch turn on.
Insert USB memory after blinking DISK access LED.
Connect USB A and USB B with one cable.
Connect MIDI IN and OUT with one MIDI cable.
Check that LCD doesn’t flicker when LCD display Set List page.
3. Sound check
Hit the key medium touch from left edge to right edge.
Check that abnormality is not heard in the sound.