Rev. Date: 12/27/17 Page 17
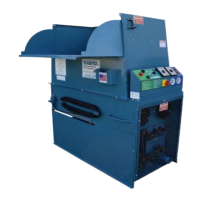
MODEL #1300/2300
BASE PLATE REPLACEMENT:
1. Remove damaged baseplate assembly from shaft using ratchet
drive wrench with extension and 1/2" socket.
2. Check seal for wear and damage. (Installing seal and top plate
on the bench is quick and easy). Remove bolts from plate
assembly and replace with new seal. Make sure seal and top
plate are assembled on correct side of base plate before
assembling in airlock. Seal should press backward towards
top plate when
installed correctly into airlock chamber. (Illustra-
tion N)
3. Install the rotor plate assembly into the airlock. The airlock runs
counterclockwise viewing it from the sprocket drive shaft.
(Illustration N) Align the base plate with holes on airlock shaft
using a tapered punch. Caution: Do not mount rotor plate
backwards. If installed improperly, damage to seals will result
and put undue stress on agitator motor. This causes overheat-
ing and poor production. Seal should be bent forwards to allow
for a counterclockwise rotation of rotor.
4. As rotor plate is installed, press bottom tab of seal under
adjacent seal with flat blade screwdriver. (See Illustration N)
Note: Entire rotor plate assembly may be removed and
replaced. This procedure maybe easier than replacing
just the seals.
General Maintenance (cont.)
(Illustration N)
CHAIN: (#50 Nickel Plated)
ADJUSTMENT: A smooth operating chain drive should have a slight sag on the idler side of the chain. New
chains should be installed under slight tension as they will elongate a small amount due to seating of pins and
bushings during the first few days of operation. Chain should be kept in good condition by proper lubrication (dry
film lubricant Dow 321) and occasional cleaning. Soaking chain in container of 10 weight oil will provide for
internal lubrication of pins and bushings. However, excess oil must be drained and wiped away as excessive
lubrication will cause insulation accumulation on chain. Worn out chain should be replaced. When chain is
replaced, worn sprockets should also be replaced, preventing further damage to new chain.
SPROCKETS:
CHECK SPROCKETS FOR WEAR. Misalignment and/or loose sprockets and improper chain tension causes
the premature wear of chain and sprockets. All sprockets, except speed reducer and idler sprockets, have been
secured with a medium grade Loctite (general purpose thread locker), to prevent gradual movement. The set
screws and key are also inserted with a medium grade Loctite. If sprocket is difficult to remove, it may be heated
with a propane torch to loosen.
Caution: Do not overheat sprocket or damage to bearing will result. A pulley or bearing puller can then be
used to remove the sprocket and key. Replace new sprocket on shaft with key and medium grade Loctite
applied to shaft. Align sprocket with corresponding sprocket, using a straightedge placed along face of
teeth and tighten set screw. Speed reducer sprocket does not require Loctite.
(Illustration M)