RDLO
Page 14 of 24
Repair and servicing work on the pump must only
be carried out by specially trained personnel, using
original spare parts.
Observe the safety regulations laid down. Any
work on the motor shall be governed by the
specifications and regulations of the respective
motor supplier.
Dismantling and reassembly must always be
carried out in accordance with the relevant
sectional drawing. The sectional drawing and
other relevant documents are found in the
annex. The dismantling sequence can be
derived from the sectional drawing.
In case of damage you can always contact our
service departments.
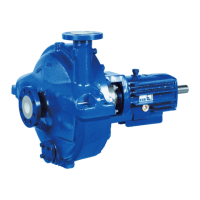
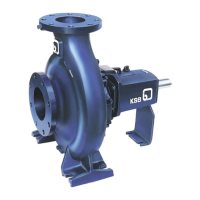
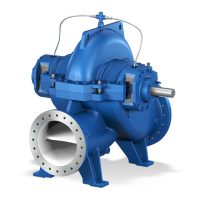
7.3.2 Dismantling
Observe the operating
instructions of the coupling.
The pump is designed so that the complete rotor
can be removed in the sequence described below
without removing the suction or discharge pipe or
disturbing the alignment of the pump unit:
Close the suction and discharge gate valves and
drain the pump by opening the drain and vent plugs
or valves (option).
Pumps with oil-lubricated bearings: Drain the oil.
Remove the flushing pipe and any pipes between
additional equipment and the pump, if applicable.
Remove the coupling guard (680.1) and guards
(680.2).
Detach the pump-side coupling half as described in
the operating instructions of the coupling in section
9.3.
Remove the bolts (901.4) between the bearing
housings (350.1 and 350.2) and the upper part of
the volute casing (102).
Undo the casing split flange bolts (901.1), detach
the upper part of the volute casing (102) from the
lower casing half with the aid of the forcing screws
and remove it with lifting equipment. Lift the upper
part uniformly without tilting it. The interior of the
pump (impeller with casing wear rings, shaft seals)
is then accessible for inspection.
In order to lock the mechanical seals (if mounted),
engage the discs (550.5) in the groove of the shaft
protecting sleeve (524.2) and tighten the bolts
(901.3).
Remove the bolts (901.4) between the bearing
housings (350.1 and 350.2) and the lower part of
the volute casing (102).
Secure the bearing on the non-
driven end against falling
down.
Should the non-driven end bearing be a cylindrical
roller bearing, the entire bearing housing on the
non-driven end (350.2) along with the bearing cover
(360) can be removed from the shaft after removing
the bolts (901.4).
Lift the rotor upwards out of the lower casing half.
For further disassembly, place it down carefully and
secure it in horizontal position against rolling.
Unscrew the nuts (920.5) for fastening the bearing
cover (360) of the floating bearing (non-driven end)
and pull off the bearing housing (350.2).
Loosen the safety screw (914.1), then unscrew the
grooved nut (920.4).
Remove the disc spring (950.2) and the deep-
groove ball bearing (321) with sleeve (520) from the
pump shaft (211).
Remove the bearing cover (360).
Remove the V-ring (411.1) from the spacer sleeve
(525.1), and the spacer sleeve from the shaft.
Remove the pump-side coupling half as described
in the operating instructions of the coupling in
section 9.3.
Undo the nuts (920.5) for fastening the bearing
cover (360) of the locating bearing and pull off the
adapter (145) and the bearing housing (350.1).
Remove the circlip (932) and pull the two angular
contact ball bearings (320) off the pump shaft (211).
Remove the bearing cover (360).
Remove the V-ring (411.1) from the spacer sleeve
(525.1) and the spacer sleeve from the shaft.
Gland Packing
Unscrew the nuts (920.2) on either side of the gland
(452, split), and remove the gland.
Pull out the packing rings with the help of a packing
extractor, and pull the shaft protecting sleeve
(524.1) out of the shaft seal housing (441).
Mechanical Seal
The two shaft seal housings (441) along with shaft
protecting sleeve (524.2), mechanical seal (433)
and seal cover (471) can be removed from the shaft
as a complete assembly unit, if the locking discs
(550.5) are engaged.
Unscrew the nuts (920.2) on either side of the seal
cover (471) and remove the complete seal cover
with mechanical seal and shaft protecting sleeve
(524.2) from the shaft seal housing (441).
Caution
Caution
 Loading...