42
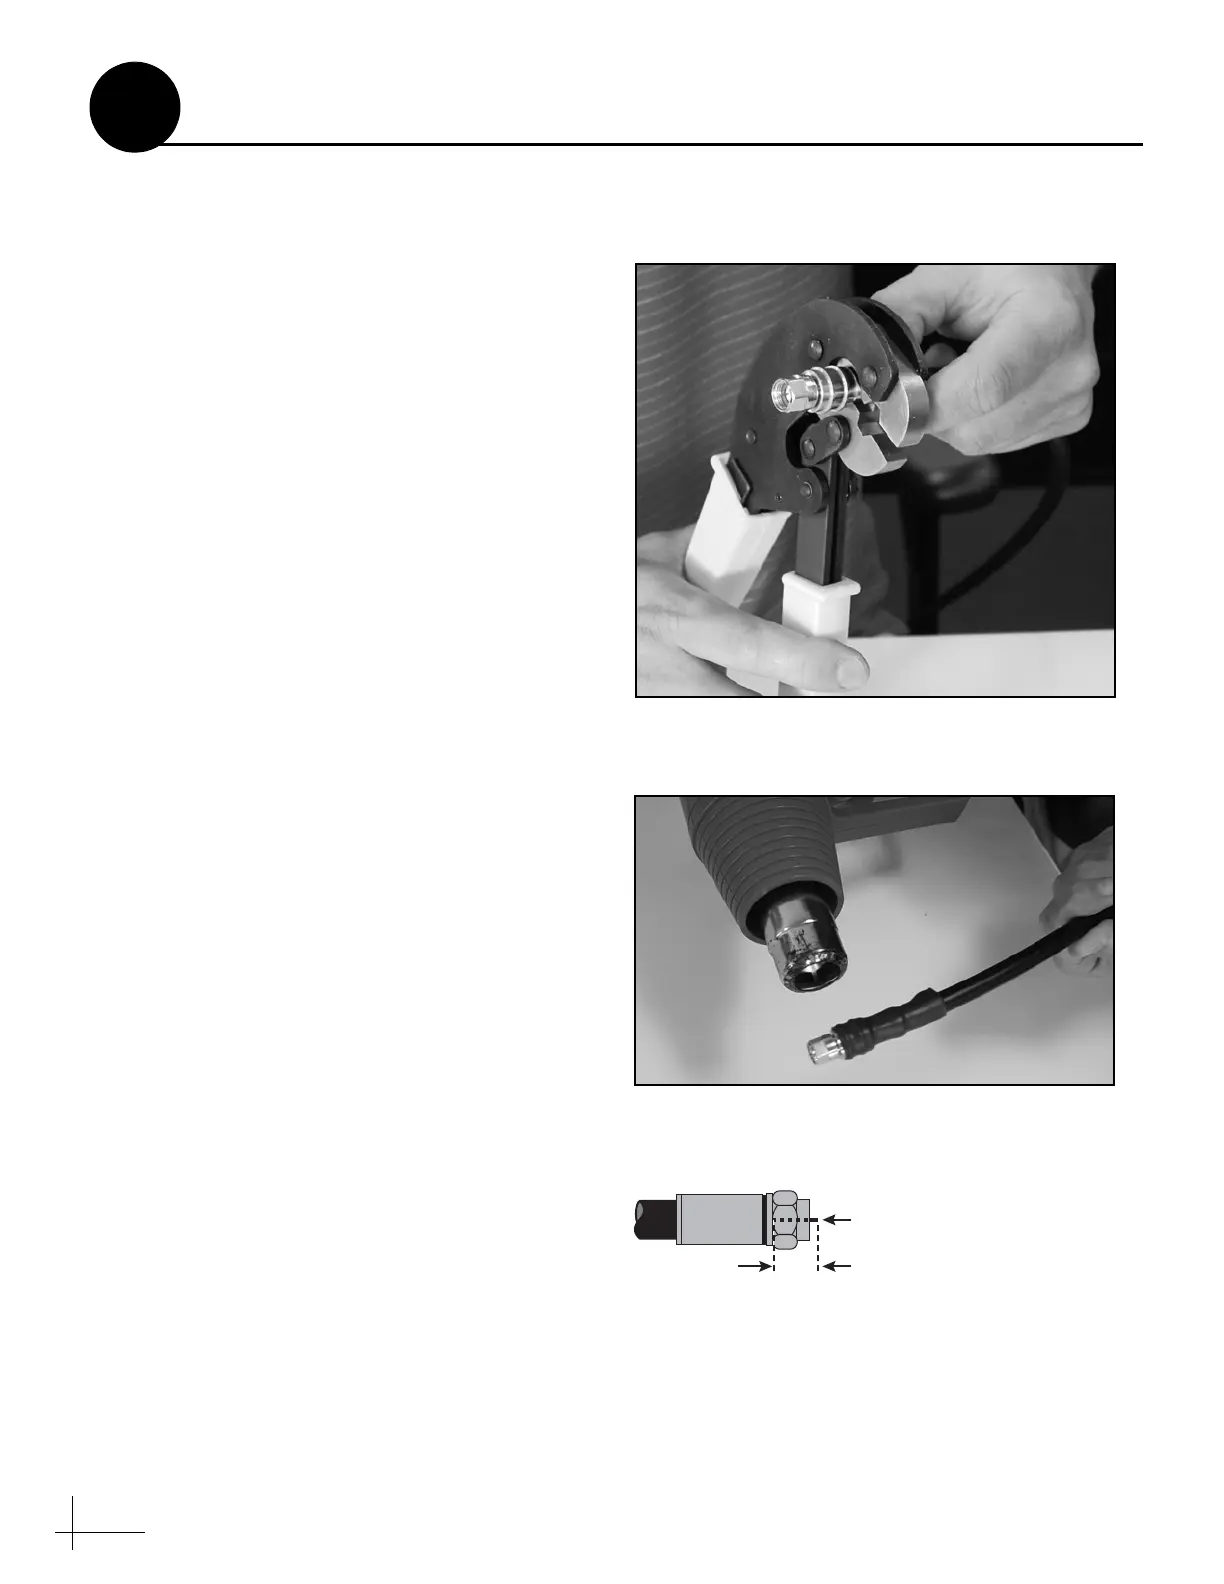
12. Using an appropriate crimp tool (either the
CT-400/300 or the HX-4 with Y1719 dies),
crimp the ferrule in place (see Figure 90).
Crimp as close to the connector body as
possible.
13. Crimp the ferrule again, but further back
from the connector. However, be careful not
to crimp the cable jacket.
14. Slide the heat shrink sleeve over the
connector body and heat it to compress it into
place (see Figure 91). When you are done, the
heat shrink should extend from the rear of the
connector to the cable jacket. This forms a
weather-tight seal.
15. Using a multimeter or similar device, check
the continuity of the cable.
16. Ensure the center conductor pin measures
between 0.20" and 0.28" (5-7 mm) in length, to
ensure proper engagement with the mating
connector (see Figure 92).
Figure 90: Crimping the Ferrule onto the Cable
Figure 91: Applying the Heat Shrink Tubing
Center Conductor
1/4" (5-7 mm)
Figure 92: Proper Center Conductor Pin Length
Continued Terminating LMR RF Cables
A
Appendix
 Loading...