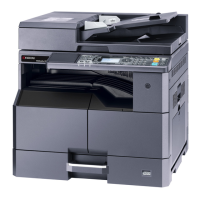
4
16
B
15
11
14
14
12
14
13
6. Open the left cover (11).
7. Release the latch (13) of the cover (12).
Slide the cover (12) to the rear, release the 6 clips (14) and remove the
cover
Attaching the sub staple cover
8. Insert the hook (15) of the sub staple cover (B) and turn the cover (B) in
the direction of arrow until it clicks to attach.
6. Ouvrez le capot gauche (11).
7. Libérer le verrou (13) du capot (12).
Faire glisser le capot (12) vers l'arrière, libérer les 6 pattes (14) et
déposer le capot.
Fixation du capot de l’agrafeuse auxiliaire
8. Insérez le crochet (15) du capot de l’agrafeuse auxiliaire (B), puis faites
tourner le capot (B) dans le sens de la flèche jusqu’à ce qu’il
s’encliquète pour le fixer.
6. Abra la cubierta izquierda (11).
7. Liberar el pestillo (13) de la cubierta (12).
Deslizar la cubierta (12) hacia atrás, liberar las 6 lengüetas (14) y quitar
la cubierta.
Colocación de la cubierta secundaria de grapas
8. Inserte el gancho (15) en la cubierta secundaria de grapas (B) y gire la
cubierta (B) en el sentido de la flecha hasta que se produzca un
chasquido para colocarlo.
6. Die linke Abdeckung (11) öffnen.
7. Lösen Sie die Raste (13) der Abdeckung (12).
Schieben Sie die Abdeckung (12) nach hinten, lösen Sie die 6 Laschen
(14), und nehmen Sie die Abdeckung ab.
Anbringen der Hefterhilfsabdeckung
8. Den Haken (15) der Hefterhilfsabdeckung (B) einsetzen, und die
Abdeckung (B) in Pfeilrichtung drehen, bis sie mit einem Klicken
einrastet.
6. Aprite il coperchio sinistro (11).
7. Rilasciate il fermo (13) del coperchio (12).
Slittate il coperchio (12) all'indietro, rilasciate le 6 linguette (14) e
rimuovete il coperchio.
Montaggio del coperchio secondario della pinzatrice
8. Inserite il gancio (15) del coperchio secondario della pinzatrice (B) e
fate ruotare il coperchio (B) nella direzione della freccia fino a quando
non si mette in posizione con un clic.
6. 左カバー(11) を開く。
7. カバー(12) のはめ込み部 (13) を外す。
カバー(12) を後側へスライドさせ、爪(14)6 箇所を解除し、取り外す。
6. 打开左盖板 (11)。
7. 松解盖板(12)的嵌入板(13)。
将盖板(12)滑至后侧,松解 6 处夹片(14)然后取下盖板。
安装副装订器盖板
8. 将副装订器盖板 (B) 的钩件 (15) 插入后,朝箭头方向转动安装,直至听
到咔叽声为止。
サブステープルカバーの取り付け
8. サブステープルカバー(B) のフック (15) を切り欠き (16) に挿入し、カ
チッと音がするまで矢印方向に回転し、取り付ける。
 Loading...