19
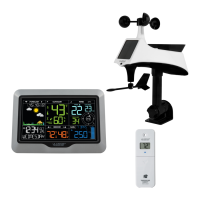
SENSORS
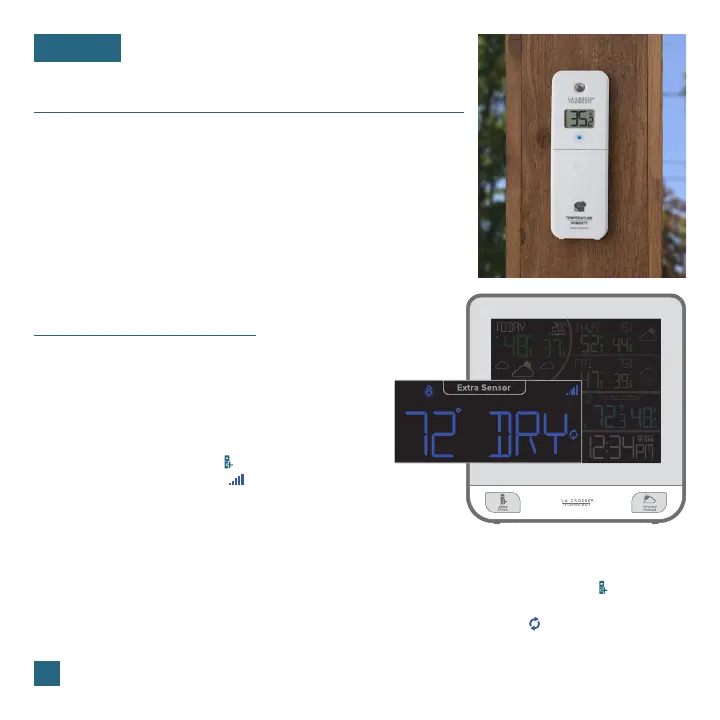
• Insert one mounting screw through the hole at the top of the sensor,
or hang it from the back using a nail.
• Mount the sensor in an open shaded location with protection from
direct weather elements and sunlight. Under an eave on a north-
facing wall is often a great choice.
• The maximum wireless transmission range to the station is up to
400 feet (121 meters) in open air, not including walls or floors.
• Be sure your sensor is mounted vertically, to allow moisture to drain
out properly.
Sensor Placement & Mounting
Add-On Sensors
Whether you choose to connect to the La Crosse View app or not,
this station can display data for up to 4 extra sensors.
This data will appear in the dark blue section on the LCD
and in your La Crosse View app if connected.
Note: When first powering up, or after a factory reset, extra sensors should automatically connect to your station.
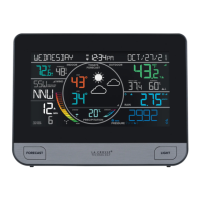
Viewing Add-On Sensor Data
If you have multiple add-on sensors connected,
press & release the EXTRA SENSOR ( ) button to
toggle through the data you’d like displayed on the
LCD. The Auto Scroll Icon ( ) will appear if activated.
This setting will also include relative pressure data
in the cycle.
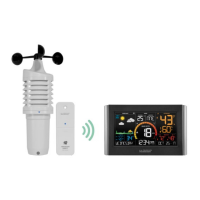
Adding Sensors to Your Station
3. Your sensor should connect within the next 3
minutes, briefly displaying its ID and type on the
LCD. The Sensor Reception Indicator will show
solid on the screen when a sensor is connected.
1. Hold the EXTRA SENSOR ( ) button until the
Sensor Reception Indicator ( ) starts to animate.
2. Install batteries into your sensor. If the sensor
has a TX button, press it to force a transmission
signal. This button is usually located in or near
the sensor’s battery compartment. The LED light
on the sensor will flash once.
Water Leak
Sensor Example
 Loading...