04
Adding & Connecting Your Station to Wi-Fi
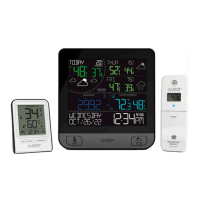
LA CROSSE VIEW
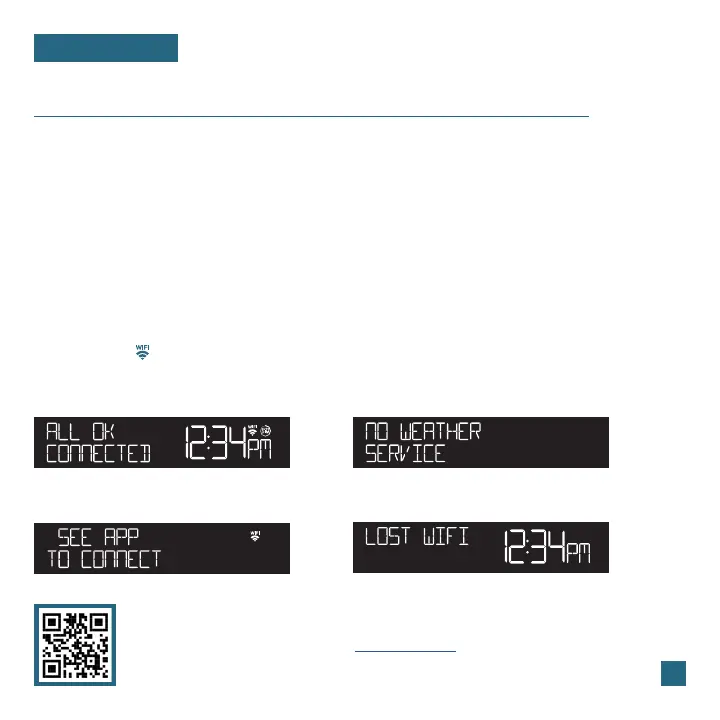
Checking Your Station’s Wi-Fi Status
Press the SET button on the top of the station to view your Wi-Fi Status.
Having Trouble Connecting to Wi-Fi?
The app should guide you through the best method for your Wi-Fi network and router. However, if
you have trouble connecting, please go to: bit.ly/wifi_questions or scan the QR code. This will explain
additional connectivity options, including connecting by WPS or contacting our technical support
team for further assistance.
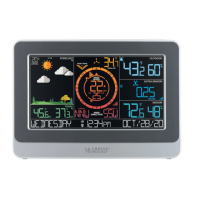
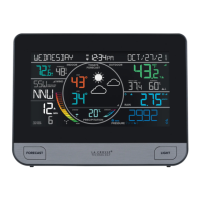
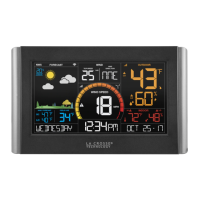
ALL OK CONNECTED: Your station is connected to
your Wi-Fi network and its data should be available
on the station and in the app.
SEE APP TO CONNECT: Check the app for notifications.
NO WEATHER SERVICE: Your Internet weather and time
services are not connecting. These should resolve on their
own, please be patient.
LOST WIFI: Check your router and network connections.
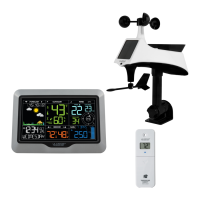
The La Crosse View app is required to connect the station to your Wi-Fi network. Download, install,
and log into your La Crosse View account first.
New User Initial Setup: When first setting up your
station, the app will lead you through a series of
instructions to help get your station added into your
account and connected to your home Wi-Fi network.
Manually Add & Connect Display: After the initial walkthrough,
stations can be added and connected via the Devices tab in the
app’s main menu. Simply tap the Add Device or + button at the
bottom of the Devices page in the app.
1.
Follow the initial app instructions or manually add the display into your account. 2.
Next, the app will prompt you to use your phone to scan the device ID barcode located on the back of
the station. Please note, adding a device to your account and connecting it to Wi-Fi are two dierent
steps. You can complete either step separately if you have any trouble.
When connected, the station will beep, and time and forecast information should populate on the
display. The indicator will also become solid.
3.
4.