Section 1: Assembly & Set-Up
Table of Contents
RCF3096, RCF3010, & RCFM3010 Rotary Cutters 326-566M11/8/18
29
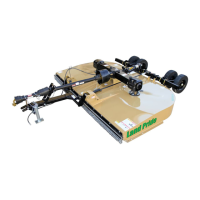
RCF3096 Tongue Assembly
Figure 1-23
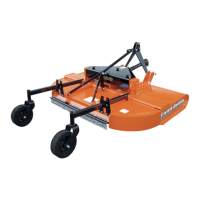
RCF(M)3010 Tongue Assembly
Figure 1-24
33945
35009
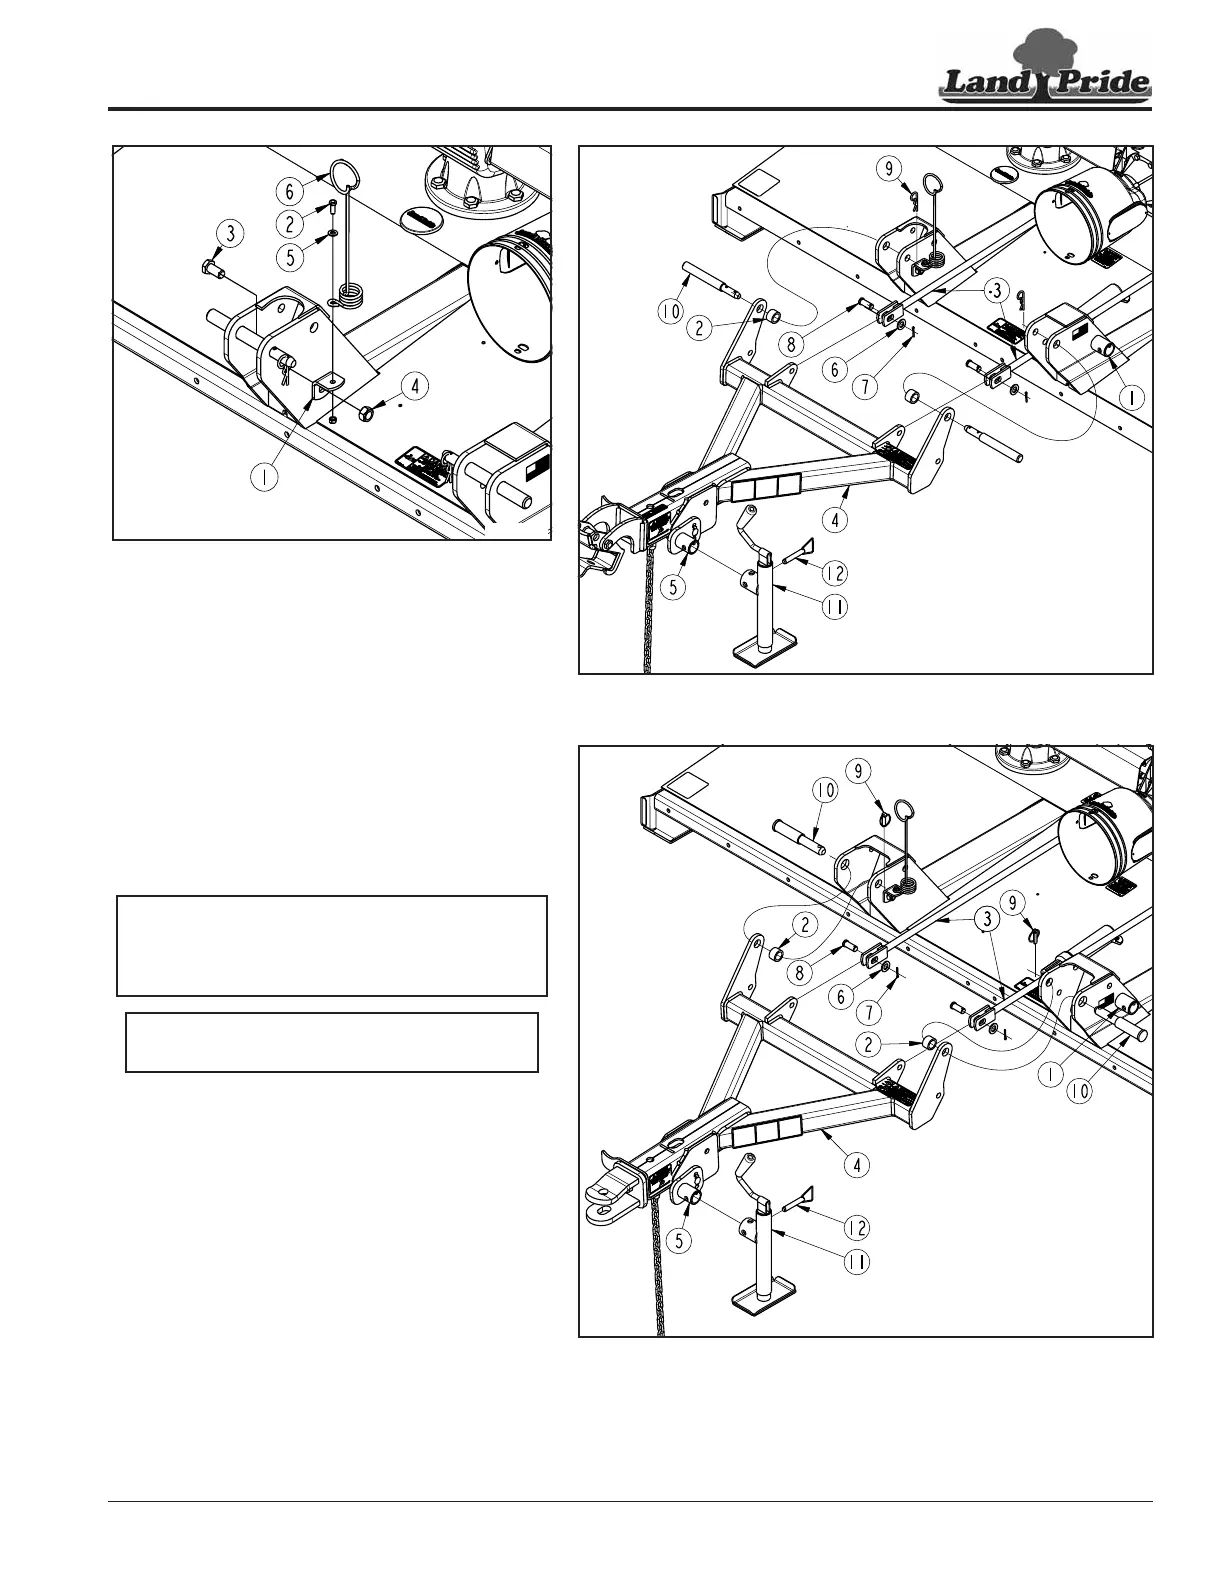
Spring Hose Loop Assembly
Figure 1-22
Spring Hose Loop (Pull-Type)
Refer to Figure 1-22:
1. Attach mounting bracket (#1) with
3/4"-10 x 1 1/2" GR5 cap screw (#3) and
locknut (#4) to the right-hand clevis as shown.
Tighten nut to the correct torque.
2. Attach spring hose loop (#6) to mounting
bracket (#1) with 3/8"-16 x 1" GR5 cap
screw (#2), flat washer (#5), and locknut (#4).
Tighten nut to the correct torque.
Tongue Assembly (Pull-Type)
Refer to Figure 1-23 for RCF3096 and
Figure 1-24 for RCF(M)3010 cutters:
1. Assemble tongue (#4) to the deck with
hitch pins (#10), spacer tubes (#2), and
hairpin cotters or linchpins (#9) as shown.
2. Attach level rods (#3) to tongue (#4) with clevis
pins (#8), flat washers (#6), and cotter
pins (#7).
Park Jack Assembly
1. Remove park jack (#11) from storage
mount (#1) and attach to adjustable jack
mount (#5) with ball detent pin (#12). Make
sure detent pin is fully inserted.
2. Adjust park jack to be vertical. Refer to “Park
Jack Angle Alignment” on page 39.
35006
NOTE: If preferred, the front guards may be
assembled first. See “Assembly of Optional
Equipment” on page 34 for front guard
assembly instructions.
NOTE: Do not tighten hardware to the
correct torque until assembly is complete.











 To Next Page