15
You will need a second person to help you
avoid damaging the appliance or your
appliance island.
Installing the Appliance in a BBQ Island
The island must be made out of non-
combustible materials. In the event it is
combustible, the use of an insulated
jacket
is required. Minimum clearance to
adjacent combustible construction is
36”
from sides & 36” from back.
Before installing an appliance in any island
cut out, make sure that the opening is not
bigger than the outside frame of the
appliance. The appliance should rest on the
lip of the frame. Pay careful attention to the
location of the gas line. It should be routed
away from sources of heat, sharp edges and
should make as few bends as possible.
Check to verify the gas line connection will
be accessible when the appliance is installed.
If the gas line connection is not easily
accessible when the appliance is installed,
support the appliance above counter level
and attach the gas line to the appliance.
When the gas connection is made, slide the
appliance into the cut out. If the gas line
connection is accessible when the
appliance is installed, slide the appliance
into the cut out and then attach the gas line.
Be very careful not to kink the gas line when
lowering the appliance into the cut out.
Keep your fingers away from where the
appliance will be supported on counter. Your
fingers could become trapped and serious
injury could occur.
Check to make sure the appliance is level
and is supported around the entire outside
edge. If the appliance is not level or is
unstable, use non-combustible shims under
the outside lip to stabilize it.
Make sure to perform the leak test
procedure as described
in this manual.
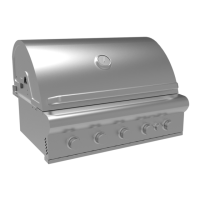
Built in Installations
NOTE: Landmann built in grills are intended
either for installation in a built in enclosure
constructed of non-combustible materials or
for an installation in a built in enclosure
constructed of combustible material when
installed with a Landmann insulated jacket .
For non-combustible applications, the grill
drops into the opening shown in the
cutout detail drawing (See Cutout
Dimensions for Built In Grills on page 16)
and hangs from its counter-top trim. A
shelf is not required to support it from the
bottom.
When using the insulated jacket in a
combustible enclosure, the jacket must be
supported from the bottom by a ledge on
each side or a full deck beneath the jacket.
Pay special attention to the instructions
shown for gas line hook-up.
The enclosure should have ventilation holes
to prevent LP gas build-up in the event of a
leak. The deck ledges and counter should
be flat and level. (refer to ANSI Z21.58
Standard for Outdoor Cooking Gas
Appliances, Section 1.7 Enclosures For Self
Contained LP-Gas Supply Systems)
If an electrical connection is desired in your
island, have a 120 volt 60 hertz, 15 amp GFI
certified outlet installed by a qualified electrician.
If you plan to use a rotisserie kit
with your grill then a minimum of
8” of clearance is needed on both
sides of the grill above the counter
top. For 3 Burner models an
additional
6" (14" total) is required on on
e side of the grill for clearance.
Always check with local building codes, fire
inspectors, neighborhood association and
local contractors before constructing an
island. A permit may be required for building
any outdoor kitchen.