Laser 5089 Code Reader User’s Guide_ Laser 5089 Code Reader User’s Guide_
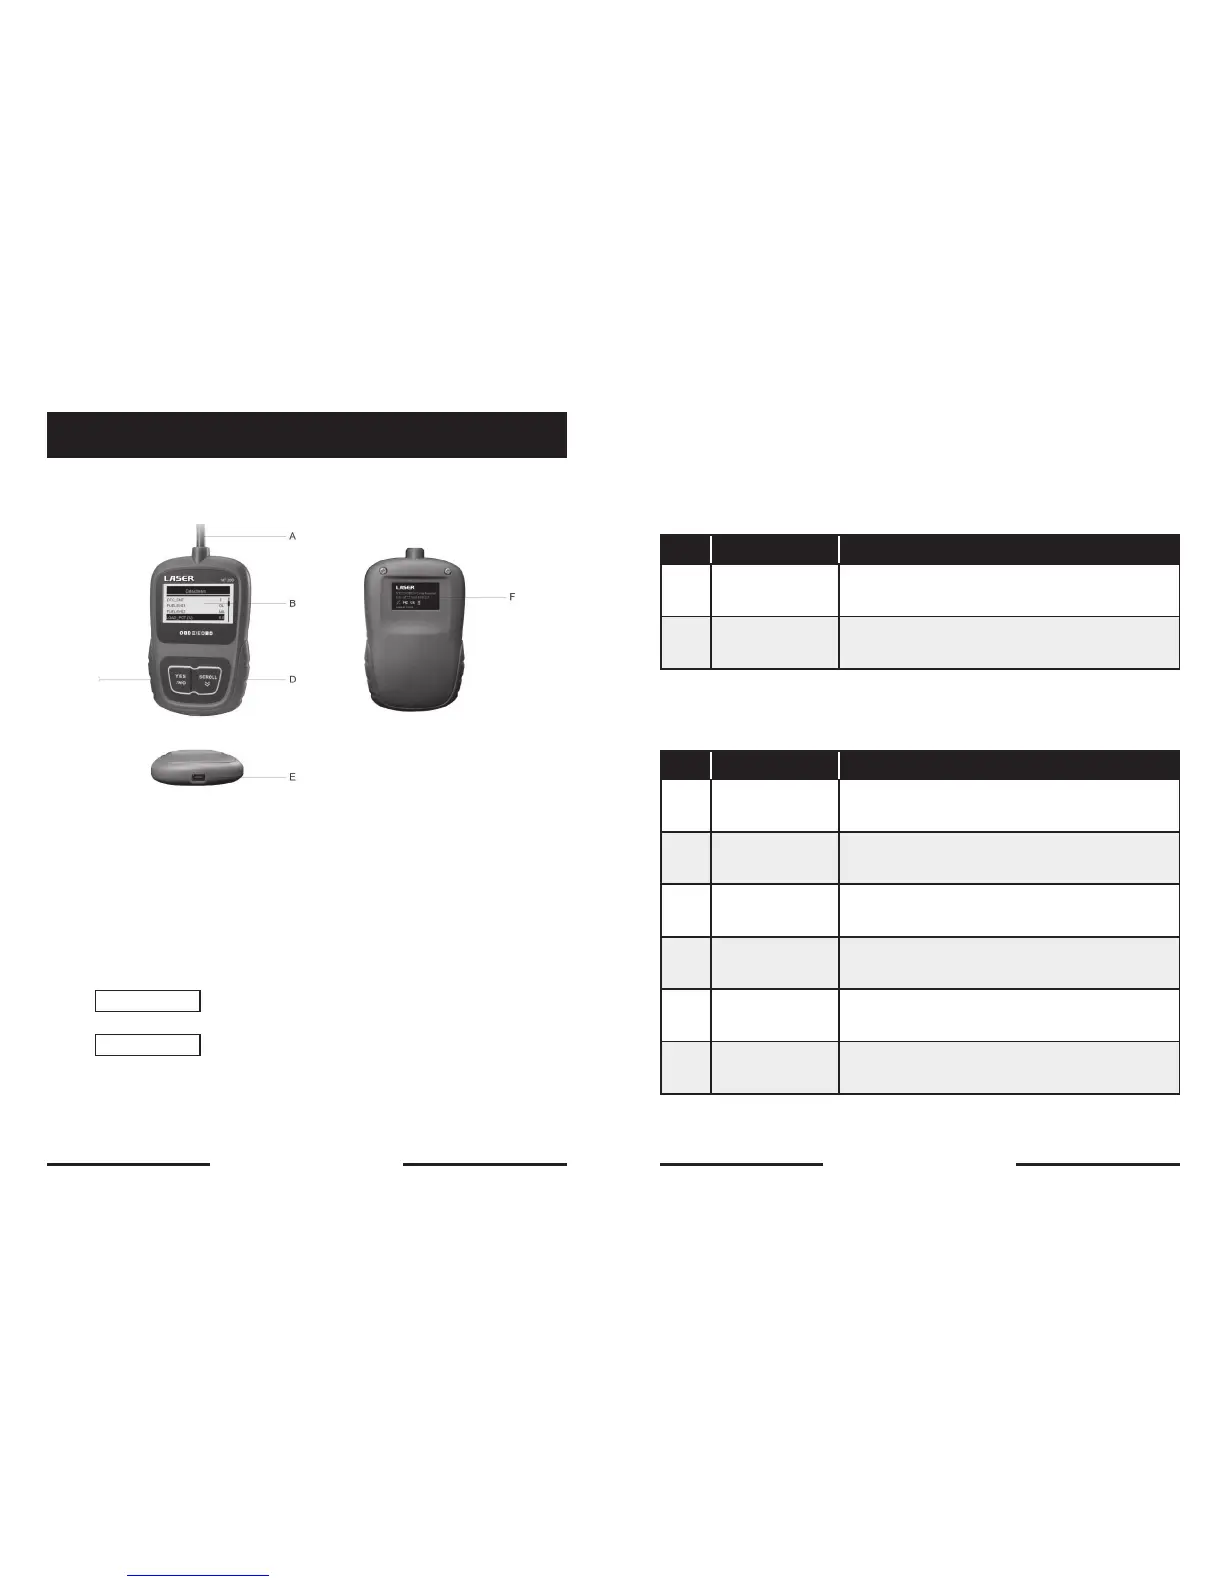
Code Reader Controls
A. OBD II Cable - provides communication for vehicle DLC.
B. LCD Display – shows menus, test results and operation tips.
C. YES/NO Key – confirms an action or returns to previous screen or level.
D. SCROLL Key - moves selection up or down. Also, press it to enter system
setup menu from home screen.
E. USB Port – provides a USB connection for the PC or laptop.
F. Rear Decal – provides serial number of code reader.
IMPORTANT
Do not use solvents such as alcohol to clean keypad or
display. Use a mild nonabrasive detergent and a soft cotton cloth.
IMPORTANT
Do not soak keypad as water might find its way into
the code reader.
4.2 About the Code Reader
Accessories Included
The first generation of On-Board Diagnostics or OBD I was introduced in early
1980’s to control engine functions and diagnose engine problems by vehicle
manufacturers. As the OBDI lacked standardization of protocols and interface, it
allowed different interpretations among vehicle manufacturers.
No. Signal Word Hazard Level
1 User’s Manual
Provides operation instructions for the usage of
code reader.
2 USB Cable
Provides USB communication for updates of
software and DTCs.
Specifications
No. Signal Word Hazard Level
1 Display
Backlit, 128 x 64 pixel display with contrast
adjustment.
2
Working
Temperature
0 to 60° C (32 to 140° F)
3
Storage
Temperature
-20 to 70° C (-4 to 158° F)
4 Power 8-18 Volts powered by vehicle battery
5 Dimensions 120*75*20mm (4.7*2.96*0.78in)
6 Weight 300g
12 13