Laser 5089 Code Reader User’s Guide_ Laser 5089 Code Reader User’s Guide_
Display Indicators
Below is a list indictors used to help navigate through menus.
No. Signal Word Hazard Level
1 $ Indicates the control unit number.
2
Indicates more than one screen of information is
available.
Power
The code reader is powered up by vehicle battery.
√ Refer to Code Reader Does Not Power Up in section 7.2 on page 33 of
Troubleshooting if there are problems.
To power up the code reader:
1. Locate the diagnostic interface on vehicle.
2. Plug in the code reader’s OBDII connector to the DLC.
NOTE
A plastic DLC cover may be found on some vehicles.
Remove the cover before plugging the OBD2 cable.
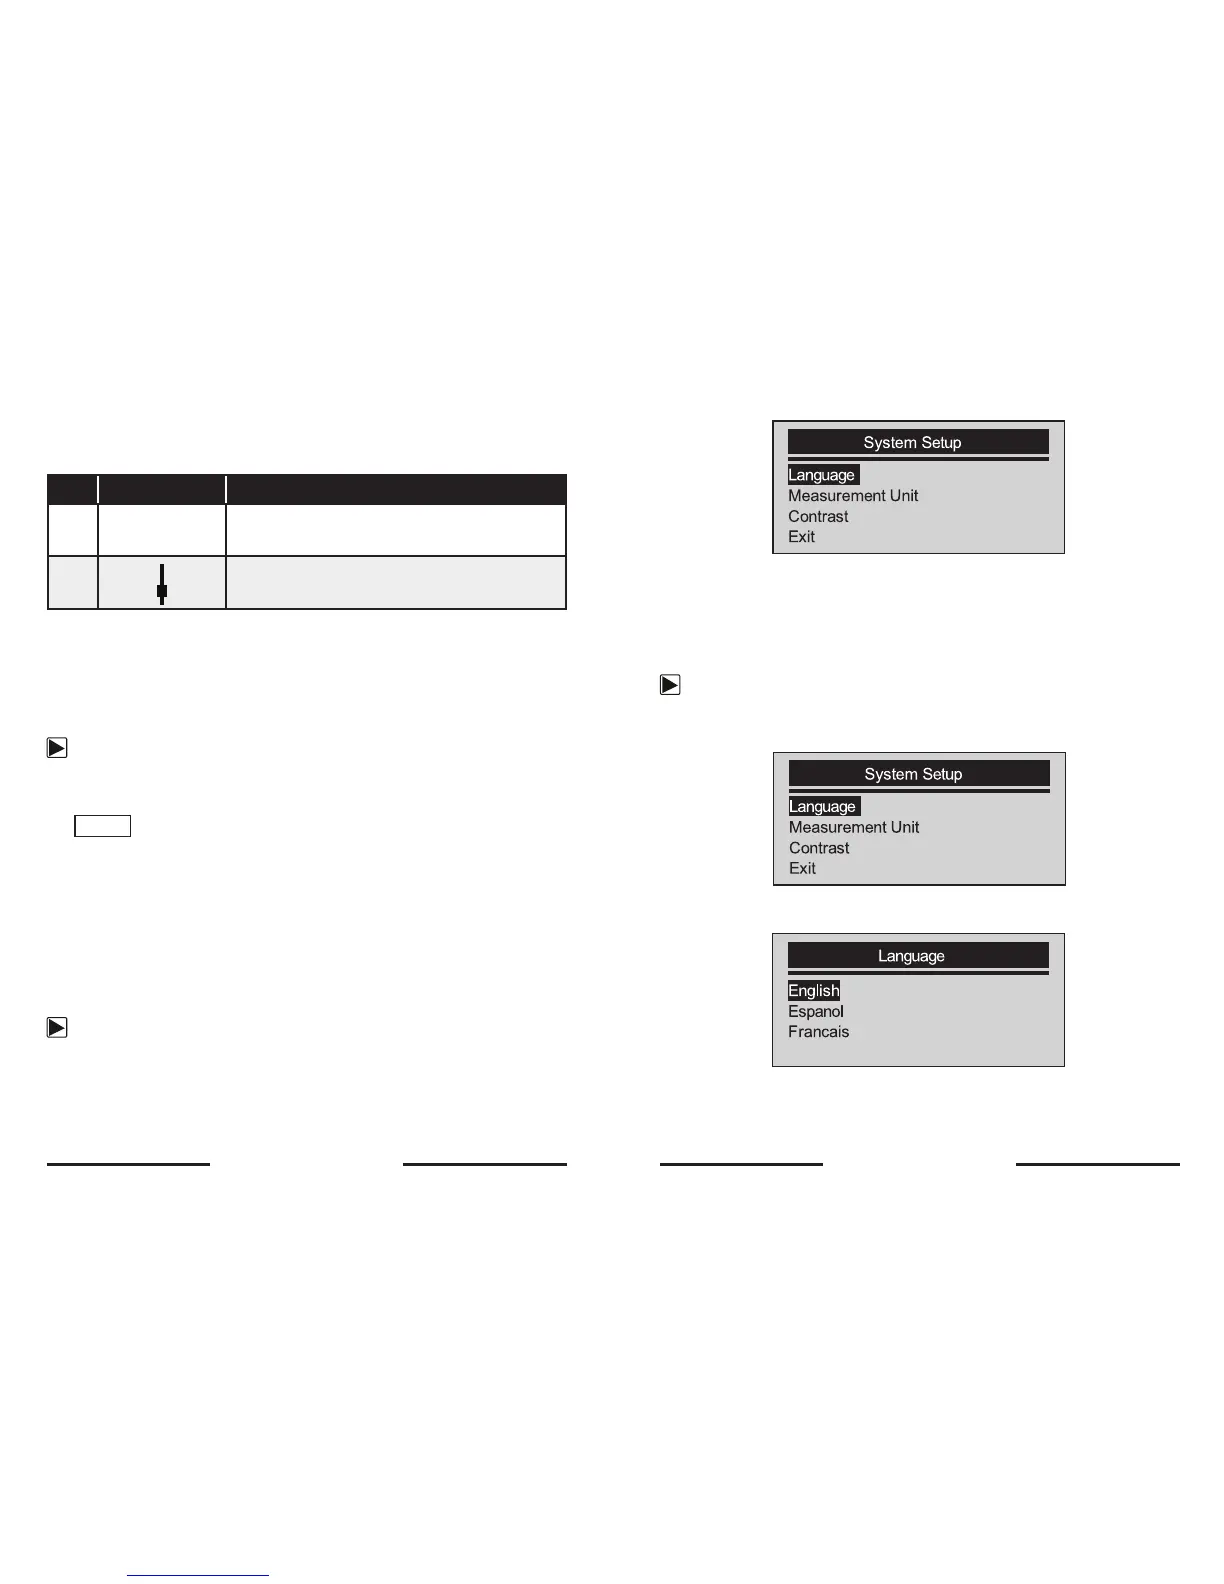
System Setup
System Setup allows you to:
• Select menu languages.
• Change measurement unit.
• Adjust display contrast.
√ System Setup settings remain until change to the existing setups are made.
To do system setup:
1. Press the SCROLL key to enter System Setup from home screen.
√ Follow on-screen instructions to program the code reader to meet your
specific needs.
Changing Language
√ The code reader is set to display English menus by default.
To change menu language:
1. Use the SCROLL key to pick Language from System Setup screen.
2. Press the YES/NO key to confirm.
3. Use the SCROLL key to select desired language.
14 15