Welcome • 7
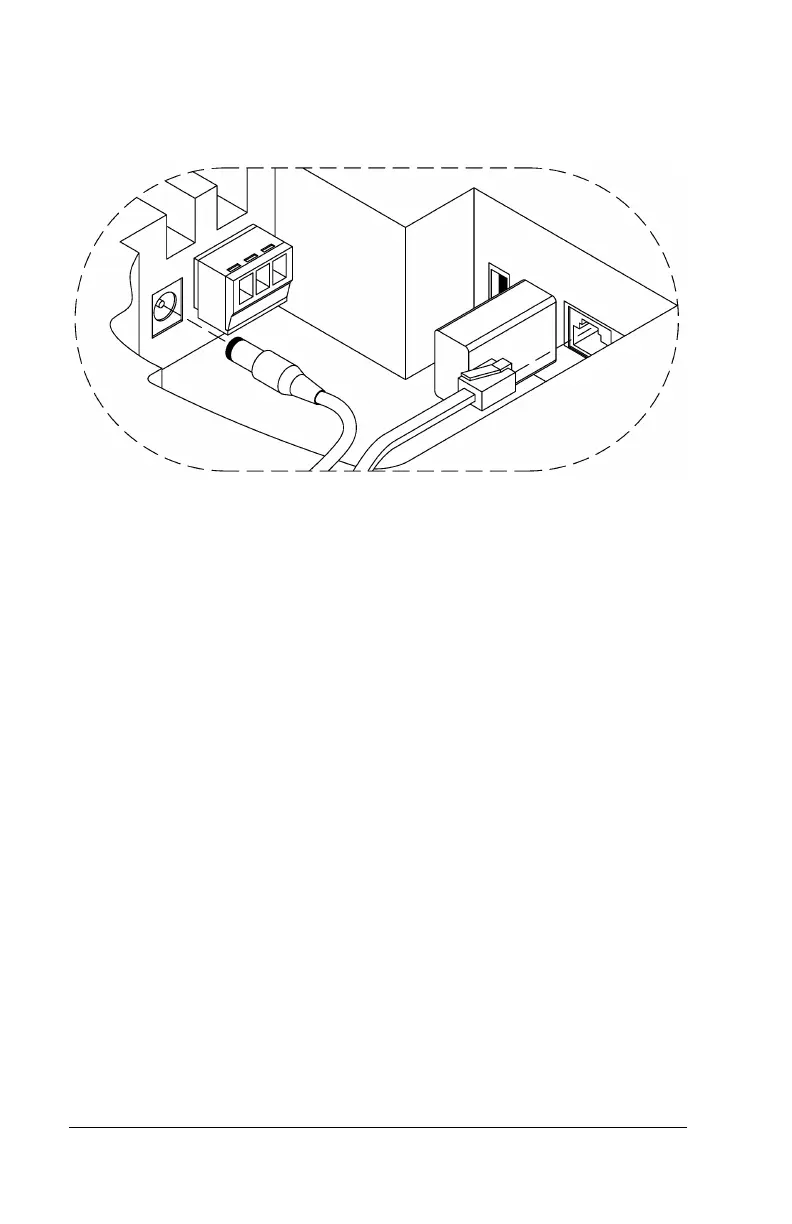
Wired Connection: Plug the RJ45 network cable into the Ethernet
port and the Power Adapter plug into the Power Adapter port which
is in the compartment on the back of the clock. See drawing below.
Insert the small “L”-shaped security bracket into the slot at the
bottom-rear of the clock, so that the tab with the hole points
downward.
Hang the clock on the wall, aligning the three keyholes on the rear of
the enclosure with the three protruding screw heads, and then
pressing downward on the clock housing until it lowers onto the
screws.
Screw the small Screw into the hole of the tab from the small “L”-
shaped bracket at the bottom of the enclosure. This will fasten the
clock to the wall, and keep it from being easily removed.
When finished, plug the power adapter into an AC wall outlet.
You are now ready to sync the PC700 clock once it is set up in the
PayClock Online software