LAUNCH X-431 PAD V
User's Manual
19
Follow the steps below to proceed.
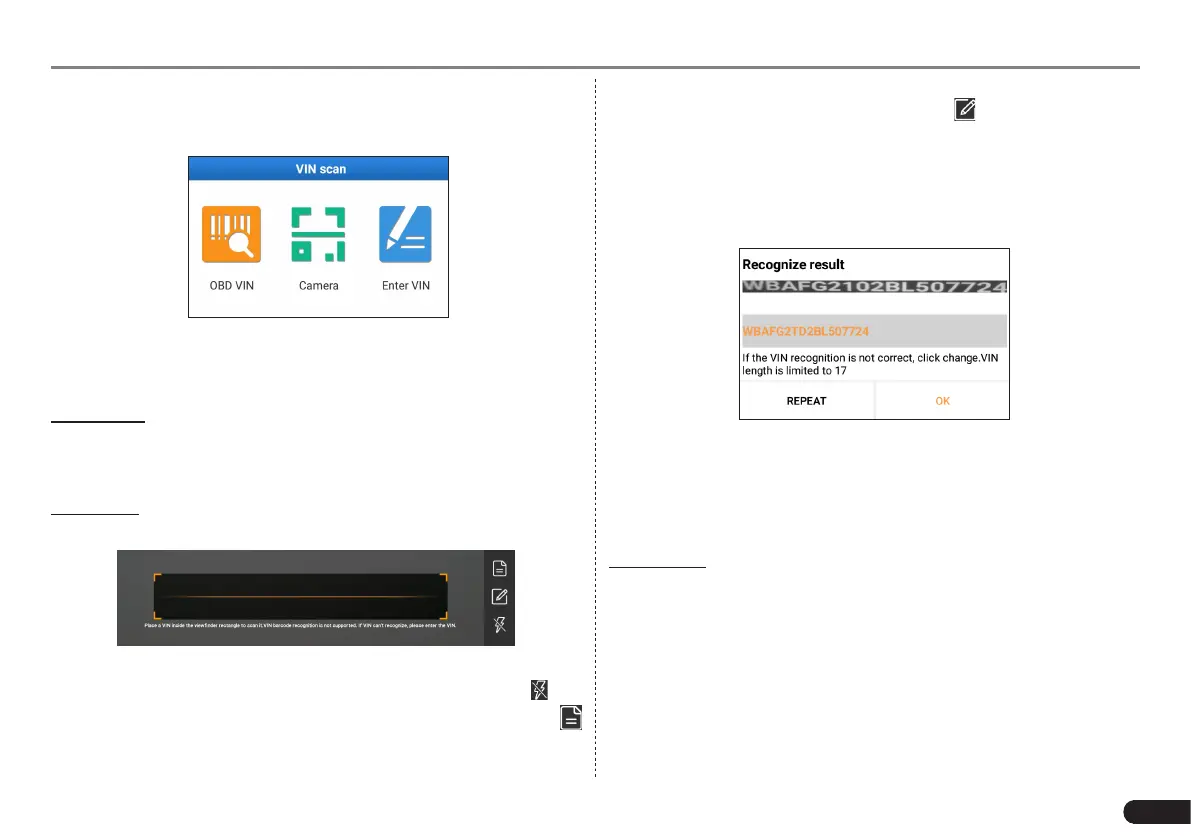
1. Tap “VIN SCAN” to enter Fig. 5-4.
Fig. 5-6
In this case, automatic scan (OBD VIN), camera and manual input
(INPUT VIN) are available.
a). OBD VIN: In this mode, the VCI device should be plugged into the
vehicle’s DLC.
Tap “OBD VIN” to start reading and decoding the vehicle identication
number of the vehicle.
b).Camera: In this mode, you need to place the VIN inside the
viewnder rectangle to scan it.
Fig. 5-7
• If the ambient light is too weak, please turn the camera ash on.
• If you have scanned the VIN of the vehicle, tap VIN record icon
to select it from the record list.
• In case the handset failed to identify it, tap to enter it manually.
*Note: In general, vehicle identification numbers are standardized - all
contain 17 characters. VIN characters may be capital leers A through Z and
numbers 1 through 0; however, the leers I, O and Q are never used in order
to avoid mistakes of misreading. No signs or spaces are allowed in the VIN.
After scanning, the screen automatically displays the result.
Fig. 5-8
• If the VIN scanned is incorrect, tap the result eld to modify it and
then tap “OK”. If the VIN exists on the remote server, the system
will enter the vehicle information screen.
• To scan it again, tap “REPEAT”.
c). Enter VIN: In this mode, you need to input the VIN manually.
The most recognizable location for this number is in the top left corner
on the vehicle’s dashboard. Other locations include the driver’s door
or post, and the rewall under the hood.
Tap “Enter VIN” and a screen similar to Fig. 5-9 will appear: