D
D
C
C
S
S
8
8
1
1
0
0
V
V
2
2
D
D
i
i
g
g
i
i
t
t
a
a
l
l
D
D
C
C
S
S
e
e
r
r
v
v
o
o
D
D
r
r
i
i
v
v
e
e
r
r
M
M
a
a
n
n
u
u
a
a
l
l
R
R
e
e
v
v
1
1
.
.
0
0
Tel: (86)755-26434369 20 Website: www.leadshine.com
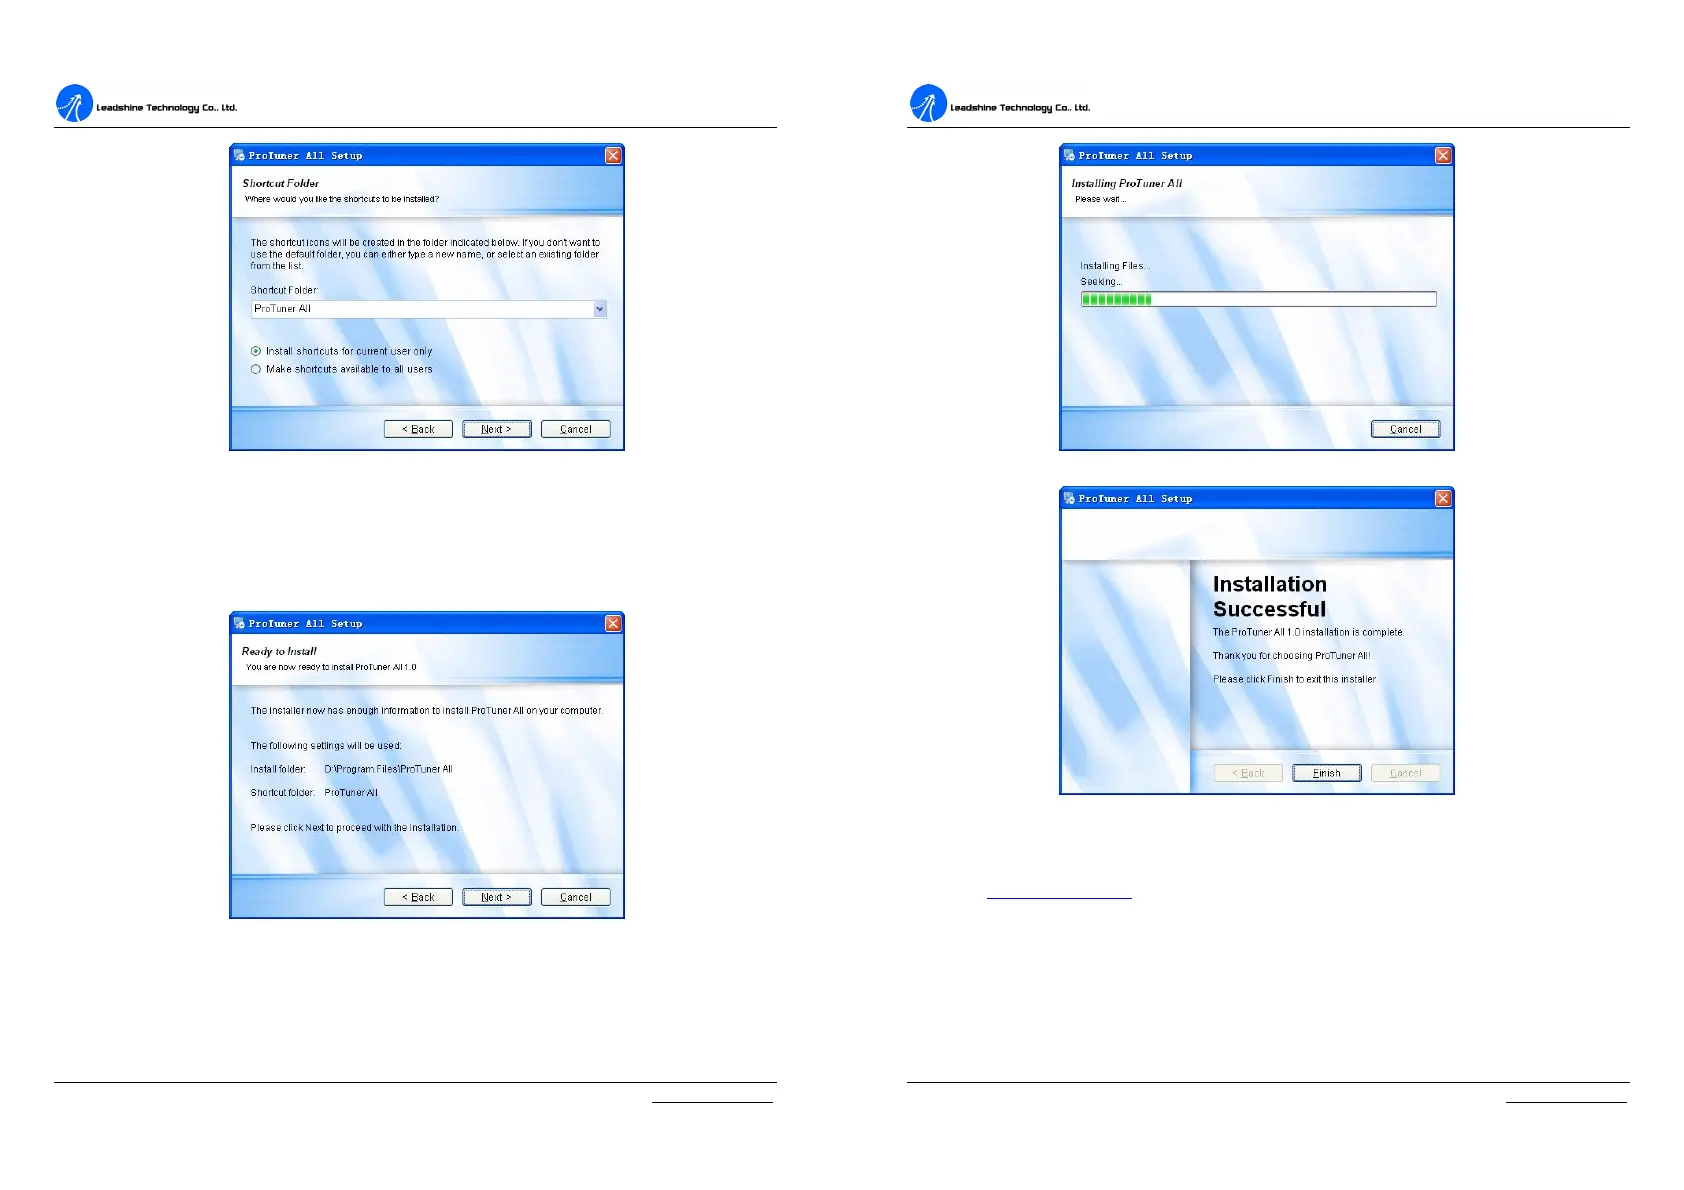
Figure 6-5: Shortcut folder setting
Set the “Shortcut Folder” in Figure 6-5 and continue to install the ProTuner by
following Figure 6-6 and Figure 6-7. An Installation Successful window will
appear if the ProTuner is installed successfully. See Figure 6-8.
Figure 6-6: Installation information summarization
D
D
C
C
S
S
8
8
1
1
0
0
V
V
2
2
D
D
i
i
g
g
i
i
t
t
a
a
l
l
D
D
C
C
S
S
e
e
r
r
v
v
o
o
D
D
r
r
i
i
v
v
e
e
r
r
M
M
a
a
n
n
u
u
a
a
l
l
R
R
e
e
v
v
1
1
.
.
0
0
Tel: (86)755-26434369 21 Website: www.leadshine.com
Figure 6-7: Installing the ProTuner
Figure 6-8: Finish installation
Note: Leadshine also offers special version ProTuner which does not need installation. Please visit
our website www.leadshine.com for latest ProTuner.
RS232 Interface Connection
Connect the servo system according to chapter “Connections” and connect the PC
to the driver as the following figure.