Do you have a question about the LeCroy Waverunner2 LT374L and is the answer not in the manual?
Details LeCroy's warranty policy for oscilloscope products and replacement parts.
Provides instructions for returning products for maintenance and repair services.
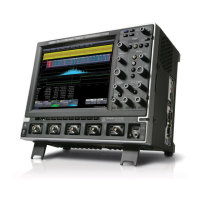
Details the vertical channel specifications like bandwidth, impedance, and sensitivity.
Describes trigger modes, sources, coupling, delays, and frequency limits.
Specifies the display type, resolution, screen saver, and waveform presentation features.
Explains the MPC603e processor, its circuit blocks, power supply, and peripherals.
Details input voltages, output voltages, and the power supply unit's overview.
Procedures for measuring channel and external trigger input impedance.
Ensures the system meets the specified bandwidth with controlled amplitude and frequency.
Tests trigger capabilities for standard edge trigger cases and division thresholds.
Instructions for upgrading firmware via floppy disk or memory card.
Provides guidance for diagnosing and resolving common instrument problems.
Step-by-step instructions for removing the upper cover assembly, including printer access.
Step-by-step instructions for removing the CPU board assembly.
Step-by-step guide for removing the power supply assembly from the instrument.
| Brand | LeCroy |
|---|---|
| Model | Waverunner2 LT374L |
| Category | Test Equipment |
| Language | English |