• Defective batteries should be disposed of according
to the respective instructions (see p. 74).
• The replaceable battery provides power to a back-
up battery which is built into the camera. This back-
up battery maintains the reference data such as the
date for up to 3 months. If this back-up battery
becomes discharged it must be recharged by insert-
ing the replaceable main battery. Once the replace-
able battery has been inserted, the full capacity of
the back-up battery is recovered after about 60
hours. This process does not require that the cam-
era be switched on.
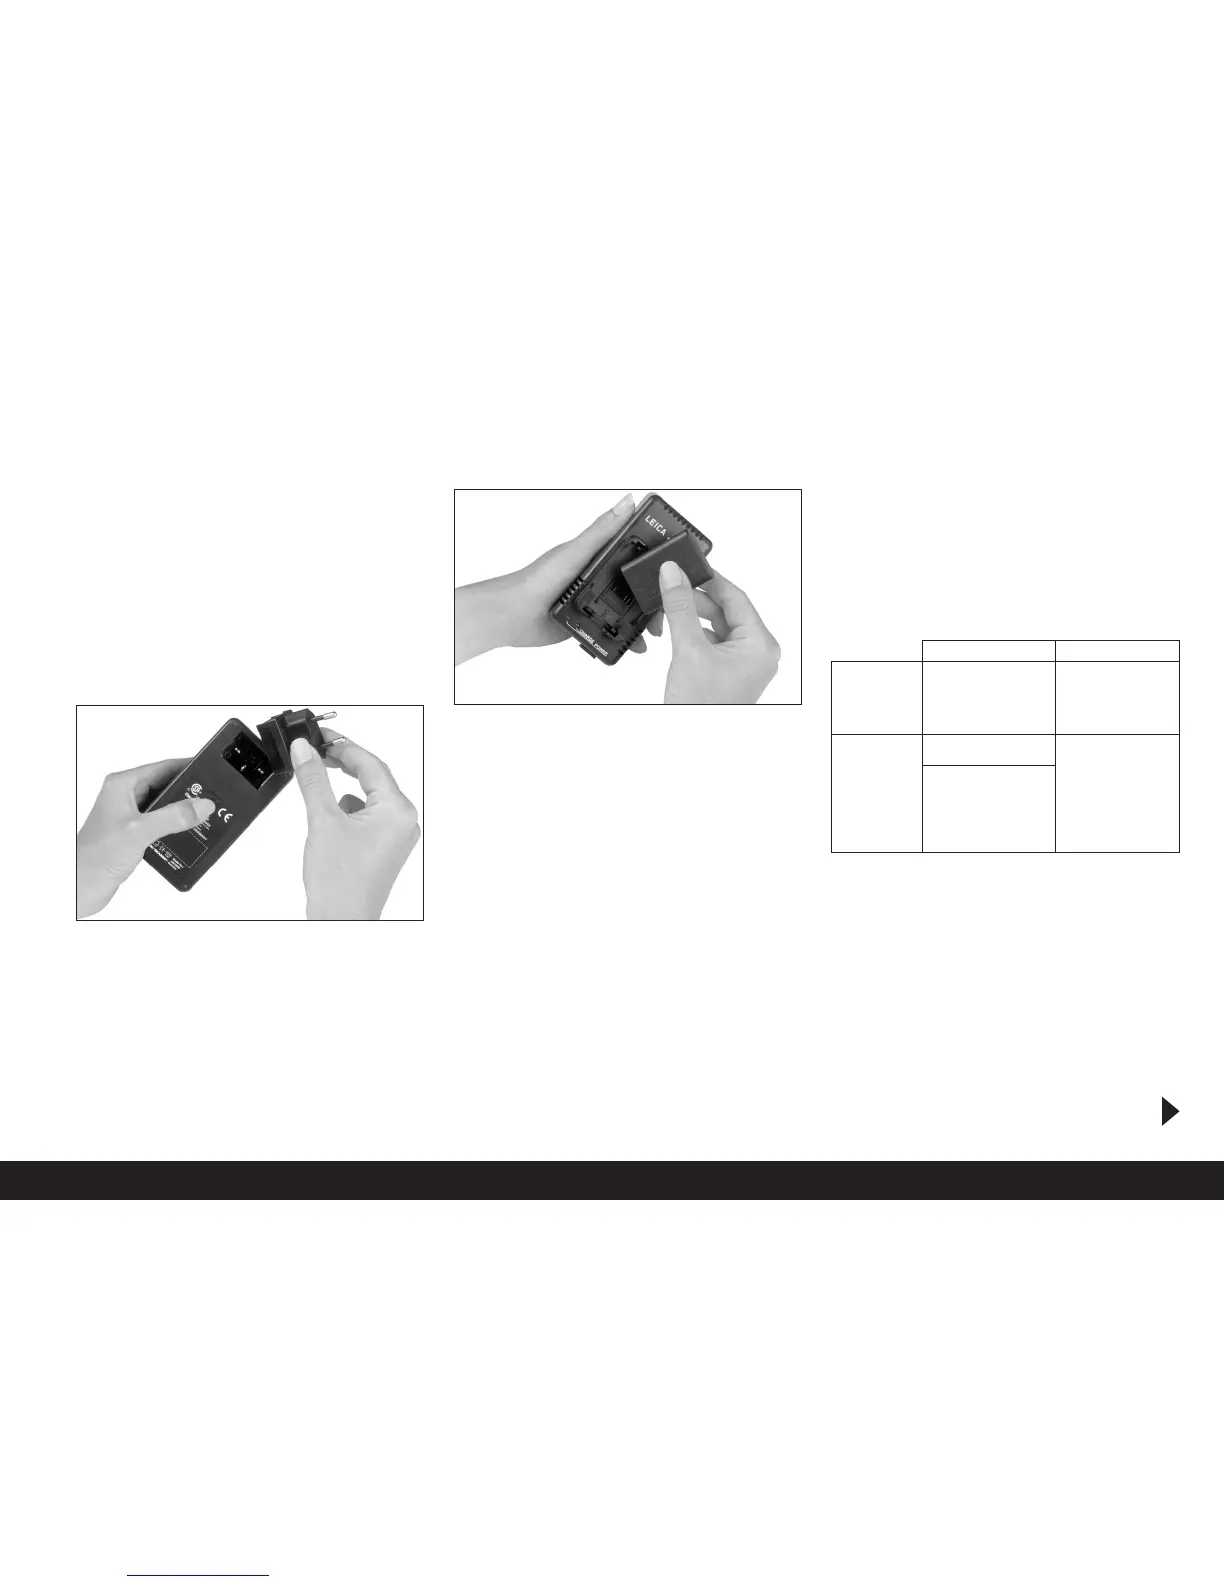
1. Insert the plug appropriate to the mains supply into
the charger. To do this the unlocking slider (1.45)
must be
a. pushed upwards (towards the plug),
b. held there, and
c. the mains plug (1.46) exchanged for the appro-
priate sort
2. Insert the mains plug into a socket.
• The green LED (1.42) marked
POWER
lights up.
3. Insert a battery with its contacts and the end
marked with an arrow facing downwards obliquely
in the charging bay (1.41) of the charger.
4. Then press it downwards until it lies flush in the
charging bay.
• When it is in the correct position the yellow
CHARGE
LED (1.43) will light up to confirm that
charging is in progress. After completion of
charging – about 3 hours – the yellow LED goes
out.
5. The charger should then be disconnected from the
mains. However, there is no risk of overcharging.
6. Remove the battery by pulling its upper face
upwards a little and then pulling it out of the charg-
er bay.
The following LED displays indicate that charging is
defective or is not possible:
If a fault cannot be resolved by eliminating the causes
stated in the above table, you should contact your
dealer, the Leica office in your country or Leica Cam-
era AG.
Comprehensive instructions/Preparations / 83
Green / a. Mains connection –
POWER LED not correct
b. Inserted battery
cannot be charged
Yellow / Battery is not being a. Battery outside tem-
charged perature range speci-
CHARGE LED a. Battery not inserted fied above
correctly
b. Battery totally dis-
b. Inserted battery charged, pulsed
already fully charged precharging will be
carried out first
LED not lit LED flashing


 To Next Page