84 / Comprehensive instructions/Preparations
Inserting the battery into the camera/removing
the battery from the camera
1. Set the main switch (1.19) to
OFF
.
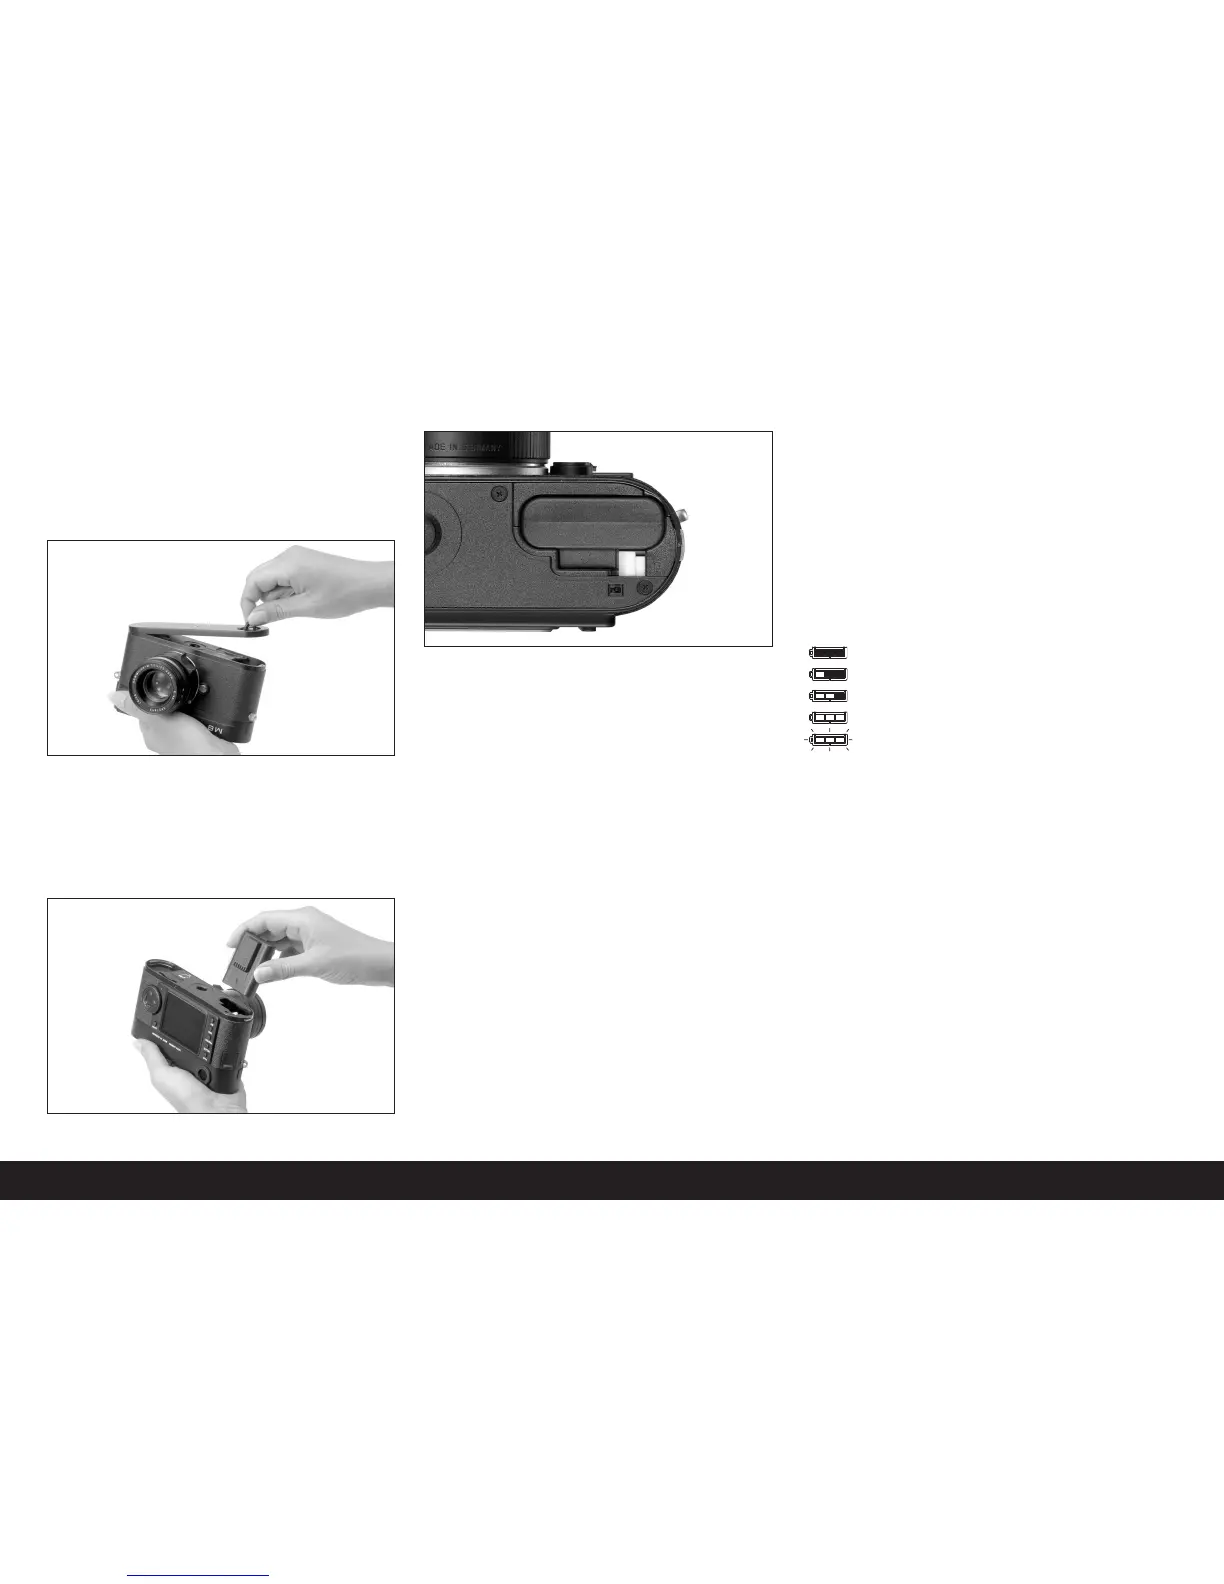
2. Remove the bottom cover (1.36) of the camera.
To do this:
a. flip up toggle (1.37) in the bottom cover,
b. turn it to the left as far as the stop, and
c. lift off the bottom cover.
3. Insert the battery into the compartment with its
contacts facing forwards. Press it into the compart-
ment (1.38) until the white sprung locking catch
(1.39) moves over the battery to hold it in place.
4. Replace the bottom cover. To do this:
a. hang it onto the retaining clip (1.9) on the side of
the camera
b. swing it down,
c. lock it by turning the toggle to the left as far as
the stop, and
d. push the toggle back down.
To remove the battery, follow these instructions in
reverse order. The white sprung locking catch in the
battery compartment must be pushed to the side to
unlock the battery.
Note:
Always switch the camera off before removing the
battery.
A fully charged battery (to the CIPA standard) is suffi-
cient for approx. 400 pictures each reviewed for 4s.
Charge level displays (3.2)
The charge level of the battery is displayed in five
stages by the top panel LCD (1.12).
: approx. 75–100%
: approx. 50–75%
: approx. 25–50%
: approx. 5–25%
: approx. 0–5%, battery replacement or
recharging necessary
Notes:
• Remove the battery if you will not be using the cam-
era for a long period of time. When doing so, turn
the camera off using the main switch first.
• After 3 months out of use, the back-up battery in
camera will be exhausted (see also the last note
under “Charging the battery”, p. 82), and all individ-
ual settings must be input again.


 To Next Page