88 / Comprehensive instructions/The most important settings
Switching the camera on and off/the main switch
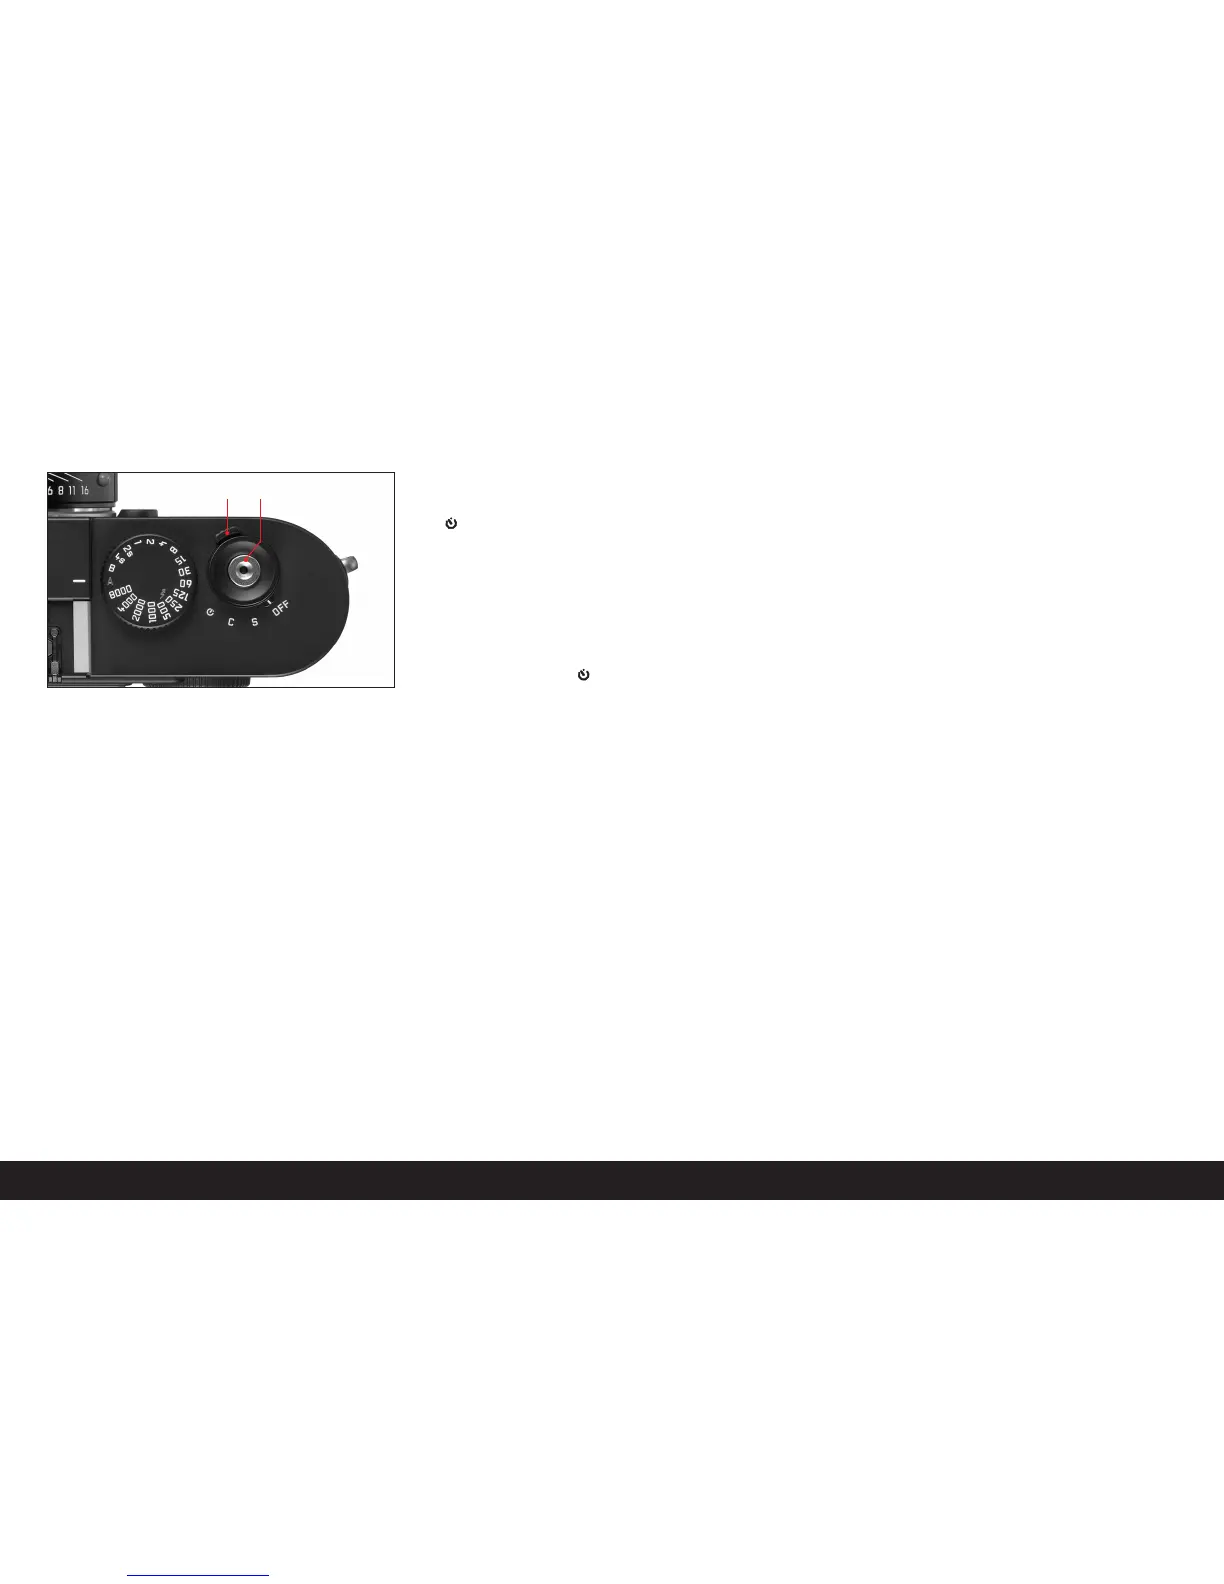
The LEICA M8 is turned on and off using the main
switch (1.19). This is below the shutter release button
(1.20) and is a lever with four detent positions:
a.
OFF
– Camera is switched off
This is the inactive position – the camera is
switched off.
b.
S
– Single picture
Pressing the shutter release button (see below)
takes only one picture, irrespective of how long it is
kept pressed.
c.
C
– Continuous series of pictures
Pressing the shutter release button (see below)
takes up to 10 pictures in succession – as long as
the capacity of the memory card being used and
the camera’s internal buffer memory are sufficient
(see “Inserting and removing the memory card”,
p. 85).
d. – Self timer
Pressing the shutter release button (see below)
starts the pre-set delay time (see p. 120), after
which a picture is taken.
Switching on
After switching on, i.e. setting the lever to one of the
three functions
S
,
C
or , the LED (1.32) lights up
briefly and the displays in the viewfinder (2.1.1) and on
the top panel LCD (1.12) appear (see p. 78).
Note:
Ready status is achieved approx. 2s after switching
the camera on.
Switching off
Even if the main switch is not set to
OFF
, the camera
automatically switches itself off if an automatic
power-off time is set using menu control (Auto Power
Off, 5.1.11, see p. 93/96) and it is not operated during
this time.
Note:
When transporting the camera, e.g. in a case, and if
the camera will not be used for a long time, if should
be turned off with the main switch.
Selecting picture taking and review modes
After switching on, the LEICA M8 is always in picture
taking mode, i.e. the monitor (1.33) remains dark –
after ready status is achieved (see p. 88) .
To review the pictures, you can choose between two
modes:
1.
PLAY
Review for unlimited time
2. Auto Review Brief review after taking the picture
Review for unlimited time -
PLAY
By pressing the
PLAY
button (1.27) you can switch to
review mode.
• The last picture taken appears in the monitor along
with the corresponding displays (see p. 79).
However, if the memory card inserted does not con-
tain any image files, the following message appears
when you switch to review mode: No valid image to
play.
1.19 1.20


 To Next Page