21
THROUGH DOVETAIL PROCEDURES
Chapter 8Super Jig-12-18-24 User Guide
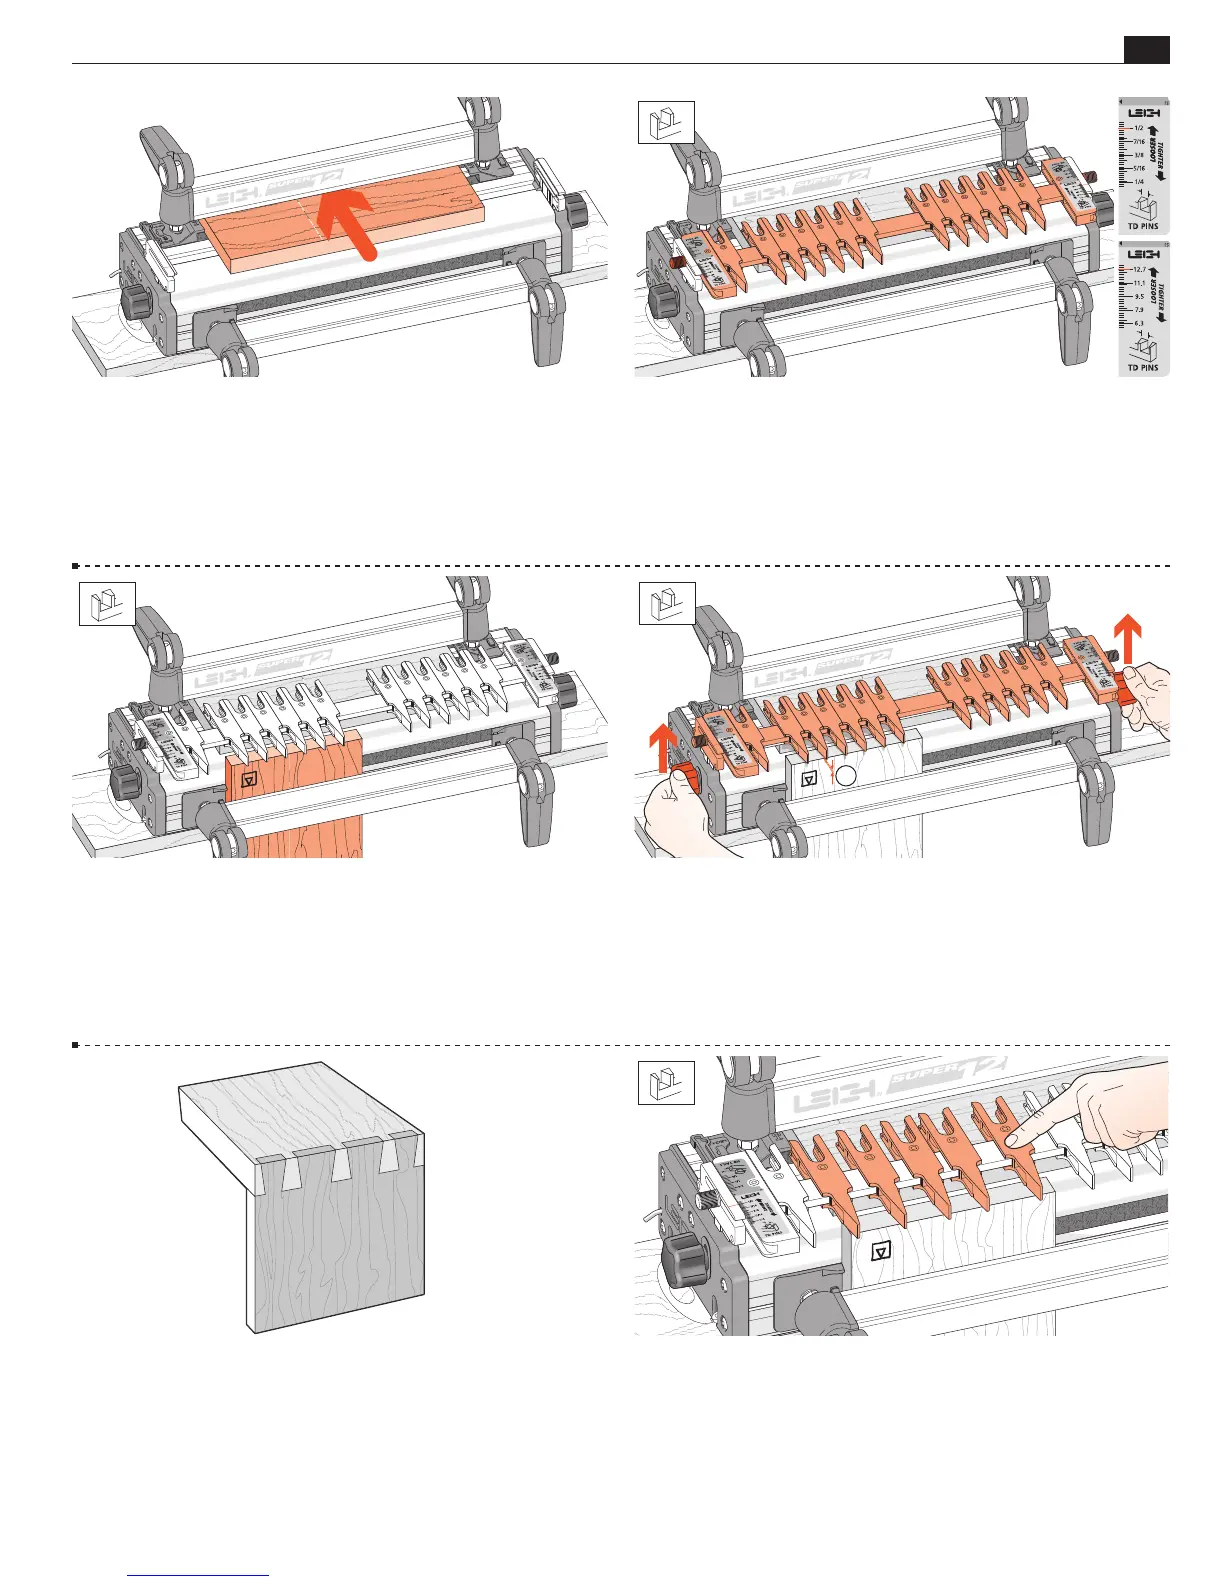
8-7 Clamp a tail board against the left front side stop, top edge
touching flush under the guidefingers, inside face
i
away from the
jig body. Although you will cut tails first, adjust the guidefinger
layout in
d
TD PINS mode. The adjustment screws are on top
in this mode, and it's easier to visualize the finished joint pattern.
8-8 Loosen the support bracket knobs and raise the finger assem-
bly about
1
⁄16"[2mm]
above the boards, then re-tighten the
knobs. This will allow easy and accurate guidefinger adjustment.
�
8-9 This joint layout is just a suggestion for this trial. It has a
typical, traditional symmetrical pin layout, with half-pins at each
edge. The Superjig however, allows for infinite dovetail spacing.
Also, boards of different thicknesses can be joined to each other
as shown in this illustration. Before attempting an asymmetrical
joint layout, see chapter 12.
8-10 Ignoring the extreme outer guidefinger next to the scale
(it just supports the router), loosen the next five guidefingers and
slide them over the top of the workpiece.
8-5 Clamp the finger support board in the rear clamp. See
Chapter 1, section 1-12
8-6 Place the finger assembly on the support brackets in
the
d
TD PINS mode, flat on the spacer board, and with the
scale set on the
1
⁄2"[12,7mm] setting for now. Don’t worry about
the scale’s specific meaning now. Each scale’s use will be fully
explained in the appropriate section.