23
THROUGH DOVETAIL PROCEDURES
Chapter 8SUPER JIG-12-18-24 User Guide
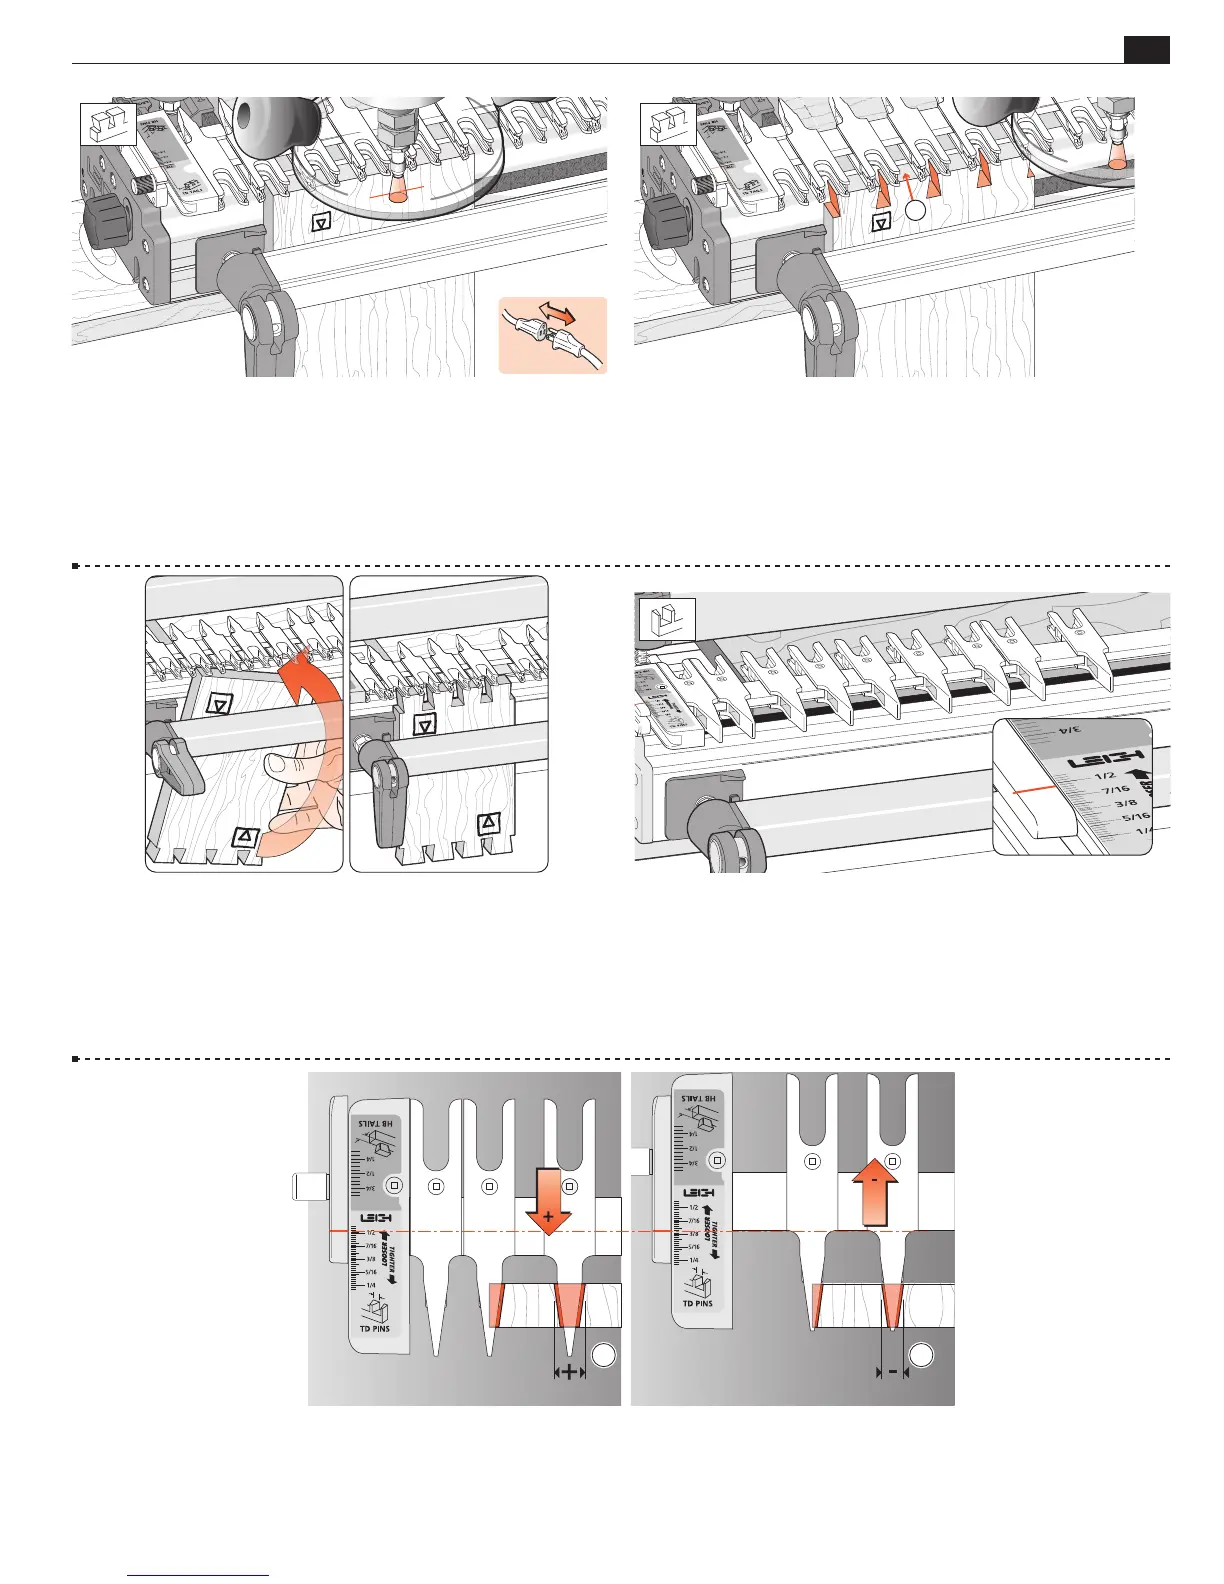
8-19 Before removing the routed board from the jig, check by
eye and touch to make sure no parts have been missed. Release
the clamp and reverse the tail board in the jig, keeping the same
inside face
i
away from the jig body.
Rout the other end of this tail board and both ends of the second
tail board in the same fashion.
8-20 Rotate the finger assembly to
d
TD PINS mode and set
it on the
1
⁄2"[12,7mm] mark
. Do not change the guidefinger
layout.
8-21 Finished Joint Tightness
The tightness of the finished joint is determined in
d
TD PINS mode. The farther out toward the operator the finger assembly is
set, the larger the pins will be
. Moving the finger assembly in will make the pins smaller
.
1 2
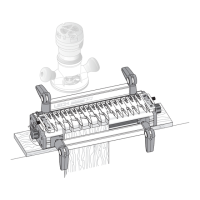
8-17 Place the router on the finger assembly and adjust the router
until the dovetail bit tip is level with the center of the pencil line.
Note: This means the pin socket will be half a thin pencil line deeper
than the thickness of the pin board, leaving minimal clean-up after
assembly.
Check to make sure the bit rotates freely.
8-18 Plug in the router and rout out the half-pin and pin sockets.
Use only light side pressure on the guide fingers. Make sure to
run the guidebush along both sides of the finger opening. Take
care not to rout unwanted sockets where there are gaps between
pairs of fingers
. Rout only between the rounded guidefinger
tips. See Hints and Tips Chapter 15.
1