7
SETTING UP OF UNIT
TOOLS NEEDED:
2 x 8" or larger crescent wrench
PROCEDURE:
1) Remove all system components from the box for assembly.
2) Remove protective cap from outlet connection of pump.
3) Connect high pressure airless paint hose to pump outlet. Tighten to
approximately 20 ft. lbs.
4) Attach the tip assembly to the spray gun.
5) Connect the paint hose to the swivel connection of the spray gun.
Tighten 20 ft lbs. Ensure the gun handle is securely hand tightened
to the gun.
6) Double check all connections, the unit is now ready.
Note: The pump contains a preservative oil when you receive it, that
may drip from the various connections when the protective caps are
removed.
WARNING: INJECTION HAZARD POSSIBLE. DO NOT SPRAY
WITHOUT TIP IN PLACE. ALWAYS ENGAGE TRIGGER LOCK
BEFORE REMOVING, REPLACING OR CLEANING TIP. NEVER TRY
TO CLEAN THE TIP WITH YOUR FINGERS.
To disengage your trigger lock: Your spray gun is shipped from the
factory with the trigger lock in the engaged position (horizontal on
the L-65). To disengage, turn the trigger lock down until it is in a
vertical position. To engage the trigger lock, turn it back to a
horizontal position.
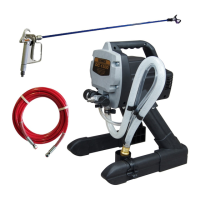
trigger lock.
Figure 2. - L-65 gun components.
gun handle
with filter
inside.
hand tight
only!
tip.
tip housing.
trigger guard
for safety. do
not remove!
high pressure
swivel, 1/4"npt.
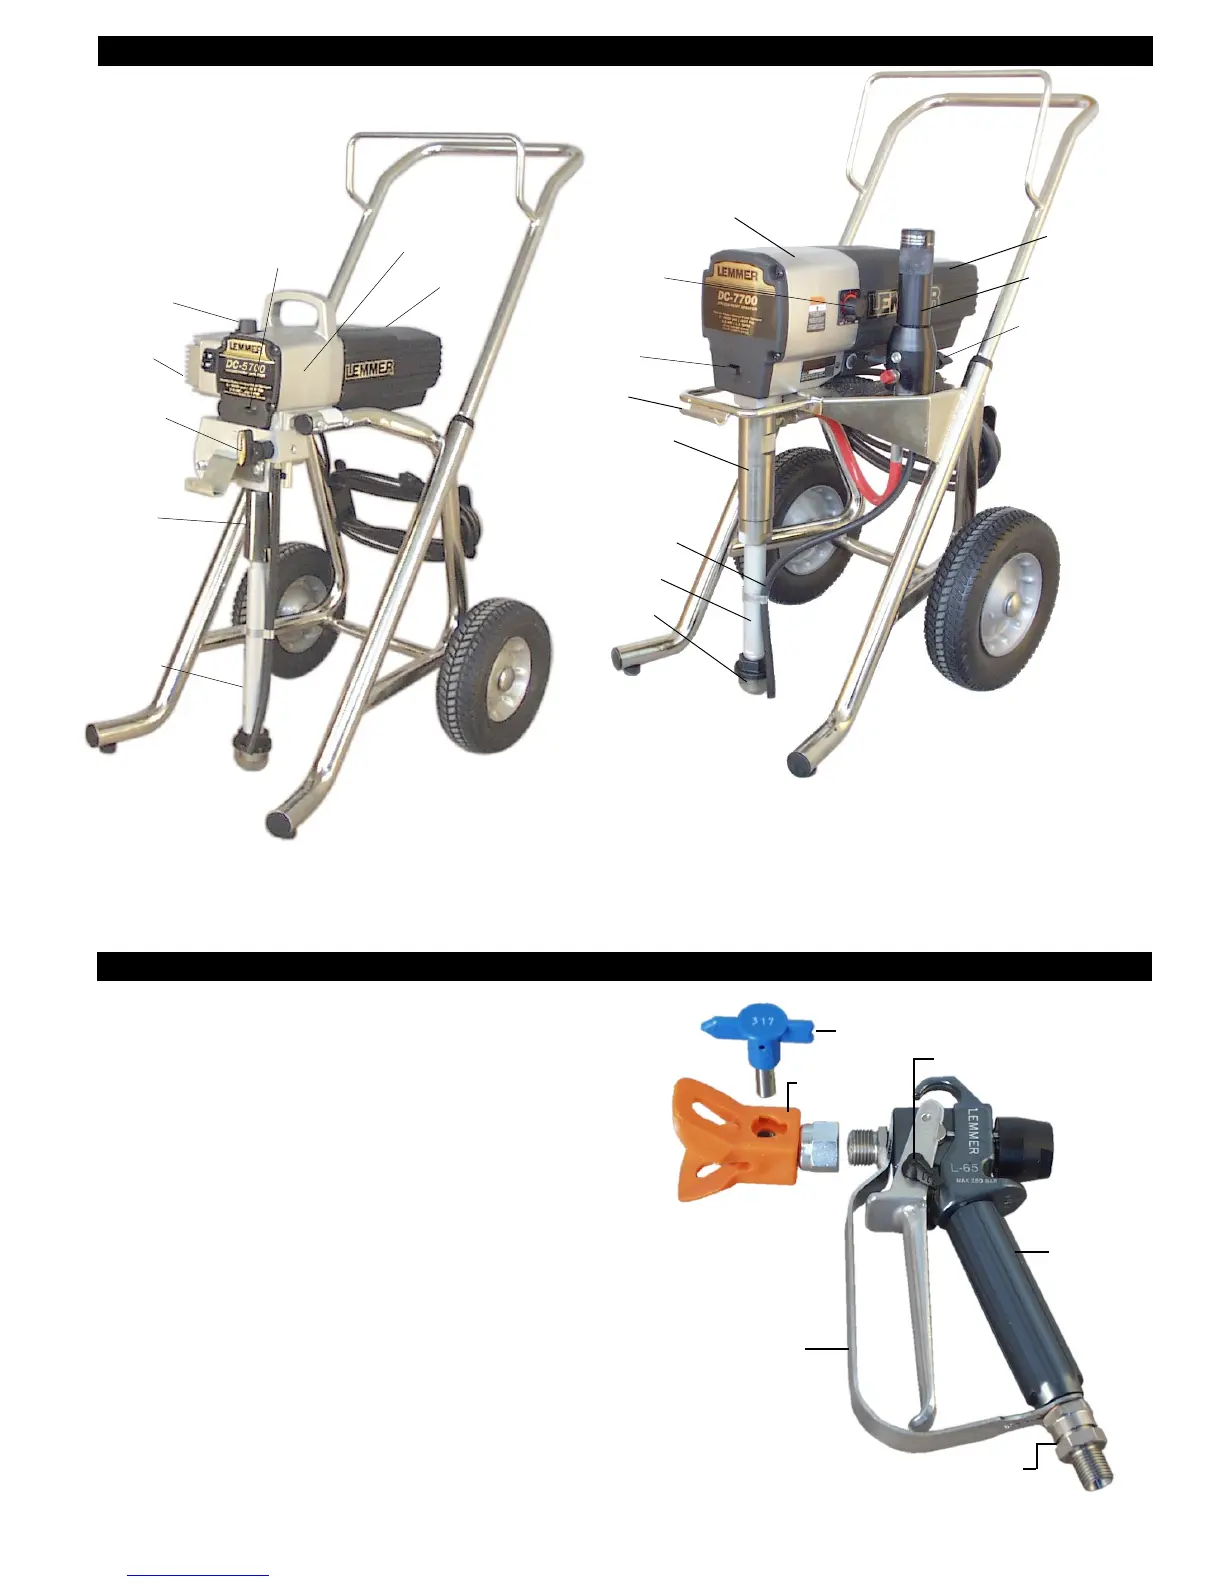
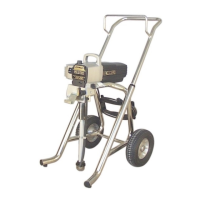
PUMP COMPONENTS
motor
pail hook
suction pipe
return hose
speed reducer
paint pump
suction screen
prime valve
pressure control
& on / off switch
High pressure filter
Figure 1e. - DC-7700 components.
Figure 1d. - DC-5700 components.
paint
pump
motor
pressure
control
speed reducer
prime
valve
suction
system
on / off
switch
2 to 3 drops
oil daily
2 to 3 drops
oil daily