Lemon RX Stabilizer PLUS Receiver – Essential Instructions v.1.5
14
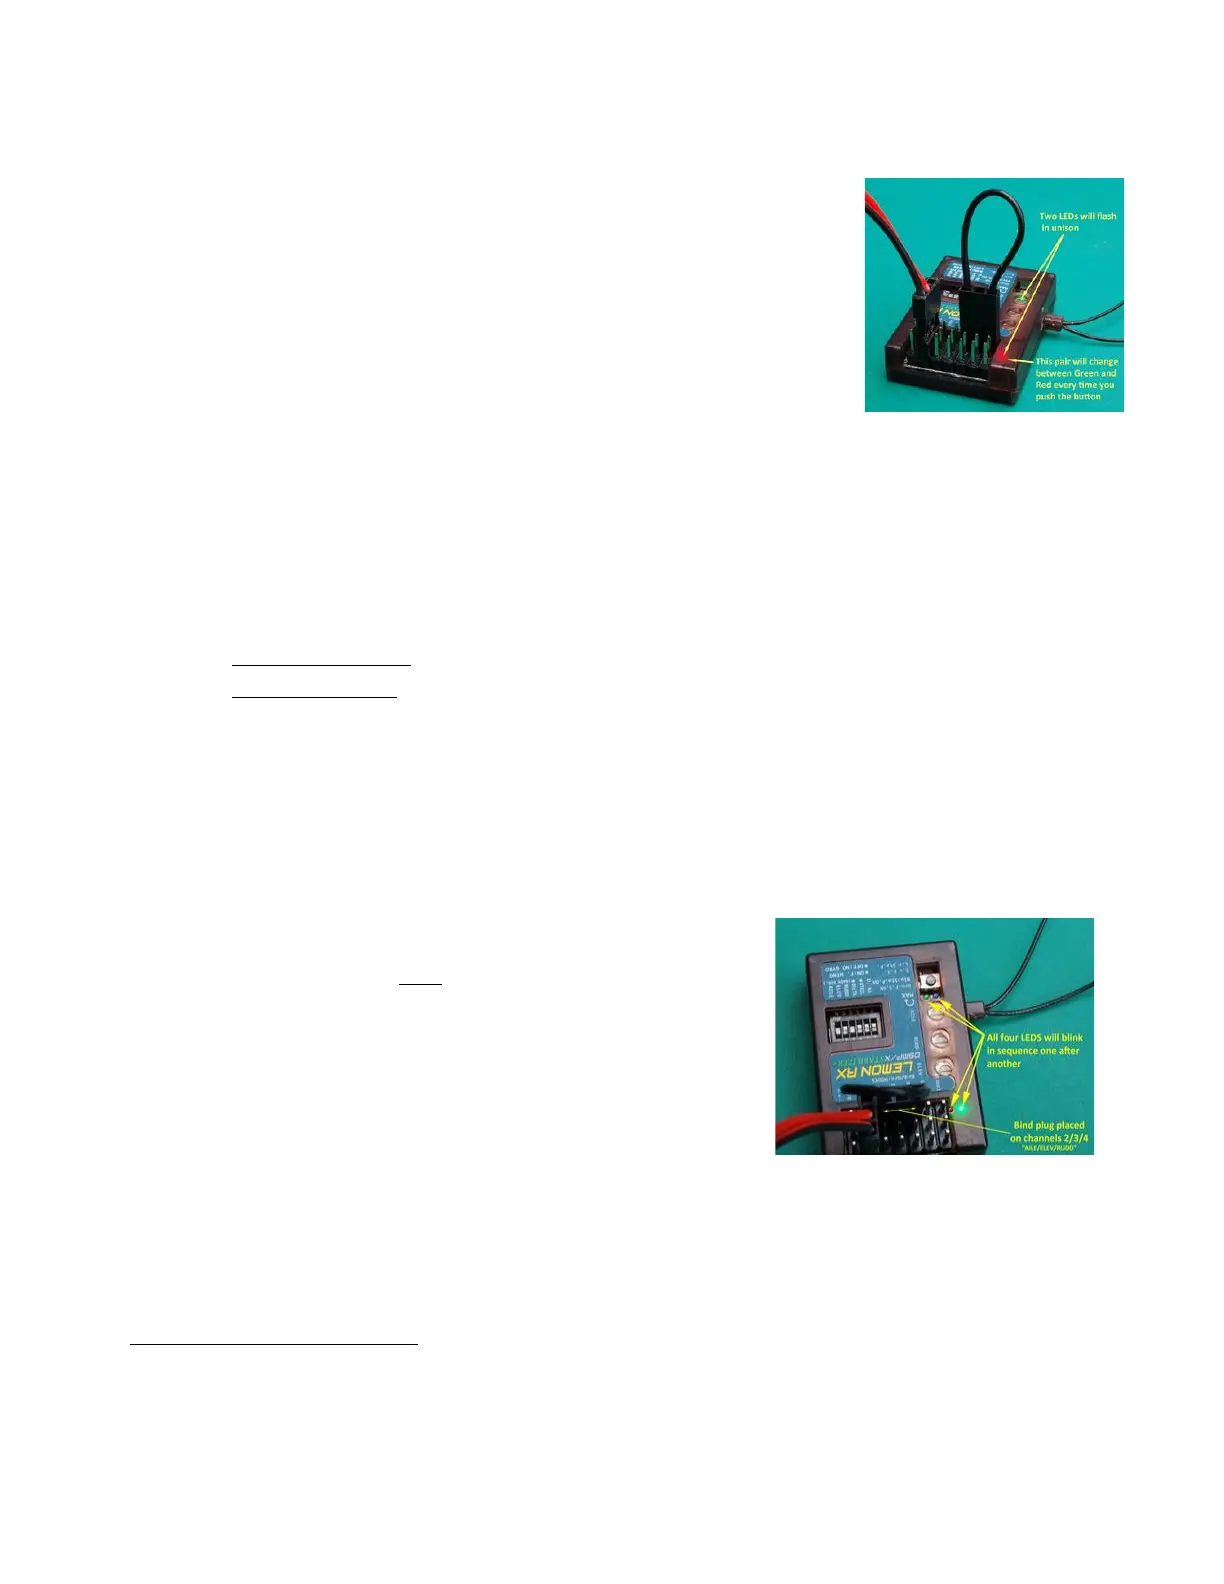
Mode Order and Autolevel Setting (Bind Plug on channels 4, 5, 6)
A bind plug inserted across the signal pins of channels 4, 5 and 6 will cause the
Stabilizer PLUS to use the blue/green Indicator 1 lights to display the current
Stabilization Mode Order:
• Default order: OFF/Gyro/Autolevel – Indicator 1 Green flashing
• Alternate order: OFF/Autolevel/Gyro – Indicator 1 Blue flashing
In this state, the Stabilizer uses Indicator 2 lights to signal the Autolevel setting:
• Beginner setting (default) severely limits bank and pitch angles –
Indicator 2 Green flashing
• Advanced setting gives the pilot a greater degree of control – Indicator 2 Red flashing.
The Mode Order and Autolevel settings can be changed as follows:
1. With the Stab PLUS powered OFF, insert a bind plug across the signal pins for channels 4, 5 and 6 (i.e.,
the last three – see picture and Annex A). Power is connected to any other available set of pins. The
transmitter is not required for this action.
2. Power up the receiver.
3. Press the stabilizer button:
• for more than 1 second to change the Stabilization Mode Order.
• for less than 1 second to change the Autolevel setting.
4. When the desired changes have been made, power OFF the stabilizer and remove the bind plug.
To check the settings, simply power up the stabilizer with the bind plug across channels 4, 5 and 6 and
observe the configuration of Indicator 1 and Indicator 2 lights. See above for the meaning of the lights.
The settings will be retained even when the stabilizer is powered off. To reverse a change, repeat the
procedure described above.
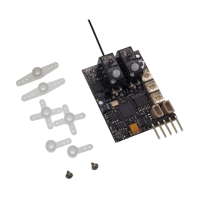
Hardware Reset (Bind Plug across channels 2, 3, 4)
To reset the Stabilizer PLUS to factory default settings, insert a bind plug
on the signal pins of channels 2, 3, and 4, as shown in the picture. Note
that channel 2 (Aileron) is the third set of pins from the left.
Connect the ESC, BEC or battery to any available set of pins. The
transmitter is not required.
When power is applied for a second or two, the lights on the stabilizer
will blink in sequence, indicating that all internal settings have been
returned to default. This includes any stabilizer offsets, orientation
settings, failsafe presets, mode order changes, etc.
To complete the reset, you may wish to set the stabilizer pots back to the 12 o’clock position and return all
DIP switches to OFF, but this is not required.
A good practice if you encounter unexpected behaviors from the stabilizer is to perform a hardware reset,
followed by rebinding of the stabilizer. Then start afresh with stabilizer settings.