Lemon RX Stabilizer PLUS Receiver – Essential Instructions v.1.5
16
IMPORTANT: Don’t Use Elevon and V-tail Mixing in the Transmitter
Like other stabilizers, the StabPLUS absolutely requires that any elevon (delta wing) or V-tail mixing MUST
take place in the stabilizer and NOT in the transmitter. Use of any such transmitter mixing will almost
invariably cause a crash immediately after takeoff! This is true even when the stab is turned OFF by the
transmitter, using channel 5 (Gear). Even in this case, Elevon and V-tail mixing MUST be controlled by
switches J4 and J5, as shown in the illustration on page 4.
Use of elevon or V-tail mixing in the transmitter is permitted only if stabilization is permanently turned OFF
at the stabilizer(i.e., switches J4 and J5 are OFF). The StabPLUS then functions as a plain 7-channel receiver.
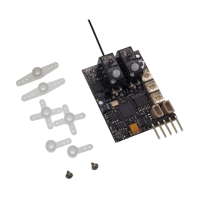
Alignment and Mounting of the StabPLUS
The Lemon Stabilizer PLUS MUST be mounted in alignment with the flight axis of the model. It can be
mounted upright, inverted or on either edge. Lemon recommend that the servo connectors should be to
the REAR of the model, although some users report successful operation with the pins forward.
Only if the StabPLUS is mounted flat on the floor can the built-in default values be used for level. If mounted
in any other orientation, or if fine tuning of stabilizer level is needed, the Reset “toggling” process described
earlier (page 11) must be used. For best results with Autolevel, the unit should be located close to the
center of gravity of the model. These issues are discussed in more detail in the Reference Guide.
Mounting
All stabilizers must be protected from vibration and shock, yet attached securely enough to follow the
movements of the model without wobbling or coming loose. The double-sided mounting tape provided
with the Lemon StabPLUS offers the simplest solution. Use it to attach the stabilizer in the appropriate
attitude to a flat surface in the model. Make sure the surface is clean, the attachment is secure and the
stabilizer case is not touching any part of the model. Good quality servo-mounting tape or 3M (Scotch)
Permanent Outdoor Mounting Tape is also suitable for this purpose. Do not use the common indoor white
foam mounting tapes for this purpose.
Mounting with adhesive tape can make subsequent removal of the unit difficult. Accordingly, Velcro®-type
tape can be used. Cover the whole bottom of the stabilizer with the fuzzy (loop) side of the material. Use a
patch of the hook-side material at least as big as the case to avoid the possibility of the stabilizer wobbling.
Be careful when removing the stabilizer , as the case is only held together by two small screws and two
pegs. To provide reinforcement, it’s a good idea to apply clear transparent tape to the case sides.
These methods are suitable for electric-powered models, but may not provide sufficient isolation in the
harsher environment of a fuel-powered (IC) model. For further information, see the Reference Guide.
Minimizing Vibration
Autolevel stabilizers are particularly susceptible to vibration. One symptom is deviation from level flight over
time in Autolevel mode. It is therefore very important, even for an electric model with a properly mounted
stabilizer, to eliminate sources of vibration. Balance the propeller and check for any out-of-true running of
the motor shaft or bearings. A well-balanced electric model should show no noticeable vibration in any part
of its speed range.