11
2. InstallatIon
2.1. Information
WARNING
Riskofpropertydamage,injury,ordeath.
Installation, adjustments, alterations, service and maintenance must be per-
formedbyalicensedprofessionalservicetechnician(orequivalent).
CAUTION
Physicalcontactwithmetaledgesandcornerswhileapplyingexcessiveforce
orrapidmotioncanresultinpersonalinjury.Beawareof,andusecautionwhen
workingnearbytheseareasduringinstallationorwhileservicingthisequipment.
CAUTION
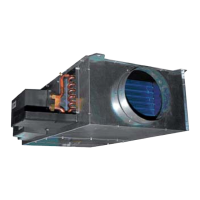
TheHumiditrolcoilisshippedfromthefactorypressurizedwithdryair.Pierce
aholeinthecoil’srubberplugvaporlinesealtorelievethepressurebeforere-
movingtheseals.
2.1.1. Refrigeration
All Humiditrol coils are shipped with a combination check/ow restrictor. The
restrictor is provided in the bag assembly and must be installed. Refer to the
appropriate high and/or low side installation instructions for information on the
appropriatelinesets.RefertoLennoxRefrigerantPipingguide(Corp.9351-L9)for
propersize,type,andapplicationofeld-fabricatedlines.
2.1.2. Releasing Air Charge
NOTE: Humiditrol units are shipped from the factory with dry air as a holding
charge.
1. Ensurethatthecoilisvoidofpressure.
2. Removetherubberplugfromthelines.
3. If thereis no pressurewhen theplugs arepierced, checkthe unit for leaks
beforecontinuingwiththeinstallation.
2.1.3. Refrigerant Line Connections
When connecting lines, becareful to avoid damaging the 3-way diverting valve
accesspanel.PlaceawetragagainstthepipingplateandaroundtheHumiditrol
unit line connections.A wet rag heat shield must be in place during brazing to
guardagainstdamagetothepaint.
2.2. Electrical Wiring
Reviewthediagramsbeforeinstallationtoensureallnecessarycomponentsare
onhandattimeofinstallation.
ConnecttheHumiditrolunitwiththeindoorandoutdoorunits,andtothethermostat.
BesurethattheoutdoorsensorisinstalledandconnectedtotheComfortSense
7500 thermostat’s outdoor sensor terminal block or that discharge air and/or
outdoor air sensors are connected to the iComfort indoor unit. The table below
eachwiringdiagramshowstherequirementsforcontrolwiring.
TheiComfortthermostatcanusetheoutdoorsensorfactorysuppliedandconnected
in iComfort outdoor units.