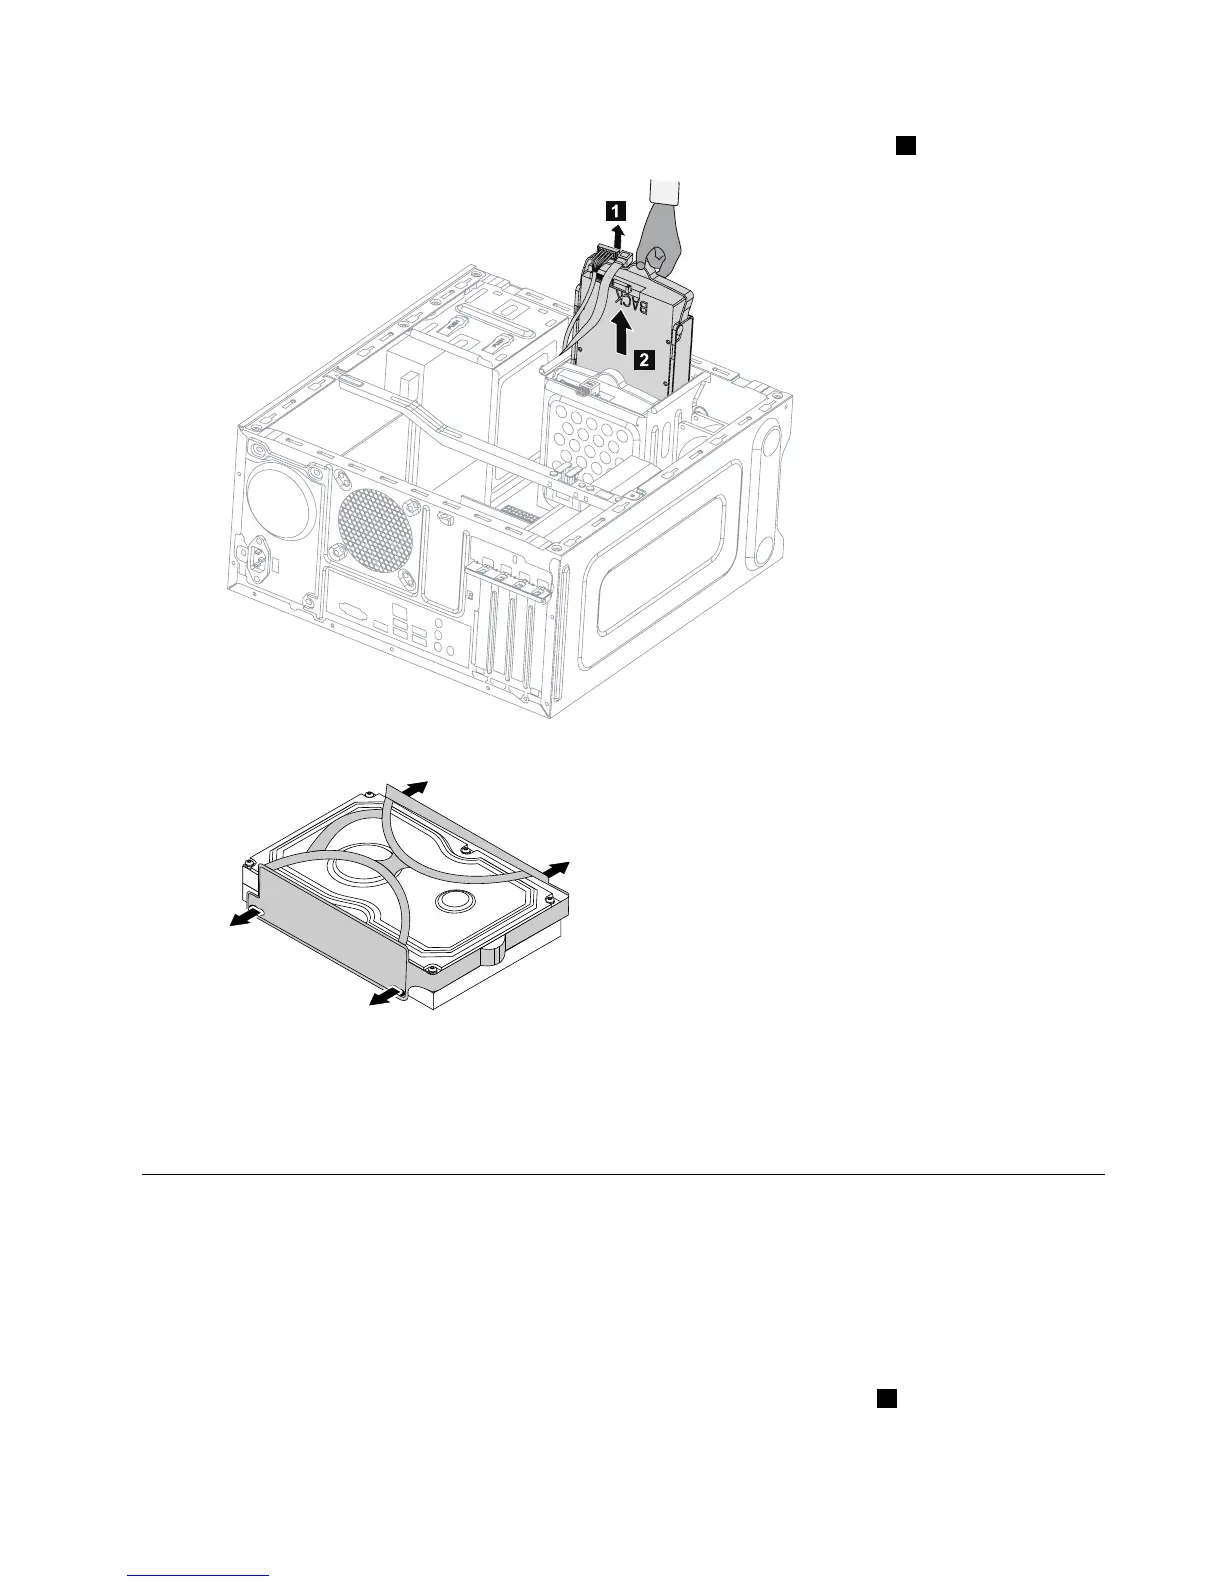
Step4.Removetheharddiskdrivefromtheplasticbracketasshown.
Step5.Lineupthenewharddiskdrivewiththeplasticbracketandsnapitintoposition.
Step6.Slidethenewharddiskdriveintothedrivebayandslidethedrivebayintoplace.
Step7.Connectthepowerandsignalcablestothenewharddiskdrive.
Step8.Reattachthecomputercover.
Replacinganopticaldrive
Note:Forthisprocedure,ithelpstolaythecomputerflat,stablesurface.
Toreplaceanopticaldrive:
Step1.Removethecomputercover.Referto“Removingthecomputercover”.
Step2.Removethefrontbezel.Referto“Removingthefrontbezel”.
Step3.Disconnectthedataandpowercablesfromtherearoftheopticaldrive.1
Chapter8.Replacinghardware29