Step1.Removeanymedia(disks,CDs,DVDs,ormemorycards)fromthedrives,shutdowntheoperating
system,andturnoffthecomputerandallattacheddevices.
Step2.Unplugallpowercordsfromelectricaloutlets.
Step3.Disconnectallcablesattachedtothecomputer.Thisincludespowercords,input/output(I/O)
cables,andanyothercablesthatareconnectedtothecomputer.Referto“Leftandrightview”
and“Rearview”forhelpwithlocatingthevariousconnectors.
Step4.Removethecomputercover.Referto“Removingthecomputercover”.
Step5.Removethememorymodule.Referto“Replacingamemorymodule”.
Step6.Removethemicroprocessorfan.Referto“Replacingthemicroprocessorfan”.
Step7.Removetheheat-sink.Referto“Replacingtheheat-sink”.
Step8.Removethegraphiccard.Referto“Replacingagraphiccard”.
Step9.RemovetheWi-Ficard.Referto“ReplacingtheWi-Ficard”.
Step10.RemovetheCPU.Referto“ReplacingtheCPU”.
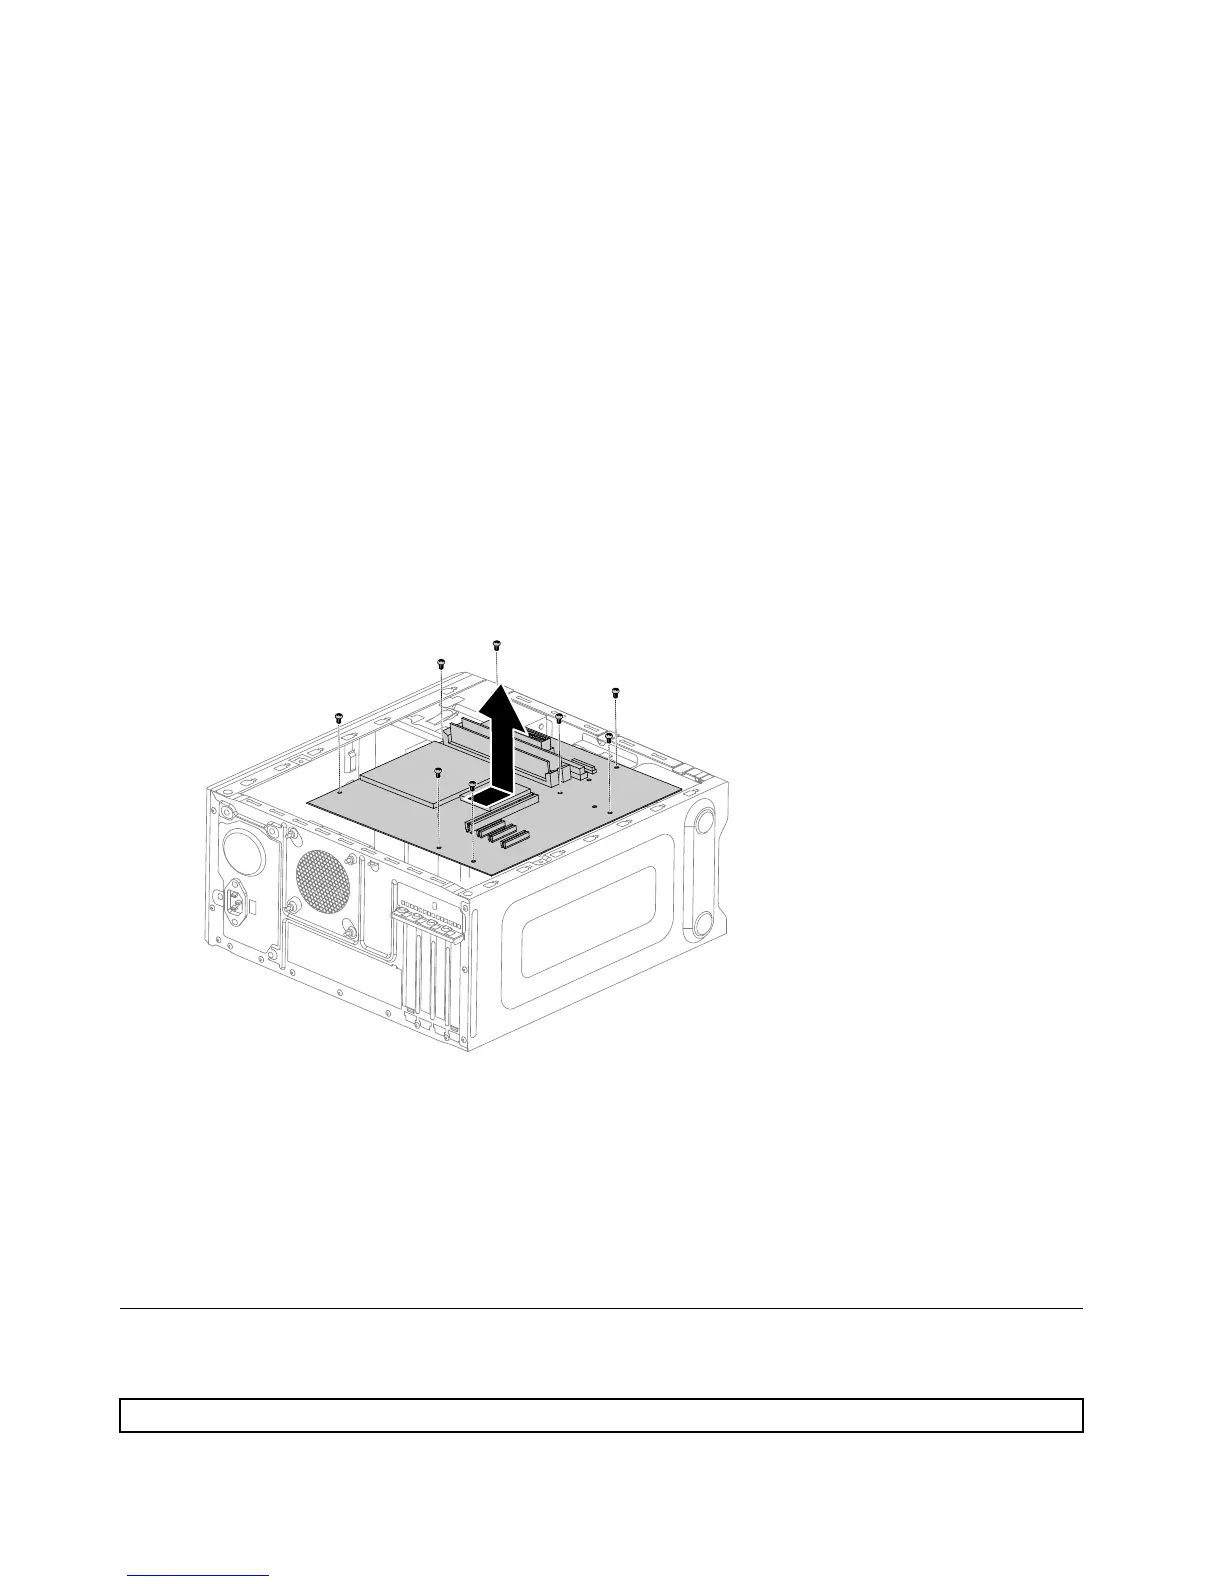
Step11.Disconnecttheallcablesfromtheconnectorsonmotherboard.
Step12.Removethe8screwsthatsecurethemotherboardtothechassis.
Step13.Slidethenliftthemotherboardoutofthechassistoremoveit.
Step14.Installthenewmotherboard:
a.Lineuptheholesonthenewmotherboardwithmountingholesonthechassisandsecure
itwithscrews.
b.Reattachthememorymodule,Wi-Ficard,CPU,andtheheat-sinktothenewmotherboard.
c.Connecttheallcablestothenewmotherboard.
d.Attachthegraphiccardtothenewmotherboard.
Step15.Reattachthecomputercover.
FRUlists
Thischapterliststheinformationonthefieldreplaceableunits(FRUs).
Attention:BesuretoreadandunderstandallthesafetyinformationbeforereplacinganyFRUs.
38LenovoErazerX310HardwareMaintenanceManual