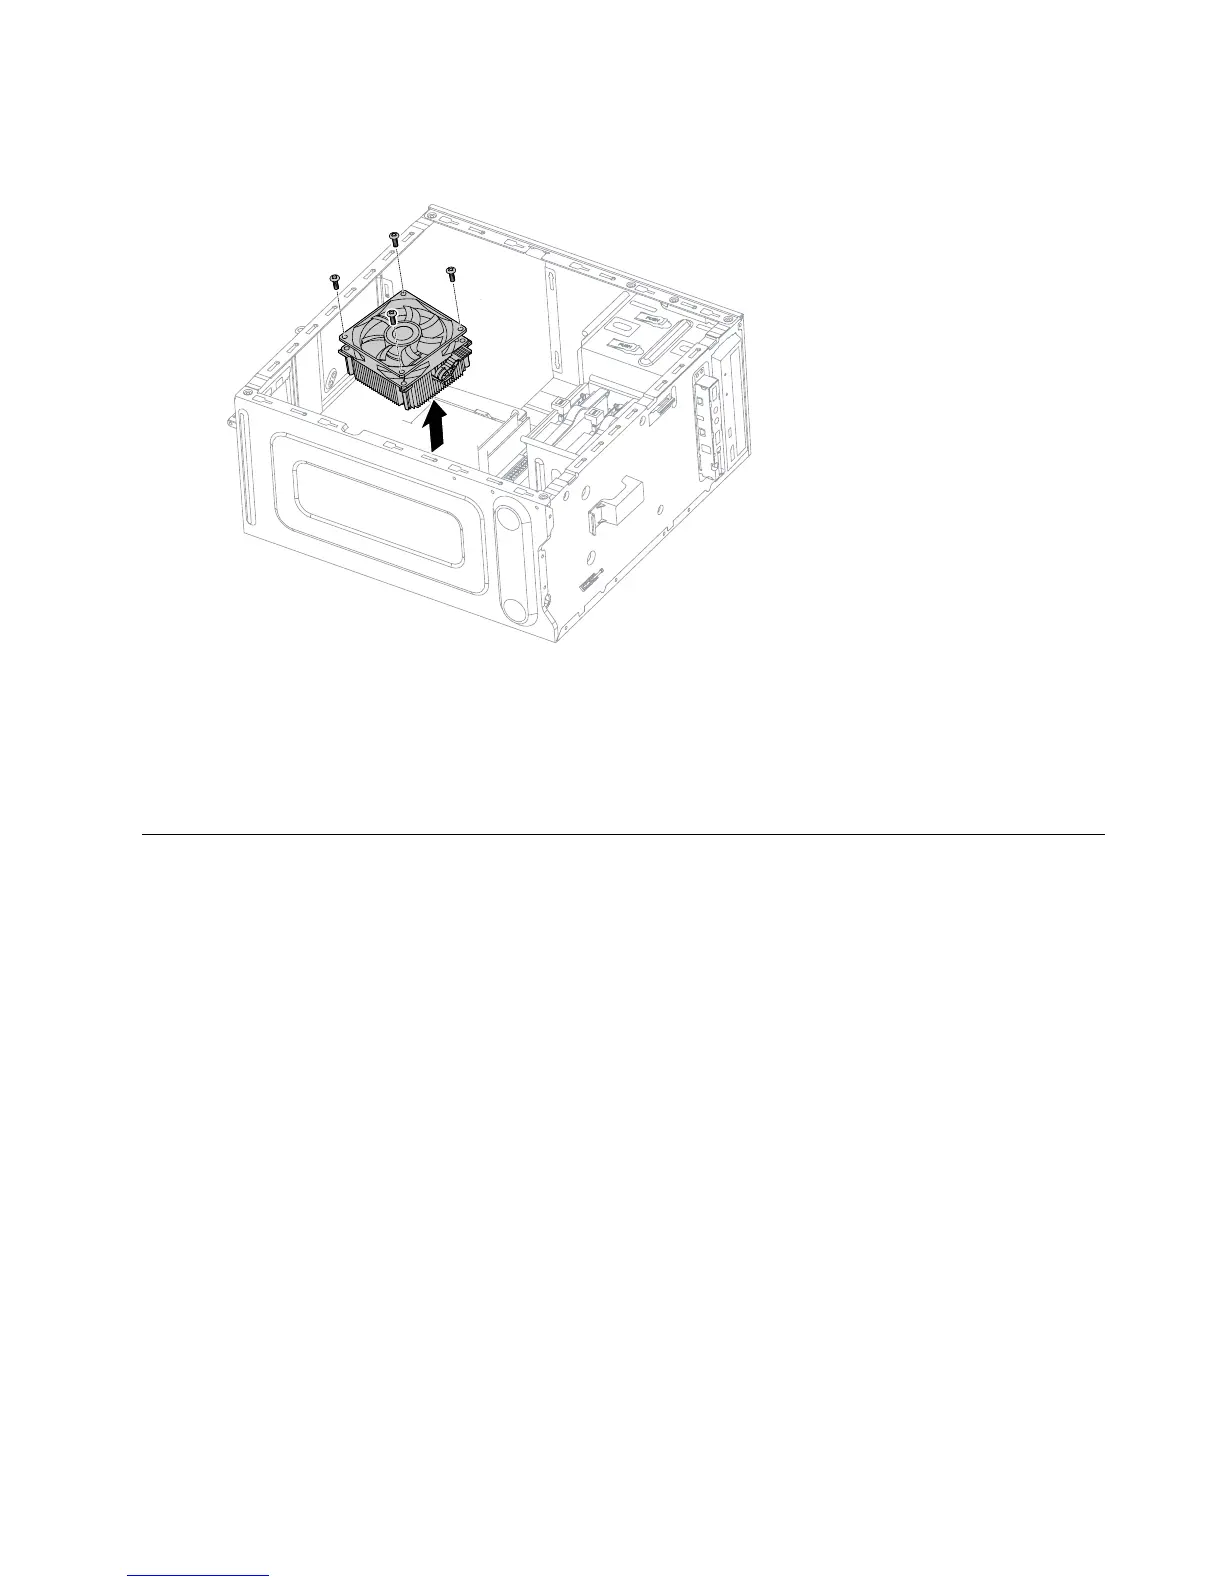
Step6.Removethe4screwsthatsecurethemicroprocessorfantotheheat-sinkandliftupthe
microprocessorfantoremoveit.
Step7.Toinstallthenewmicroprocessorfan:
a.Lineupthenewmicroprocessorfanwiththeheat-sinkandsecureittotheheat-sinkwith
4screws.
b.Connectthemicroprocessorfanpowercabletotheconnectorontheboard.
Step8.Reattachthecomputercover.
Replacingtheheat-sink
Note:Forthisprocedure,ithelpstolaythecomputerflat.
Toreplacetheheat-sink:
Step1.Removeanymedia(disks,CDs,DVDs,ormemorycards)fromthedrives,shutdowntheoperating
system,andturnoffthecomputerandallattacheddevices.
Step2.Unplugallpowercordsfromelectricaloutlets.
Step3.Disconnectallcablesattachedtothecomputer.Thisincludespowercords,input/output(I/O)
cables,andanyothercablesthatareconnectedtothecomputer.Referto“Leftandrightview”
and“Rearview”forhelpwithlocatingthevariousconnectors.
Step4.Removethecomputercover.Referto“Removingthecomputercover”.
Step5.Removethemicroprocessorfan.Referto“Replacingthemicroprocessorfan”.
Step6.Removethe4screwsthatsecuretheheat-sinktothemotherboard.
Chapter8.Replacinghardware33