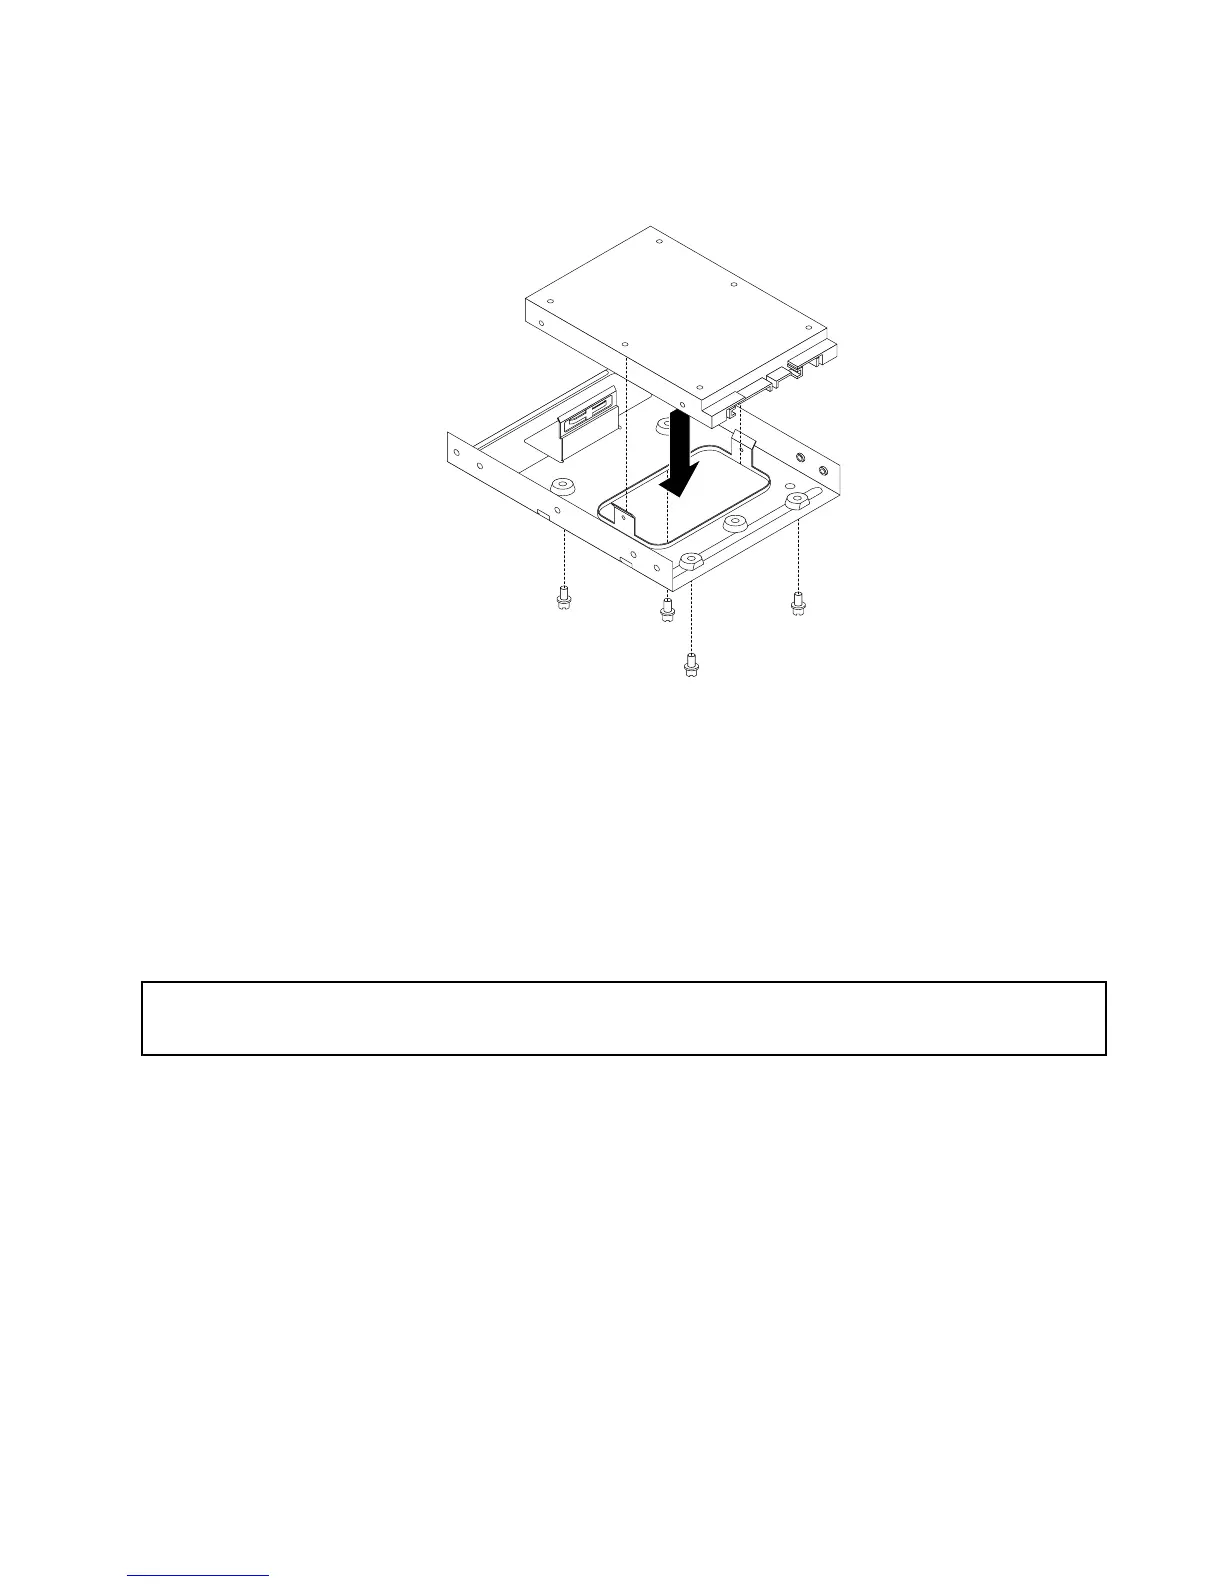
1.Installthesolidstatedriveintothestorageconverter.Then,installthe4screwstosecurethesolid
statedrivetothestorageconverter.
Figure21.Installingthesolidstatedriveintothestorageconverter
2.Connectthesignalcableandthepowercabletothesolidstatedrive.
3.Installthesolidstatedriveintotheharddiskdrivebay.See“Replacingtheharddiskdrive”onpage41.
Whattodonext:
•Toworkwithanotherpieceofhardware,gototheappropriatesection.
•Tocompletetheinstallationorreplacement,goto“Completingthepartsreplacement”onpage61.
Replacingtheharddiskdrive
Attention:
Donotopenyourcomputerorattemptanyrepairbeforereadingandunderstandingthe“Importantsafetyinformation”
onpagev.
Thissectionprovidesinstructionsonhowtoreplacetheharddiskdrive.
Note:Dependingonyourmodeltype,yourcomputermightcomewitha2.5-inchsolidstatedrive.Toinstall
thesolidstatedrive,see“Installingthesolidstatedrive”onpage40
.
Toreplacetheharddiskdrive,dothefollowing:
1.Turnoffthecomputeranddisconnectallpowercordsfromelectricaloutlets.
2.Removethecomputercover.See“Removingthecomputercover”onpage32.
3.Removethefrontbezel.See“Removingandreinstallingthefrontbezel”onpage32.
Chapter5.Installingorreplacinghardware41







 To Next Page