Page 12 of 32
User Guide
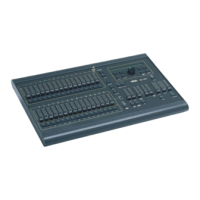
Leviton MC 7500 Series Memory Lighting Controllers
Clearing Patch:
Pressing the Clr function will completely zero out all patch information for the active patch in nonvolatile memory,
leaving a blank or empty patch to start with. A confirmation screen will appear on the LCD, select Yes to proceed or
No to cancel and return to the previous screen.
Console will have no output to stage with an empty patch.
Defaulting Patch:
Pressing the Default function button will set up a one-to-one patch for the active patch in nonvolatile memory. This
patches channel 1 to dimmer 1, channel 2 to dimmer 2, and so forth. Any previous edits will be lost, but the patch
may be edited after defaulting. A confirmation screen will appear on the LCD, select Yes to proceed or
No to cancel
and return to the previous screen. This is the standard factory setup.
Editing Patch:
Pressing the Edit Patch function button will display the patch edit screen on the LCD. Shown are dimmer numbers
on the top row. Turning the encoder wheel will cause the dimmer number to scroll back and forth as the cursor moves
along the bottom line. All dimmers up to the maximum number of dimmers configured will be displayed.
Dim: 1 2 3 Full Clr
Ch: 1>100% 2>100% 3>100%
The LCD shows the channel number patched and patch level on the bottom row in the following format: Channel
> Level. The channel number may be changed. Each dimmer may be assigned to one channel and any channel
may have several dimmers. To change the channel assignments, use the encoder wheel to place the cursor on the
channel number position under the desired dimmer. Hold down the
CHANGE button while rotating the encoder until
the desired channel is indicated, and then release the
CHANGE button. If a level other than 100% is desired, move
the cursor to the level to change using the encoder. Hold down the
CHANGE button key while rotating the encoder
until the desired level is indicated, and then release the
CHANGE button. Use the Clr function button to unpatch
any dimmer (dimmer is disconnected). Use the
Full function button to set an unpatched dimmer to a 1-to-1 patch,
or a patched dimmer to full.
Saving Patch:
Press the MAIN MENU button to save the patch to nonvolatile memory. The patch edits will be lost if the controller
is interrupted before pressing MAIN MENU button. So use the MAIN MENU button often when editing a large
patch
.
Dimmer/Memory Menu
The next menu allows changing the type of dimmer output (DMX or MCX), setting preheat (0-50), number of dimmers
to be output (MAX DIMS) and channel size of the memory. The
More function button leads to the next menu of
options.
Out Preheat Max Dims Size More
MCX 16 16 16