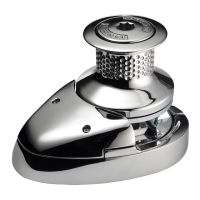
ro-Series & Pro-Fish Windlass
DO NOT use a
ermanent adhesive/sealant, e.
., 5200 to the base
of the windlass, any mountin
ad or around the studs
Fi
. 1.6.2
ro
)
m
m01(
"
8
/3
=
A
l
li
rD
)
m
m
6
7
(
"
3
=
B
waS
e
l
oH
)mm0
1
(
"
8
/3 =
A
l
l
i
rD
)
m
m
6
7
(
"3
=
B
w
a
S
e
lo
H
ssaldniW
enilt
u
O
e
s
a
B
taM
s
sa
l
dn
i
W
en
ilt
u
O
esa
B
t
a
M
en
o
ci
l
i
S
t
n
al
ae
S
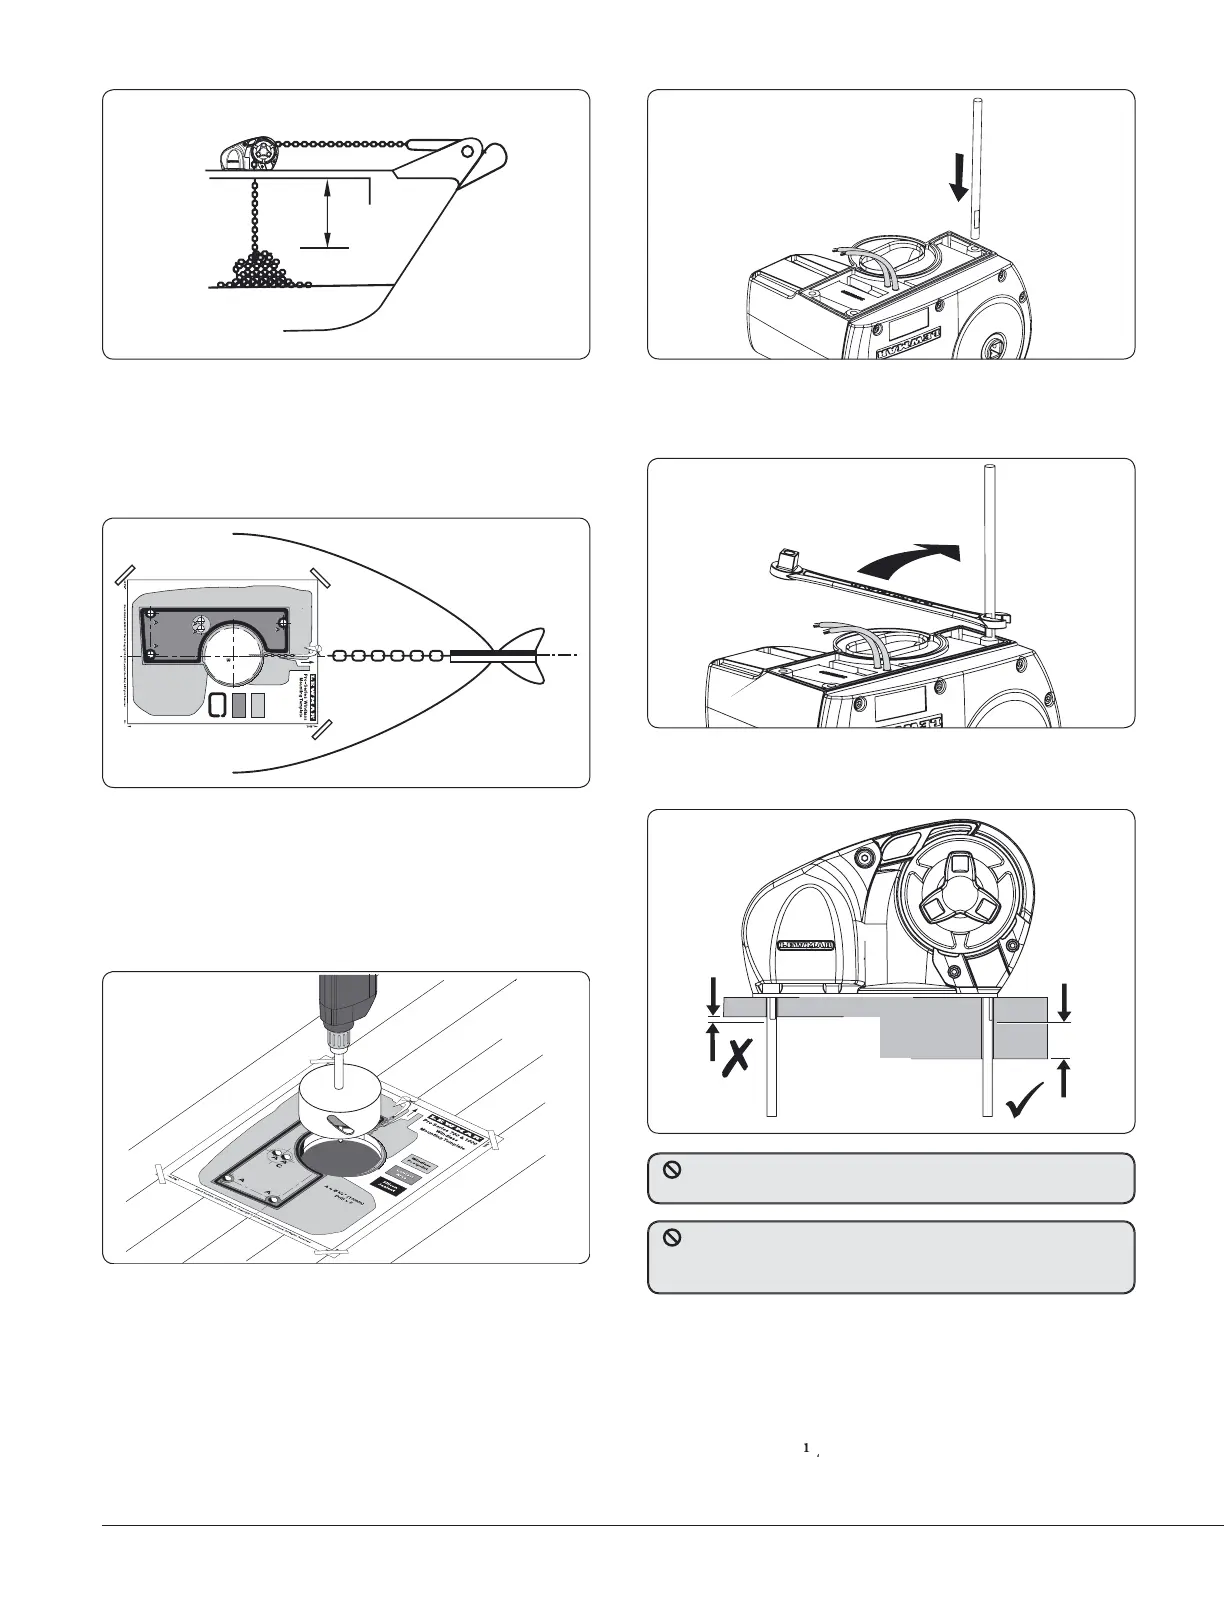
• Usin
a 10 mm (
diameter drill, make the three holes
for the mountin
studs and two for the motor wires. With
76 mm
3”
diameter hole saw, make the hole for the rode to
ass throu
h. When all the holes have been made, remove the
template. To help avoid water absorption b
the deck, appl
an appropriate marine sea
ant to t
e fres
y cut
o
e e
ges.
e
l
c
r
i
C
ret
u
O
=
B
Ø
m
6
7
(
"
3
m
)
=
C
Ø
)
m
m5
2
(
"
1
e
vi
t
a
n
r
e
t
l
A
el
oH
e
r
i
W
u
O
=
B
e
lc
r
i
C
re
t
Ø
m6
7
(
"
3
)
m
=
C
Ø)
m
m5
2
(
"1
e
v
i
t
a
n
r
e
t
l
A
e
l
oH e
r
iW
• P
ace t
e mounting temp
ate on t
e
ec
or mounting pa
in
the desired
osition for the windlass and hold it in
lace usin
adhesive ta
e
• NOTE: Check the
cale of the
tem
late matches the winch.
ig.
.
.5
• Fu
y screw t
e t
ree mounting stu
s into t
e
ase of t
e
windlass. This can be done, quite simpl
, using the multi-tool
wrench su
lied. Screw the studs into the base fi n
er ti
ht,
with the fl ats towards the base (Fi
1.6.5).
Next, using t
e wrenc
on t
e fl ats, tig
ten t
e stu
s unti
hey bottom out in their holes. Do this to each of the studs in
rn
i
. 1.6.
As a ru
e of t
um
, if t
e fl ats on t
e stu
s are visi
e
e
ow
eck, the deck and/or any packing is likely to be too thin to
ffer ade
uate su
ort when the windlass is under load.
NOTE: If usin
silicone or other rubber y type sealant,
t is advisable to allow curin
of the sealant before
nal ti
htenin
of the mountin
nuts. Trim the studs
ac
to 6 mm
e
ow t
e
u
y t
g
tene
nuts.
DO NOT
et CAULK or SEALANT under the GEAR TRAIN COVER
17
as it makes it diffi cult to remove. Secure the windlass fi rmly
to the deck
rom below, using the nuts and washers supplied
Fig.
.
.3
P
ace t
e
ase mat in position on t
e
ec
, optiona
y, app
y
suita
e sea
ant.
i
. 1.6.
 Loading...