EasyManuals Logo

Lexmark CX510 series User Manual

Lexmark CX510 series
342 pages
To Next Page IconTo Next Page
To Previous Page IconTo Previous Page
Page #91 background imageLoading...
Page #91 background image
4 In the Fax Number field, enter the printer fax number.
5 Click Submit.
Choosing a fax connection
Scenario 1: Standard telephone line
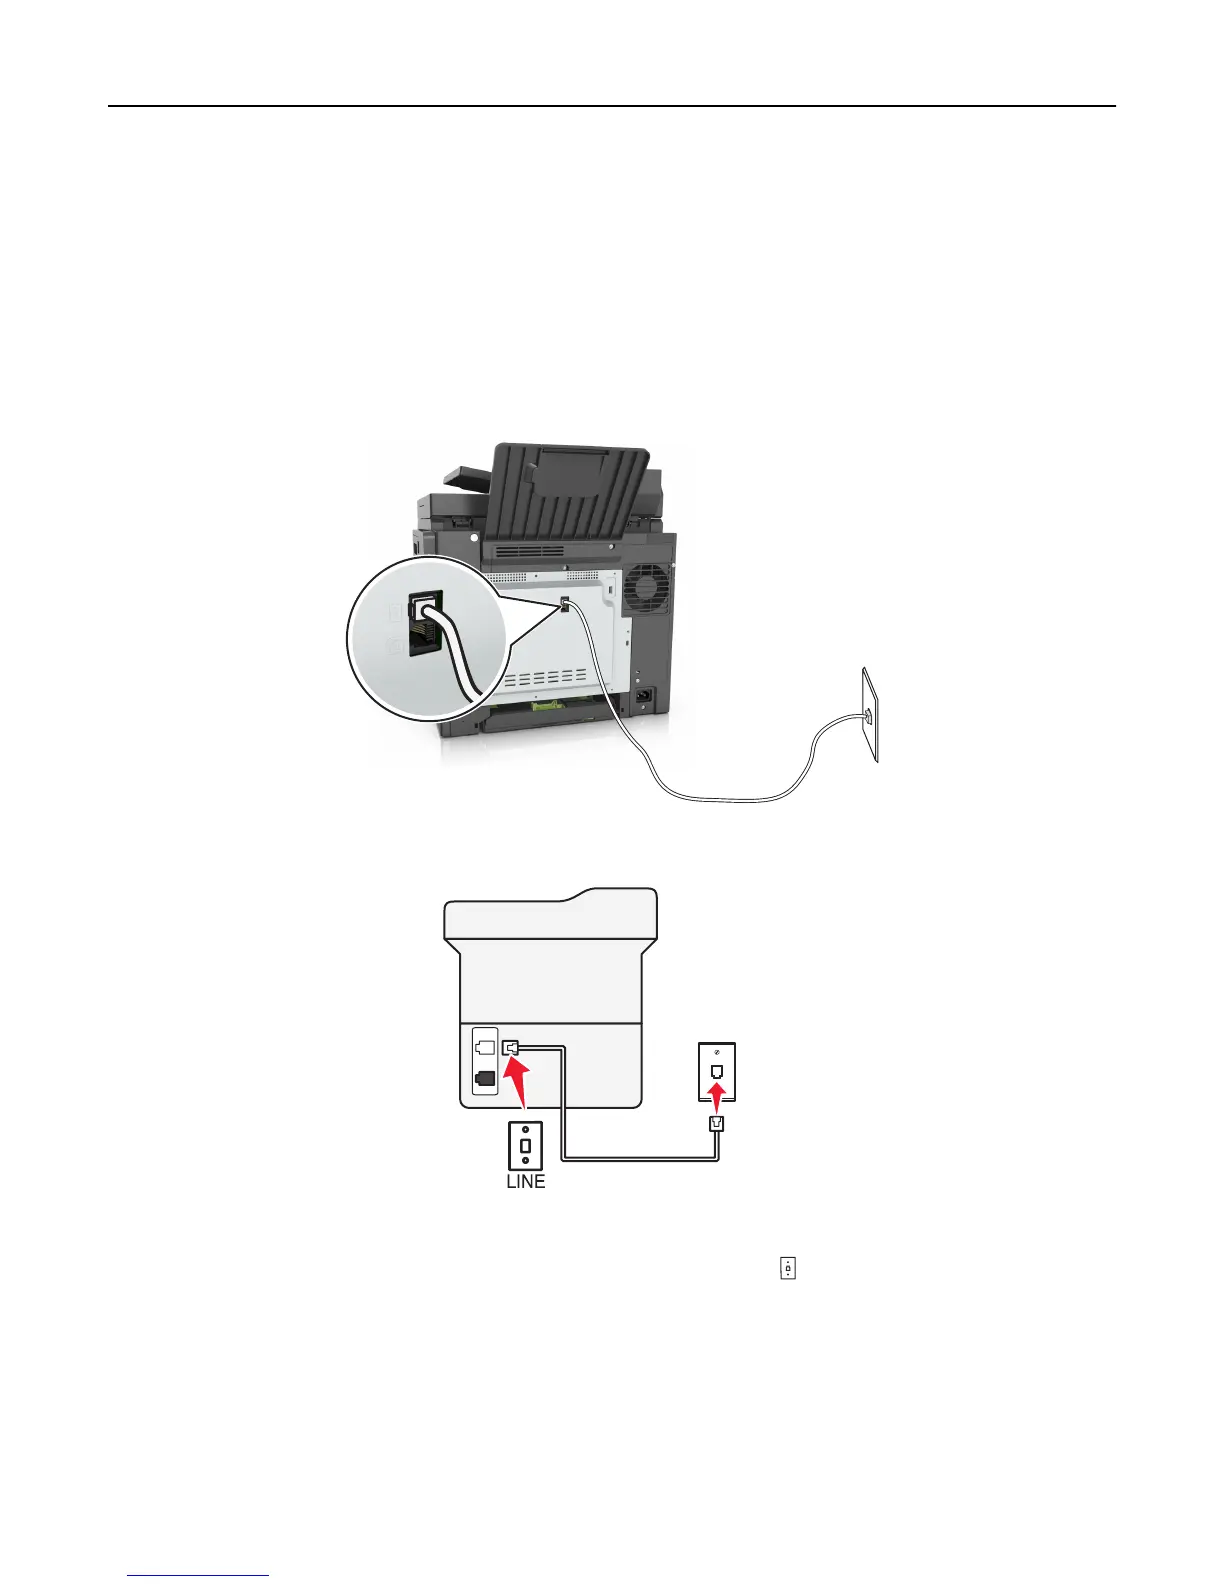
Setup 1: Printer is connected to a dedicated fax line
To connect:
1 Connect one end of the telephone cable that came with the printer to the port of the printer.
2 Connect the other end of the telephone cable to an active analog wall jack.
Tips for this setup:
You can set the printer to receive faxes automatically (Auto Answer On) or manually (Auto Answer Off).
If you want to receive faxes automatically (Auto Answer On), then set the printer to pick up on any number of rings
that you want.
Faxing 91

Table of Contents

Other manuals for Lexmark CX510 series

Questions and Answers:

Question and Answer IconNeed help?

Do you have a question about the Lexmark CX510 series and is the answer not in the manual?

Lexmark CX510 series Specifications

General IconGeneral
Print TechnologyColor Laser
Print Resolution1200 x 1200 dpi
Duplex PrintingYes
Display4.3-inch color touch screen
Monthly Duty Cycleup to 75, 000 pages
Maximum Paper Size8.5 x 14 inches
Scanner TypeFlatbed scanner with ADF
FaxYes
Processor Speed800 MHz
Fax Speed33.6 kbps
Operating System CompatibilityWindows, Mac, Linux
Print Speed (Black)32 ppm
Print Speed (Color)32 ppm
Memory1024 MB
ConnectivityUSB, Ethernet
Standard Paper Input250-sheet input tray
Copier Speed (Black)32 cpm
Copier Speed (Color)32 cpm

Related product manuals