Creating a fax destination shortcut using
the Embedded Web Server
Assign a shortcut number to a single fax number or a group of fax
numbers.
1 Open a Web browser, and then type the printer IP address in the
address field.
Notes:
• View the printer IP address in the TCP/IP section in the
Network/Ports menu. The IP address appears as four sets of
numbers separated by periods, such as 123.123.123.123.
• If you are using a proxy server, then temporarily disable it to
load the Web page correctly.
2 Click Settings > Manage Shortcuts > Fax Shortcut Setup.
Note: A password may be required. If you do not have an ID and
password, then contact your system support person.
3 Type a name for the shortcut, and then enter the fax number.
Notes:
• To create a multiple‑number shortcut, enter the fax numbers
for the group.
• Separate each fax number in the group with a semicolon (;).
4 Assign a shortcut number.
Note: If you enter a number that is already in use, then you are
prompted to select another number.
5 Click Add.
Canceling an outgoing fax
Canceling a fax job while the original documents
are still scanning
• If you are using the ADF tray and Scanning page appears, then
press
.
• If you are using the scanner glass and Scanning page, Scan
the Next Page, or Finish the Job appears, then press
.
Canceling a fax job after scanning the original
documents
1 From the printer control panel, press .
2 Press the left or right arrow button to scroll to the job you want to
cancel.
3 Press > Delete Selected Jobs.
Scanning
Scanning to an FTP address using a
shortcut number
1 Load an original document faceup, short edge first into the ADF
tray or facedown on the scanner glass.
Notes:
• Do not load postcards, photos, small items, transparencies,
photo paper, or thin media (such as magazine clippings) into
the ADF tray. Place these items on the scanner glass.
• The ADF indicator light comes on when the paper is loaded
properly.
2 If you are loading a document into the ADF tray, then adjust the
paper guides.
3 From the printer control panel, press #, and then enter the FTP
shortcut number.
4 Press .
Clearing jams
Avoiding jams
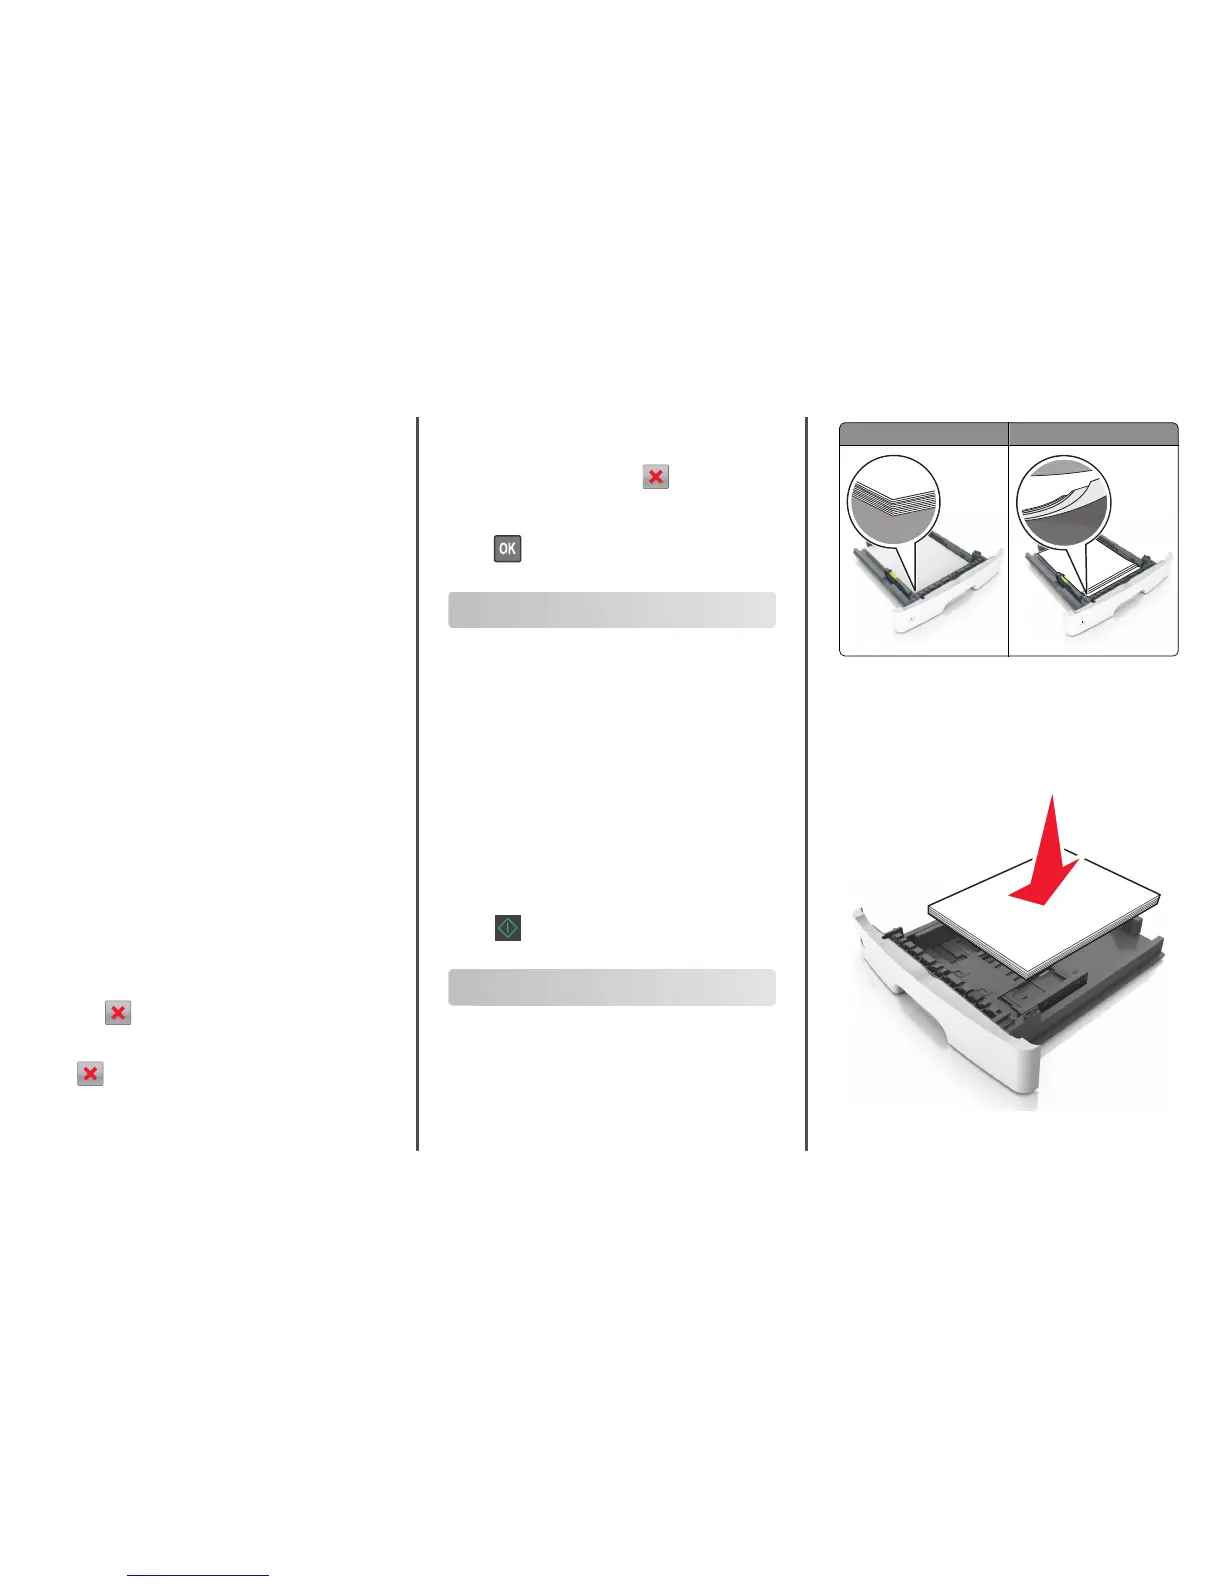
Load paper properly
• Make sure paper lies flat in the tray.
Correct loading of paper Incorrect loading of paper
• Do not remove a tray while the printer is printing.
• Do not load a tray while the printer is printing. Load it before
printing, or wait for a prompt to load it.
• Do not load too much paper. Make sure the stack height is below
the maximum paper fill indicator.
• Do not slide the paper into the tray. Load paper as shown in the
illustration.
9
 Loading...