Prepare to configure the printer
1 Locate the printer MAC address on the sheet that came with the printer. Write the last six digits of the MAC address
in the space provided below:
MAC address: ___ ___ ___ ___ ___ ___
2 If your printer has faxing capabilities, then connect the telephone cable.
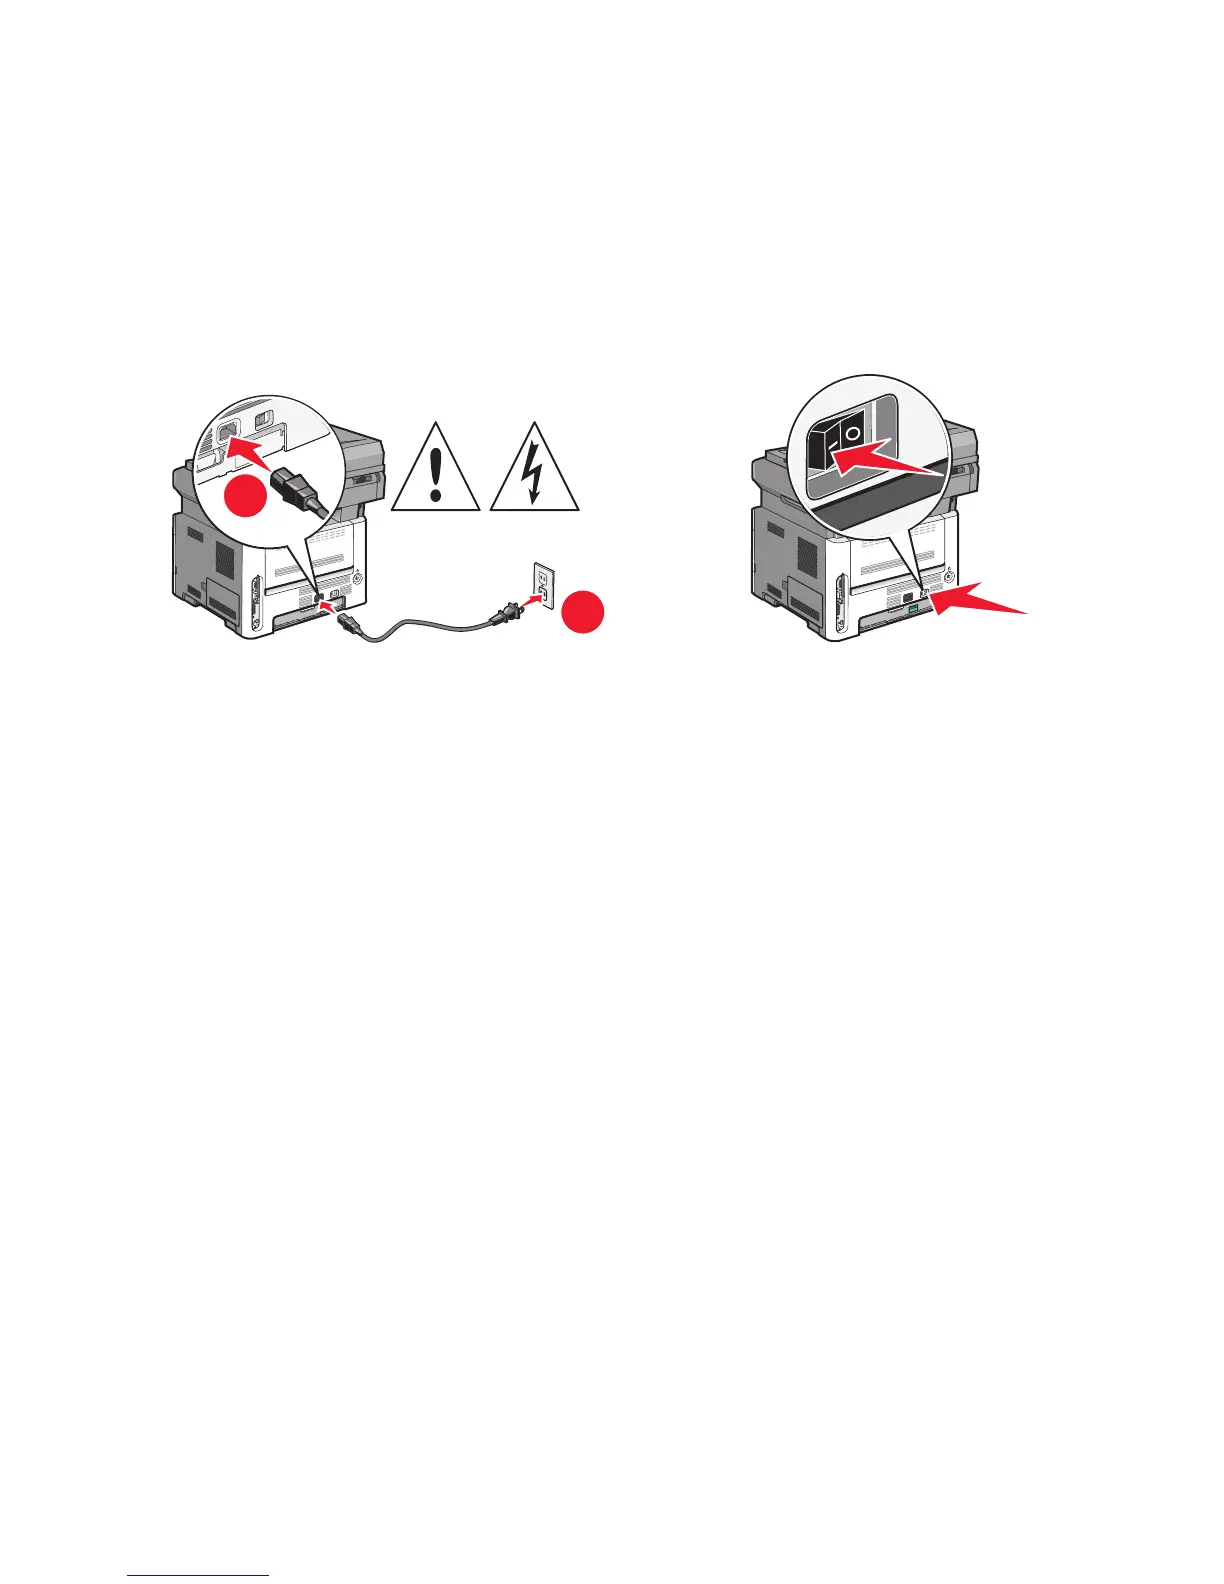
3 Connect the power cable to the printer, and then to a properly grounded electrical outlet, and then turn the
printer on.
2
1
Enter the printer information
1 Access the AirPort options.
In Mac OS X version 10.5 or later
a
From the Apple menu, choose System Preferences.
b Click Network.
c Click AirPort.
In Mac OS X version 10.4 and earlier
a
From the Go menu, choose Applications.
b Double-click Internet Connect.
c From the toolbar, click AirPort.
2 From the Network pop-up menu, select print server xxxxxx, where the x’s are the last six digits of the MAC
address located on the MAC address sheet.
3 Open the Safari browser.
4 From the Bookmarks drop-down menu, select Show.
5 Under Collections, select Bonjour or Rendevous, and then double-click the printer name.
Note: The application is referred to as Rendezvous in MAC OS X version 10.3, but is now called Bonjour by Apple
Computer.
6 From the main page of the Embedded Web Server, navigate to the page where the wireless settings information
is stored.
Additional printer setup
30