8 Press Start Color or Start Black.
Notes:
• If there is not enough memory on the flash drive, a prompt appears on the display.
• Do not remove the flash drive until a message appears on the display indicating that copying is complete.
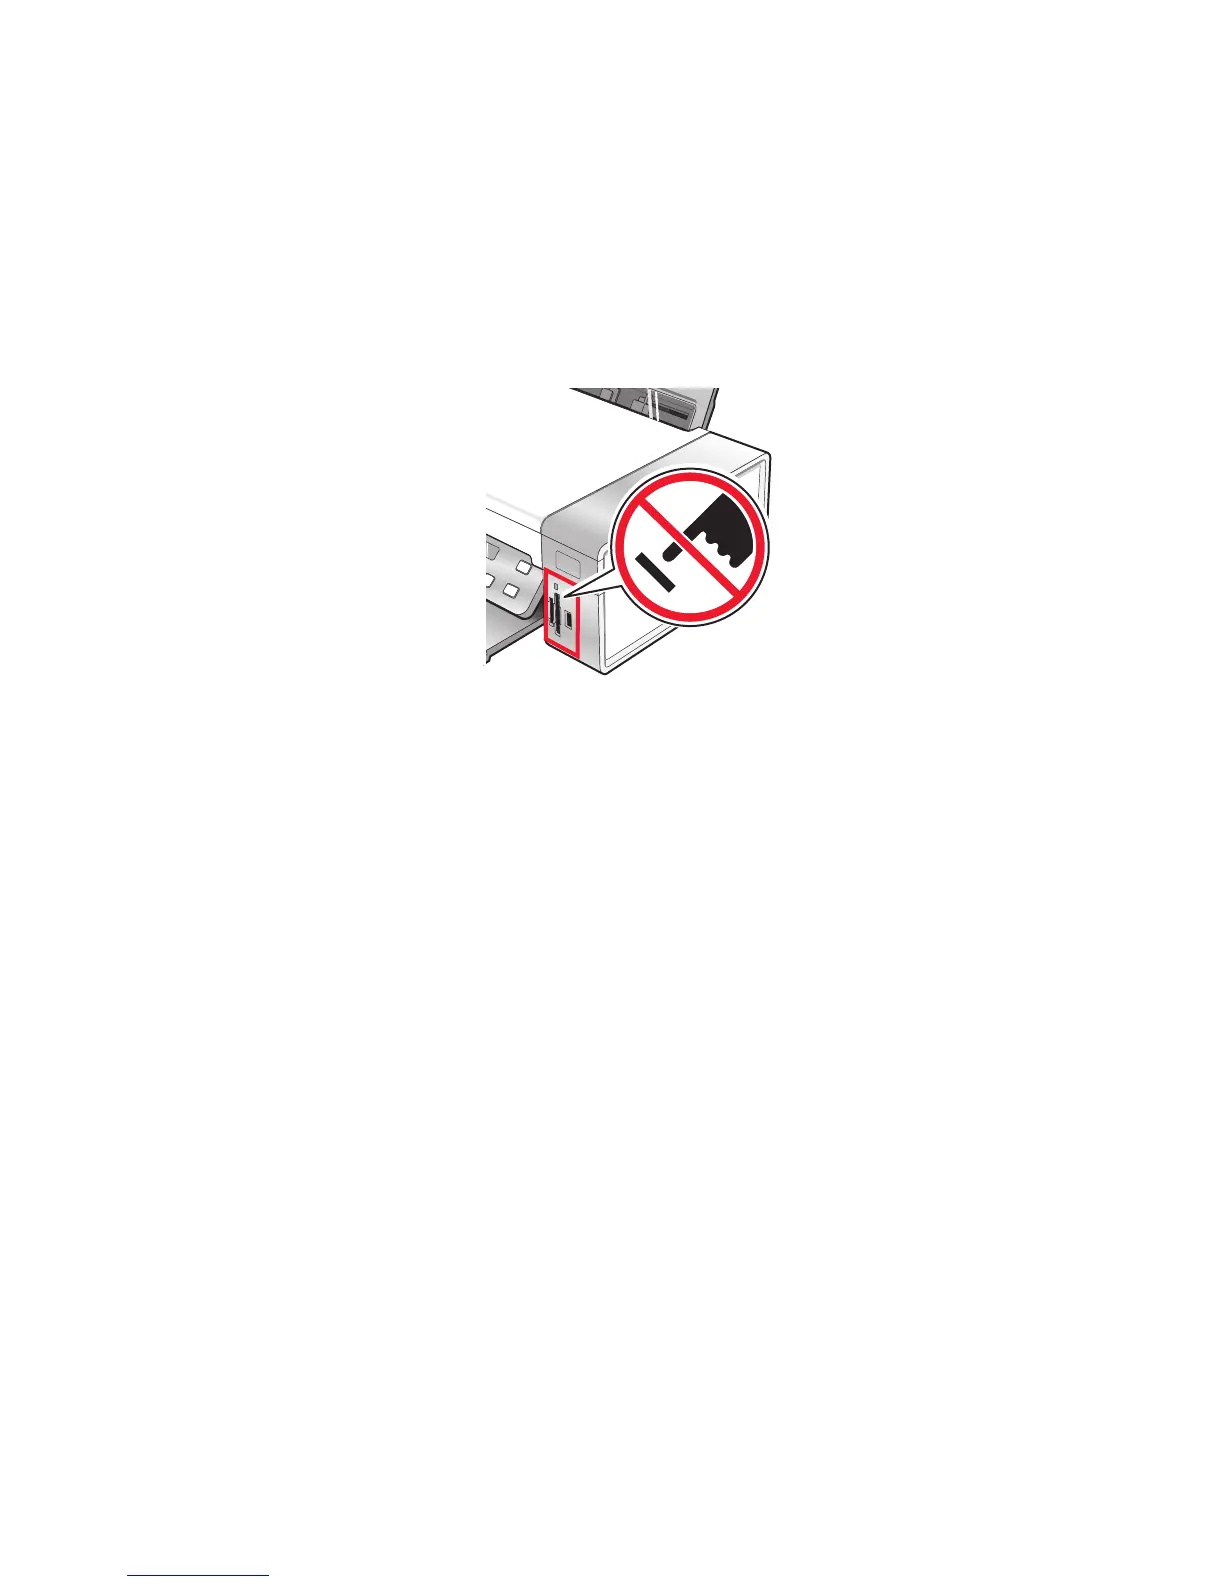
Warning—Potential Damage: Do not touch cables, any network adapter, the memory card or flash drive, or
the printer in the area shown while actively printing, reading, or writing from a memory card or flash drive. A
loss of data can occur. Also, do not remove a memory card or flash drive while actively printing, reading, or writing
from a memory card or flash drive.
Changing the Lexmark Productivity Studio preferences
Changing the Productivity Studio temporary files preferences
1 From the desktop, double-click the Productivity Studio icon.
2 From the Tools menu, click Preferences.
3 Click Temporary Files.
a Use the slider to set the maximum disk space you want to allocate for temporary files created by the
Productivity Studio.
b Click Browse to choose a different folder for saving the temporary files.
4 Click OK.
Changing the Productivity Studio searched folders preferences
1 From the desktop, double-click the Productivity Studio icon.
2 From the Tools menu, click Preferences.
3 Click Searched Folders.
4 If you want to exclude system folders when looking for photos, select Ignore system folders.
5 Click OK.
Working with photos
74