Step
F-l
(b) (2) (Cont'd.)
(m)
CAUTION:
FAILURE
TO
EVENLY
DRIVE
THE
ROTATIONAL
LOCK
BEARING
DOWN
THE
SHAFT
COULD RESULT
IN
GALLING
OF
THE
BEARING
ID.
REQUIRED ACTION: Apply Loctite 609
to
the area of the shaft where the
bearing will fit and to the
10
of the new rotational lock bearing. USing a hammer and
a pipe that has an
10
greater than the shaft
00,
gently tap the rotational lock bear-
ing down over the shaft until
it
bottom$,
out.
Wipe off any excess Loctite.
(n)
CAUTION: It takes about 5 minutes
for
loctite
609
to
begin setting. For
D30A pump models, Steps
(0)
and
(p)
should be completed before the Loc-
tite
has
time
to
set, in case
the
end plate must
be
removed.
Apply Loctite
609
to
the
00
of
the
new
rotational lock bearing and
to
the
10
of the mating bearing well in
the
end plate.
(0) Repeat Steps (f), (c), and (b), except assemble rather than disassemble.
(p)
For
D30A
pump models
only,
spin the fan
to
check
if
the
motor
rotates
freely.
If
there
is
a
lot
of
friction,
immediately remove the fan and the fan
end-plate before the Loctite
has
time
to
set; then remove and discard one
of
the spacer rings and
reassemble
the
motor.
(q) Using the
four
screws, attach the fan cover
to
the
motor.
(r) Spin the shaft
to
check
if
the fan contacts the fan cover or fan end-plate.
If
it
does, remove the fan cover and adjust the position
of
the fan on the
shaft; then reassemble.
(s)
NOTE:
Allow
the
motor
to
sit
for
at least 1
Y:,
hours
prior
to
testing. This
will
allow the
locktite
time
to
cure and
firmly
bind
the surfaces.
REQUIRED
ACTIONS:
Use
the instructions at the beginning
of
Step b(2)
to
determine
if
the rotational
lock
bearing
is
installed correctly
and
to
correct
the problem
if
the lock bearing
is
installed backwards
or
is
malfunctioning.
If
the lock bearing
is
installed correctly, repeat Steps
b(l)
(a)
through
b(l)
(d)
to
check the wiring
of
the
motor.
F-2
NOTE:
When
reassembling the valve plate (50)
to
the second
stage
pump
cylinder (46), ensure
that
the bent
tabs
that
cover the exhaust holes
are
facing down.
If
the tabs
are
not
bent,
it
does
not
matter which side
is
faCing
down.
Repeat
Steps
0-15
through 0-11,
0-9,
and
D-7
through 0-2, except assemble rather than disassemble.
F-3
CAUTION:
NICKS OR
TEARS
IN
THE
RADIAL
SHAFT
SEAL
COULD
RESULT IN A
LUBRICATING
FLUID
LEAK
AND
POOR PUMP PERFORMANCE.
34
CAUTION:
FAILURE
TO RECESS
THE
RADIAL
SHAFT
SEAL
(45) IN ITS SLOT
IN
THE
REAR
END
PLATE
(60)
WILL
RESULT IN
THE
VANES
(53) RUBBING
AGAINST
THE
SEAL
(45)
DURING
PUMP
OPERATION.
NOTE:
The side
of
the
seal
that
has
a small circular spring around the 10 faces the bronze bushing in the rear
end
plate (60).
REQUIRED
ACTION:
Use
one
of
the
following
methods
to
install a new radial shaft
seal
(45) in the rear end
plate
(60)
(see
Figure 5-12).
Method
(1) - Insert the new
seal
into
its slot in the rear end plate. Using a hammer and a
seal
driver
(see
Figure
5-22),
recess
the
seal
in the slot.
or
Method (2) - Insert the new
seal
into
its slot in the rear end plate.
Place
the
used
seal
over the new
seal.
Use
a
hammer
to
tap the
used
seal
until
it
indents the new
seal
in its slot in the rear end plate. Remove and discard the
used
seal.
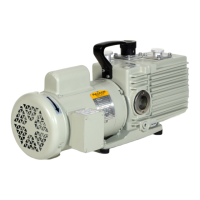
TRIVAC
"A
II
Manual, Edition L
 Loading...