61
REFERENCE
Do not touch the inner pins of the jacks on the rear panel.
Electrostatic discharge may cause permanent damage to the unit.
Caution
Caution
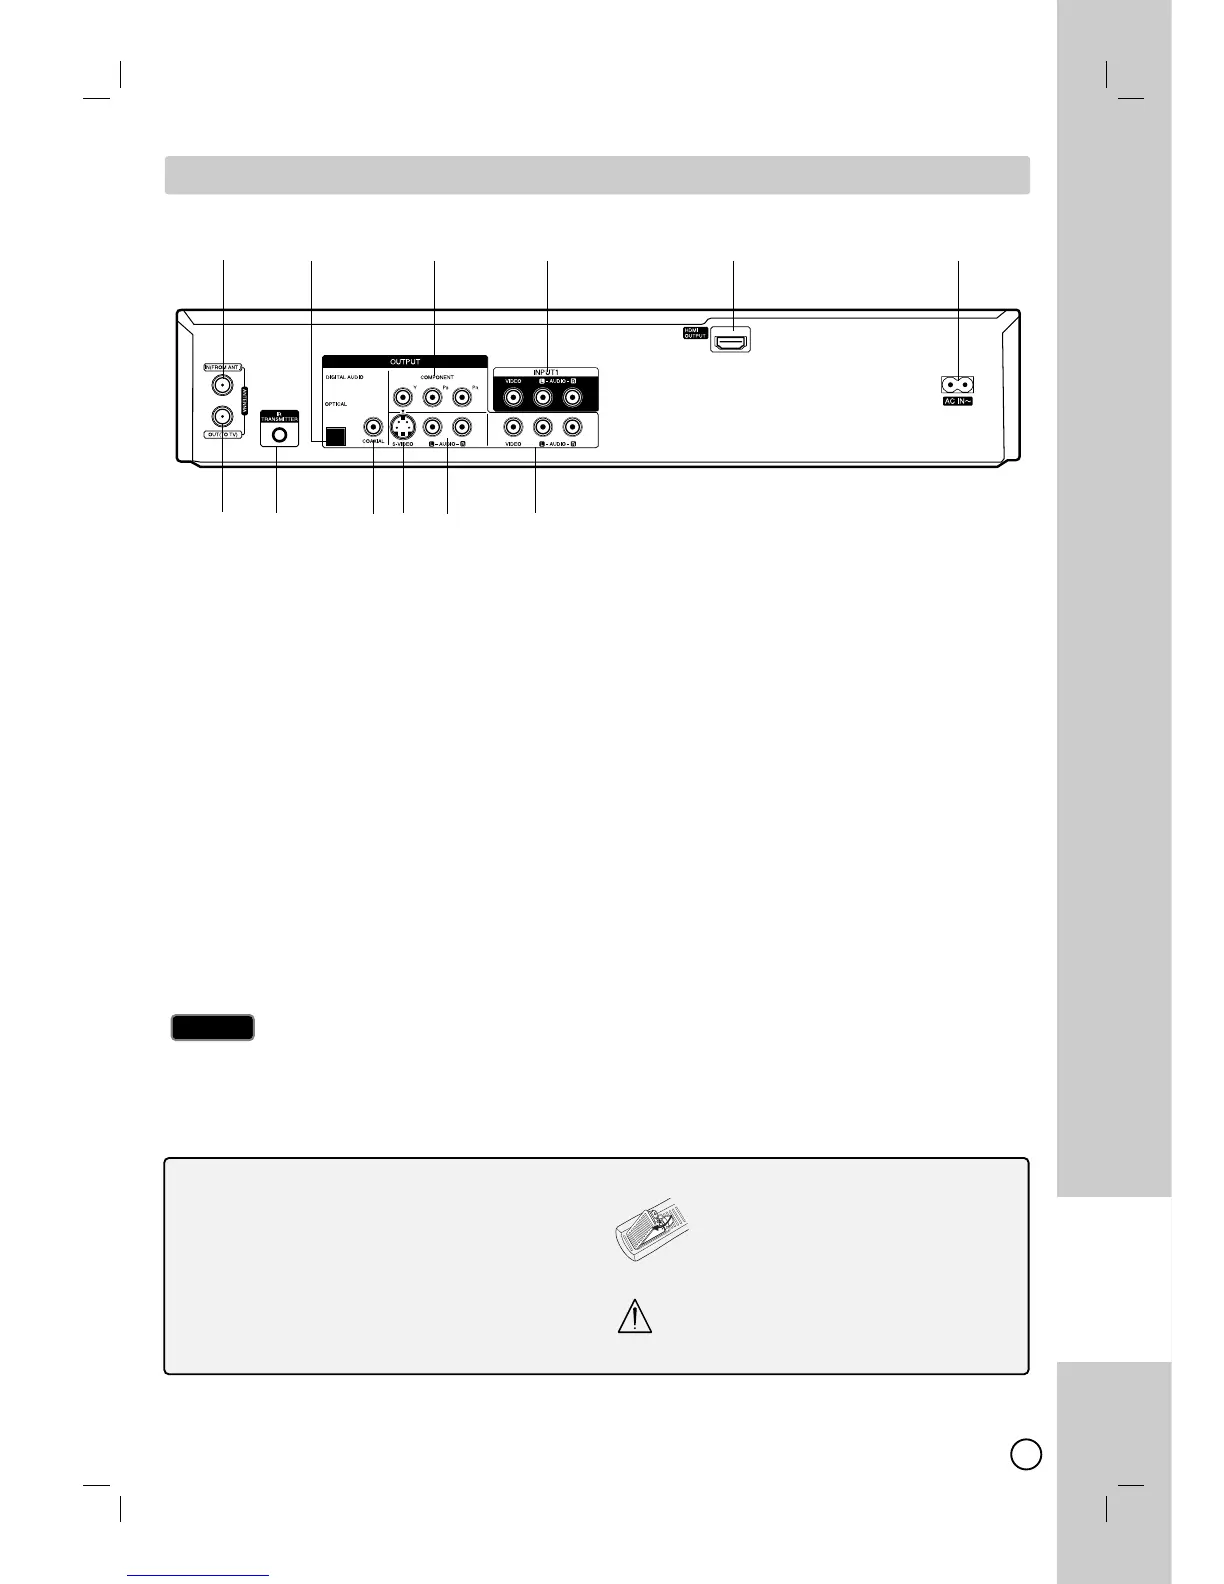
a ANTENNA IN (FROM ANT.)
Connect the antenna to this terminal.
b OPTICAL (DIGITAL AUDIO OUTPUT)
Connect to digital (optical) audio equipment.
c COMPONENT OUTPUT (Y PB PR)
Connect to a TV with Y P
B PR inputs.
d INPUT 1 (VIDEO/AUDIO (Left/Right))
Connect the audio/video output of an external
source (Audio system, TV/Monitor, VCR,
Camcorder).
e HDMI OUTPUT
HDMI output providing a high quality interface
for digital audio and video.
f AC Power Cord
Plug into the power source.
g ANTENNA OUT (TO TV)
Connect to a TV with ANTENNA coaxial inputs
h IR TRANSMITTER
Connect the IR control cable (if used).
i COAXIAL (DIGITAL AUDIO OUTPUT)
Connect to digital (coaxial) audio equipment.
j S-VIDEO OUTPUT
Connect to a S-Video Input on TV.
k
AUDIO OUTPUT (Left/Right)
Connect to a TV or other equipment with audio
inputs.
l VIDEO/AUDIO OUTPUT (Left/Right)
Connect to a TV with video and audio inputs.
ab c d e f
gh ijk l
Rear Panel
Rear Panel
About the Remote Control
Operation Range
Point the Remote Control at the Remote Sensor and
press the buttons.
Distance: About 23 ft (7 m) from the front of the
Remote Sensor.
Angle: About 30° in each direction of the front of
the Remote Sensor.
Battery installation
Remove the battery cover on the rear of
the Remote Control, and insert R03
(size AAA) battery with 3 and #
matched correctly.
Do not mix old and new batteries and never
mix different types of batteries such as stan-
dard, alkaline, etc.
 Loading...