14
Settings
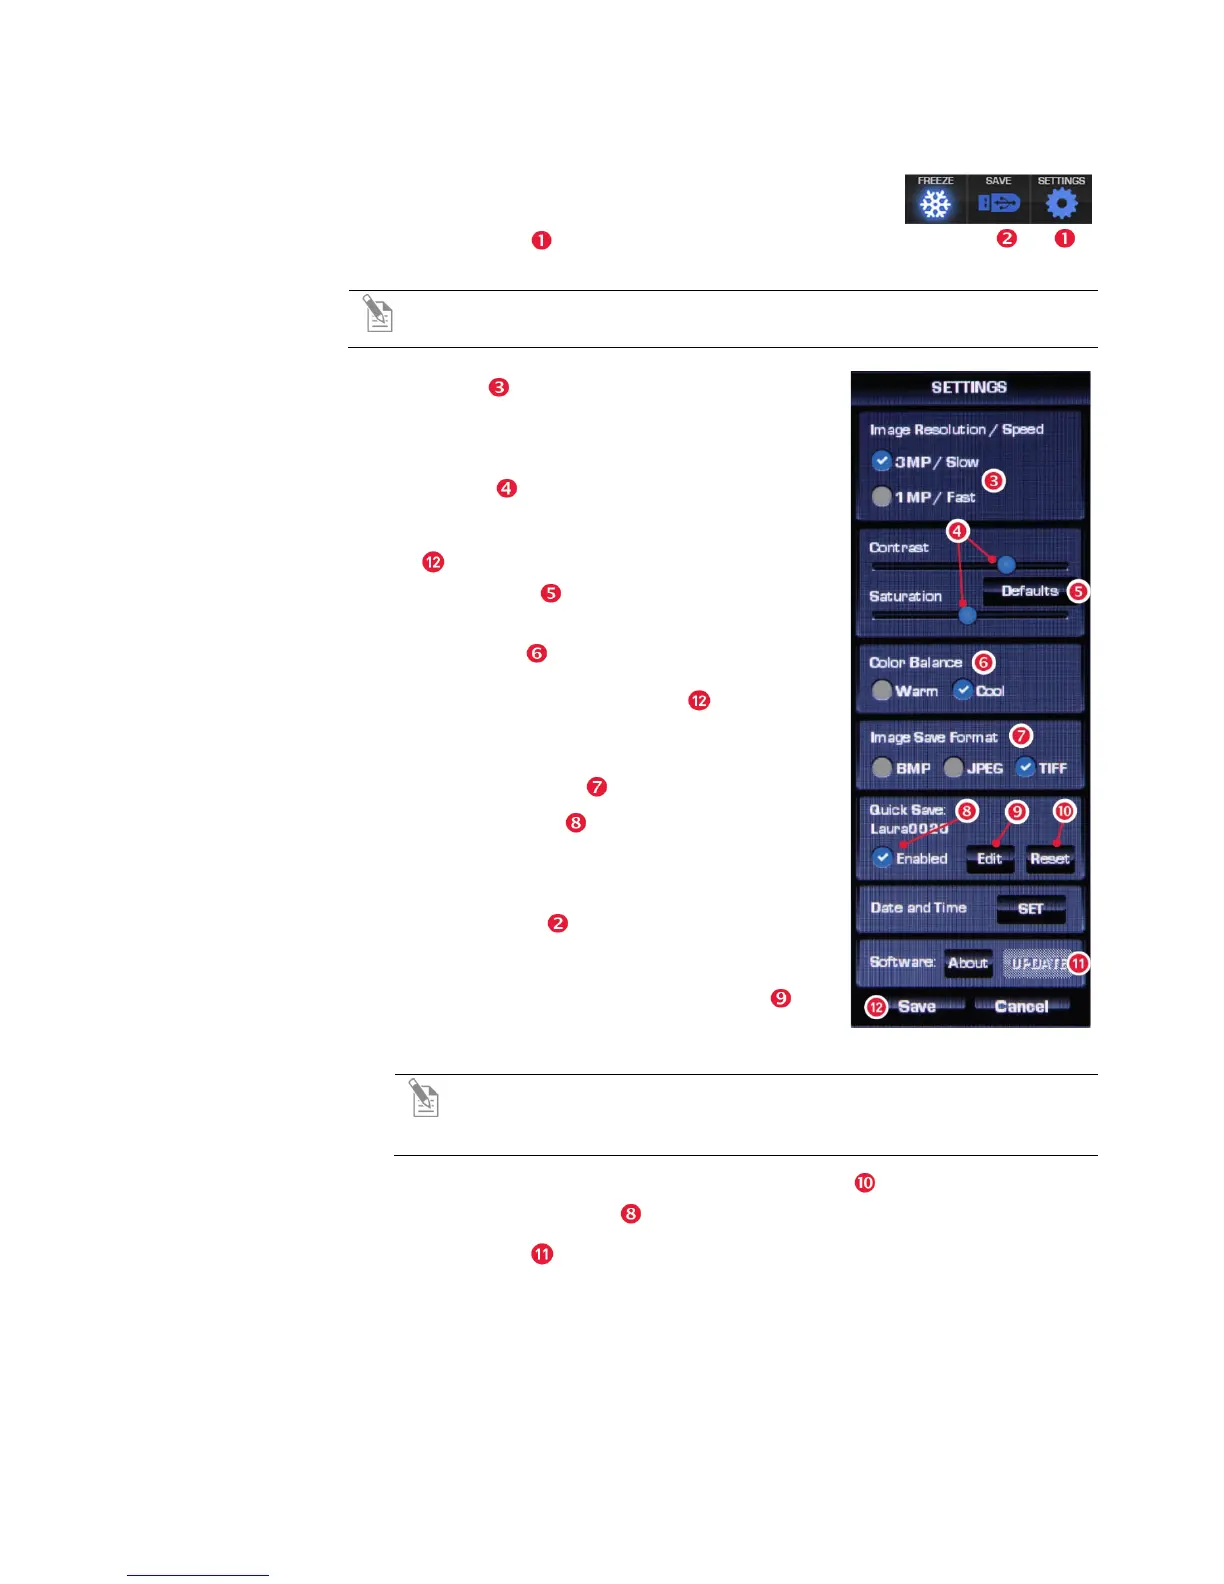
The Settings popup provides various controls to customize
display performance and image file names and formats.
The Settings button toggles to display or hide the Settings
popup.
Note: If the power is switched off before saving the settings, the system
will revert to the most recently saved settings.
Image
Resolution/Speed
These buttons provide two optimized settings:
• 3MP/Slow produces sharper onscreen images
• 1MP/Fast is helpful for quick scanning
Contrast &
Saturation
Use the sliders to customize these display
attributes. The changes will appear immediately, but
they will not be saved unless you click the Save
button at the bottom of the popup.
The Defaults button will reset contrast and
saturation levels to factory settings.
Color Balance
Click these buttons to adjust the color balance.
Changes will appear immediately, but they will not be
saved unless you click the Save button at the bottom
of the popup.
Image Save Format
Select a file format (.tif, .jpg or .bmp) for saving your
image using these buttons .
Quick Save settings
The Quick Save option allows for a custom base
file name; each file name also includes a three-digit
sequence number.
When Quick Save is enabled, a single click of the
onscreen Save button saves the file under the
custom base file name. The manual Save button (see
previous page) uses the same base file name.
1. In the Settings menu, click the Edit button
under the Quick Save option and enter the base
file name in the virtual keyboard.
Note: To prevent the system from overwriting files, Quick Save will
use the next available sequence number if the USB installed contains
any files with the same base file name.
2. To reset the sequence to zero, click the Reset button .
3. Click the Enabled button to enable or disable the Quick Save option.
Software update
The Update button is inactive unless a USB drive with an update is installed.
See “Software Updates” (page 15) for update instructions.
 Loading...