49
SECTION 5 (CONTINUED) / SECTION 5 (SUITE) / SECCIÓN 5 (CONTINUACIÓN)
TOOLS AND HARDWARE REQUIRED / OUTILS ET QUINCAILLERIE REQUIS / INSTRUMENTAL Y HERRAJE REQUERIDOS
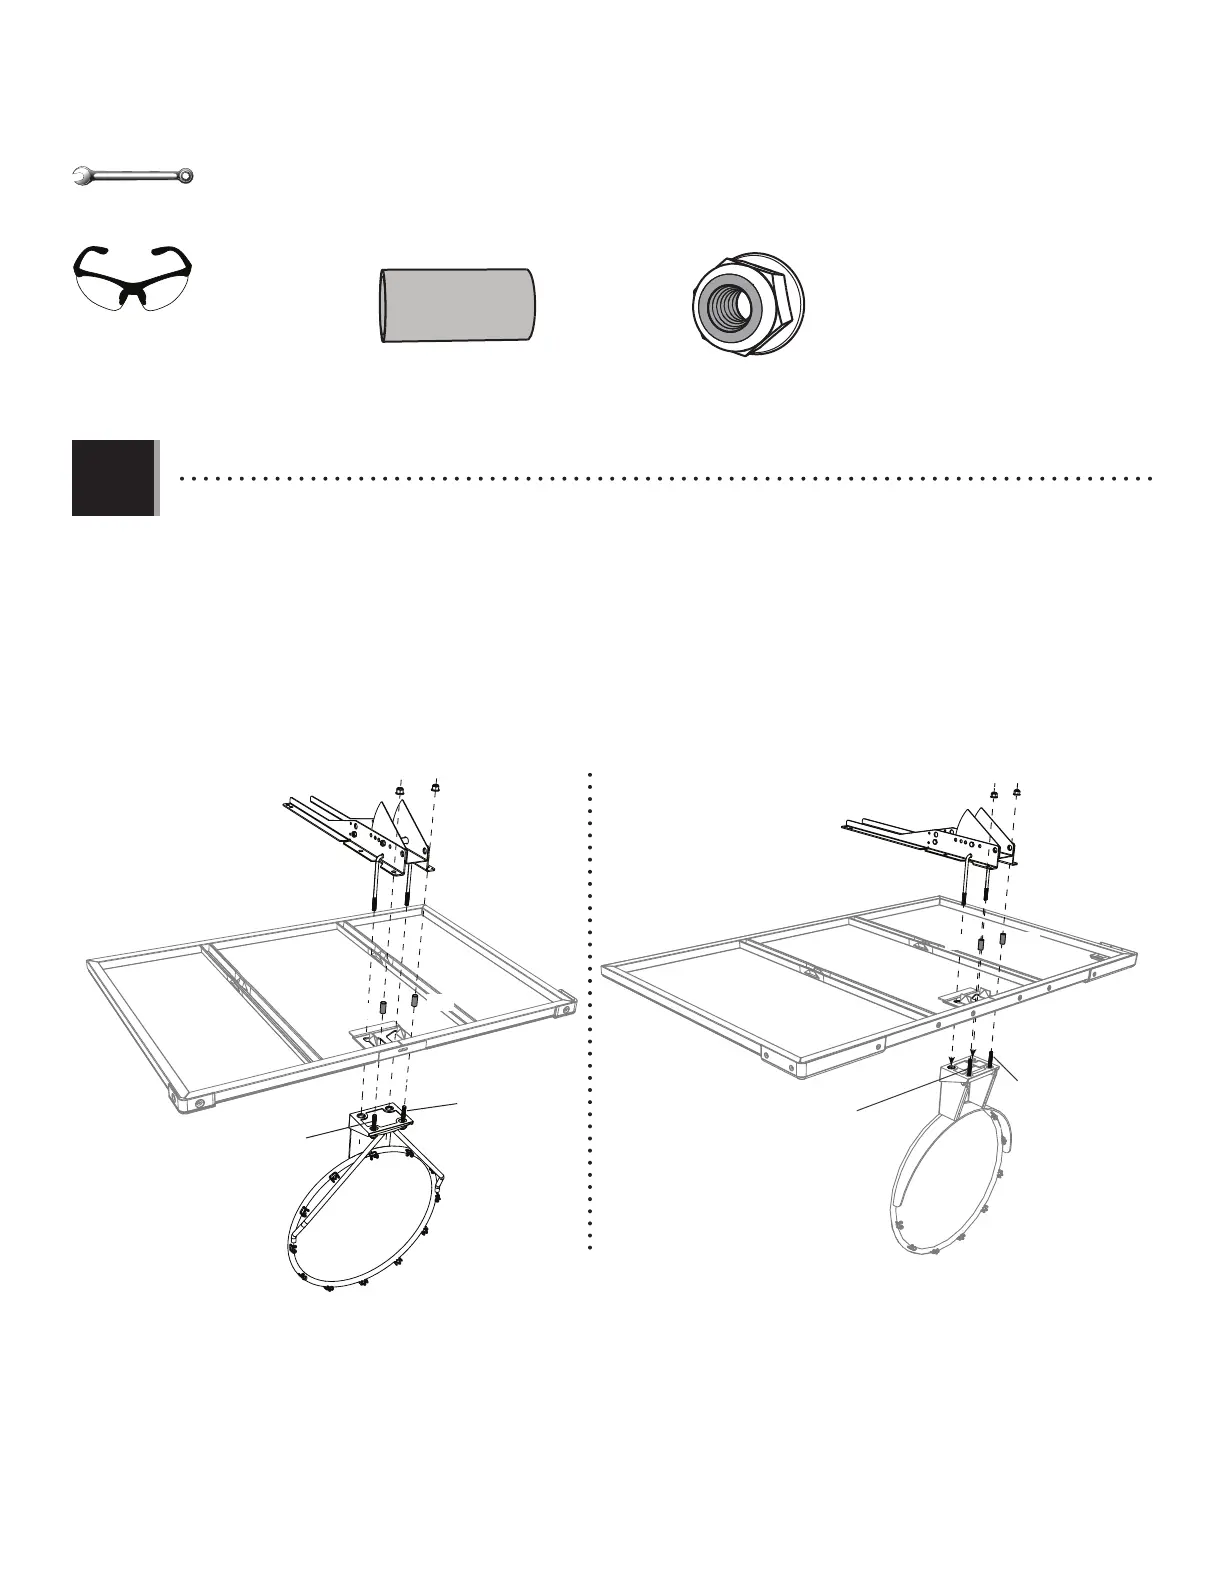
• Insert the two rim bolts up through the holes in the backboard. Slide one (1) spacer (ACS) over each bolt. Set the backboard bracket
assembly onto the backboard, the ends of the u-bolt through the holes. Secure the rim to the backboard with two (2) nuts (ABK).
• Insérer les deux boulons de l’anneau à travers les trous dans le panneau. Faire glisser une (1) entretoise (ACS) sur chaque
boulon. Mettre l’assemblage des supports de panneau sur le panneau, les extrémités du boulon en « U » à travers les trous.
Bien attacher l’anneau au panneau en utilisant deux (2) écrous (ABK).
• Insertar los dos pernos del aro a través de los agujeros en el tablero. Deslizar un (1) espaciador (ACS) sobre cada perno. Colocar
el conjunto de los soportes del tablero en el tablero, los extremos del perno en «U» a través de los agujeros. Fijar bien el aro
al tablero usando dos (2) tuercas (ABK).
• Slam-It
®
Pro Rim• Slam-It
®
Rim
Rim bolt
Boulon de l’anneau
Perno del aro
Rim bolt
Boulon de l’anneau
Perno del aro
Rim bolt
Boulon de l’anneau
Perno del aro
Rim bolt
Boulon de l’anneau
Perno del aro
ACS (x2)
ABK
ABKABK
ACS
ACS
ACS
ACS
ABK
5.9
1/2 in/po (≈13 mm)
(x2)
ABK (x2)