55
SECTION 5 (CONTINUED) / SECTION 5 (SUITE) / SECCIÓN 5 (CONTINUACIÓN)
TOOLS AND HARDWARE REQUIRED / OUTILS ET QUINCAILLERIE REQUIS / INSTRUMENTAL Y HERRAJE REQUERIDOS
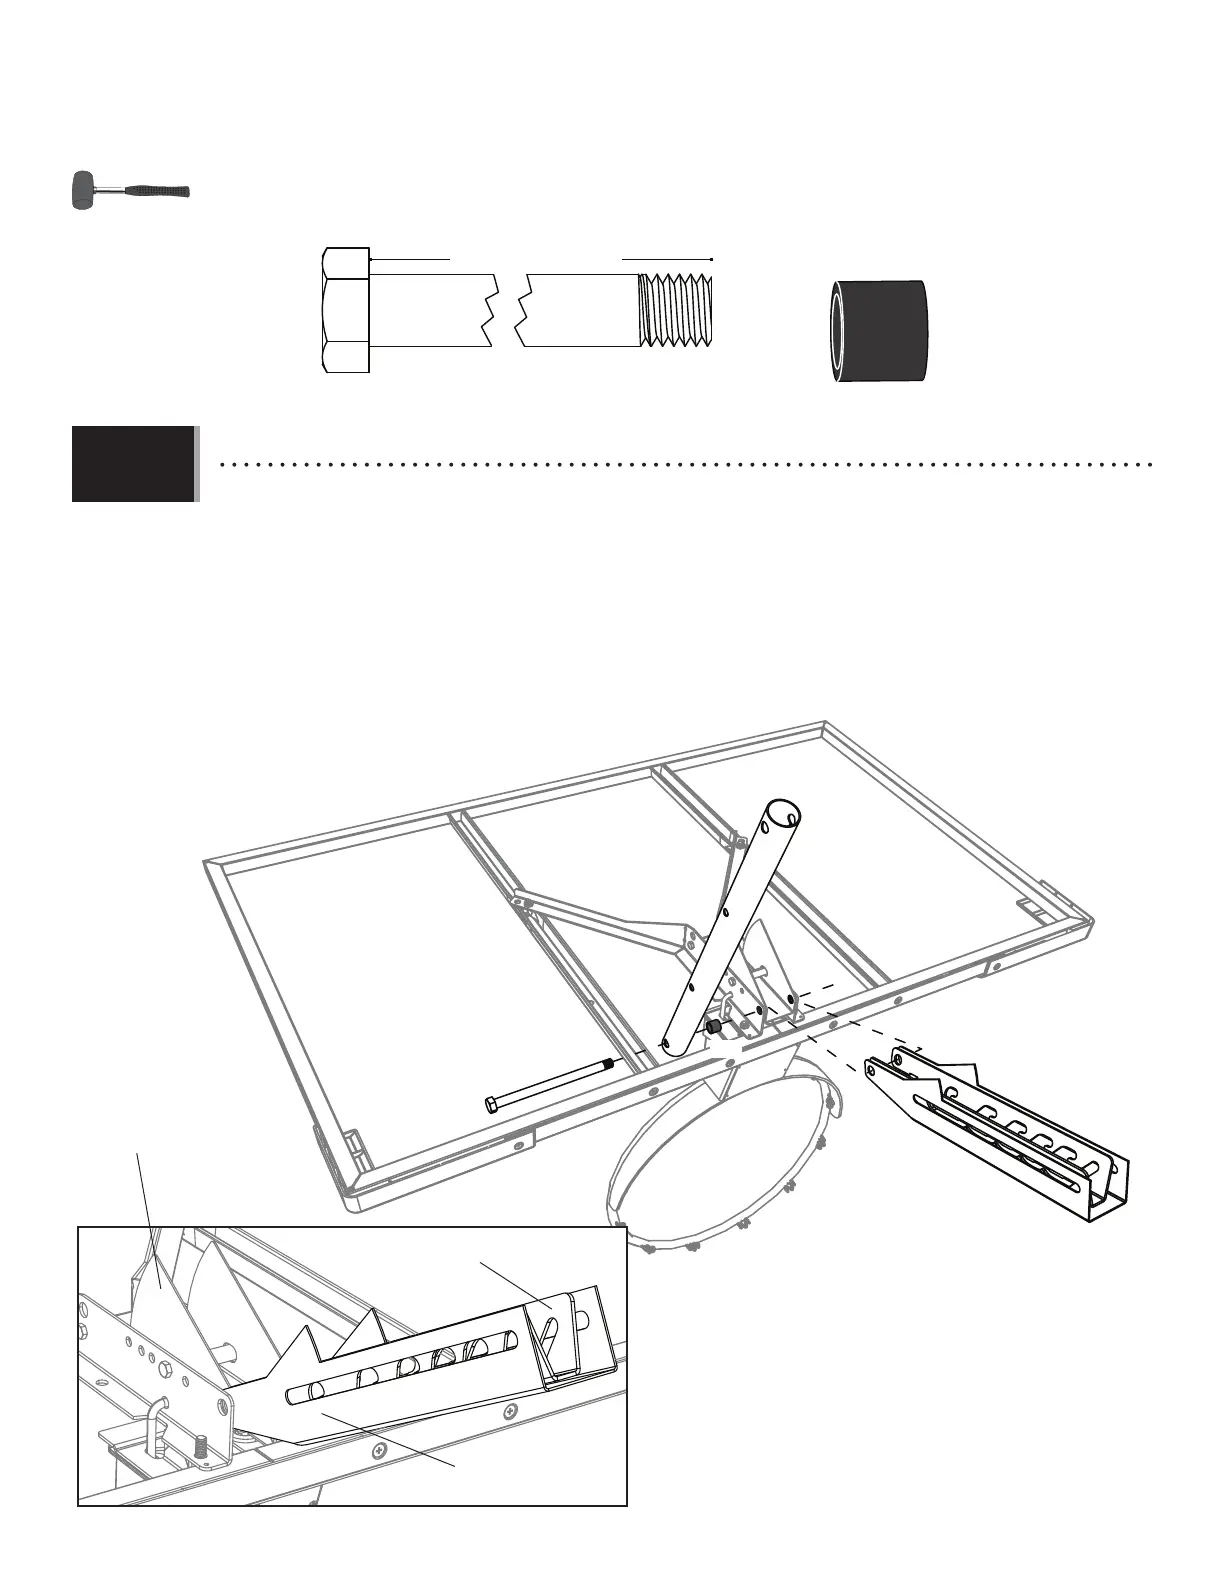
• Place one of the four extension arms (AKC) against the backboard bracket with a spacer (ABL) between them. Insert a bolt
(AAD) through the extension arm and spacer. Slide the end of the Quick Adjust
®
assembly between the two sides of the
inner guard. Push the bolt through the assembly and out the other side.
• Poser un des quatre bras de rallonge (AKC) contre le support du panneau avec une entretoise (ABL) entre eux. Insérer un
boulon (AAD) à travers le bras de rallonge et l’entretoise. Faire glisser l’extrémité de l’assemblage du Quick Adjust
®
entre
les deux côtés de la protection intérieur. Pousser le boulon à travers l’assemblage et out the other side.
• Colocar uno de los cuatro brazos de extensión (AKC) contra los soportes del tablero con un espaciador (ABL) entre ellos.
Insertar un perno (AAD) por el brazo de extensión y espaciador. Deslizar el extremo del conjunto del
Quick Adjust
®
entre los dos lados del protector interior y empujar el perno a través del conjunto y por el otro lado.
AAD (x1)
ABL (x1)
AKC
AAD
ABL
5.19
• Inner Guard
• Protection intérieure
• Protector interior
• Outer Guard
• Protection extérieure
• Protector exterior
• Dunk Latch
• Outer Guard
• Dunk Latch